🌍 I18n (Internationalization)
The I18n feature allows you to configure multi-language support for your project, enabling internationalization of interface text. Through the I18n feature, you can provide different text content and font schemes for different languages.
📍 Accessing I18n Configuration
The I18n configuration is located in the "I18n" tab of the Asset Manager:
- In the toolbar, click the "Assets" button
- In the Asset Manager dialog, click the "I18n" tab
- You will see the I18n configuration interface
Note: Before using the I18n feature, you need to enable it in the project settings first.
🚀 Quick Start
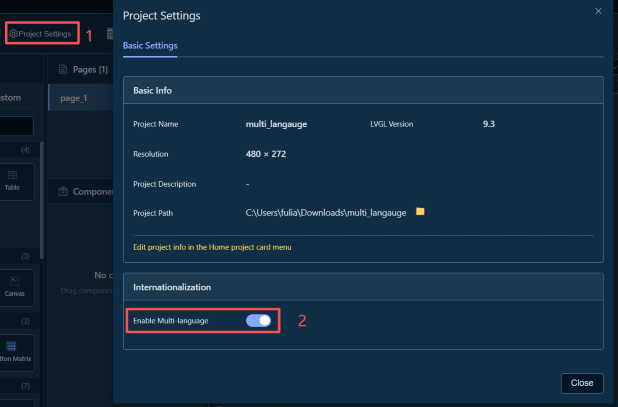
Step 1: Enable I18n in Project Settings
- In the toolbar, click the "Settings" button (or use the shortcut)
- In the Project Settings dialog, find the "Internationalization" section
- Enable the "Multi-language" switch
- Click the "Close" button to save the settings
Tip: After enabling I18n, the "I18n" tab in the Asset Manager will display the configuration interface.
📚 I18n Configuration
The I18n configuration consists of three main parts:
1. Language Management
Used to manage the list of supported languages and default language settings.
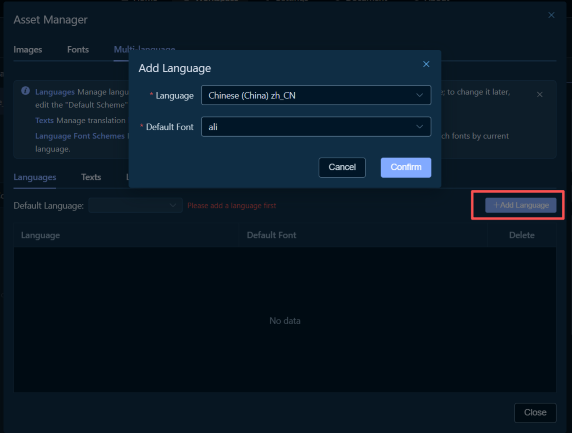
Adding a Language
- In the "Languages" tab, click the "Add Language" button
- In the Add Language dialog:
- Language Code: Select or enter a language code (e.g.,
zh_CN,en_US) - Default Font: Select the default font for this language
- Click the "Confirm" button to add the language
Tips: - When adding the first language, the system will automatically set it as the default language - Language codes are used to identify languages. It is recommended to use standard formats (e.g.,
zh_CN,en_US)
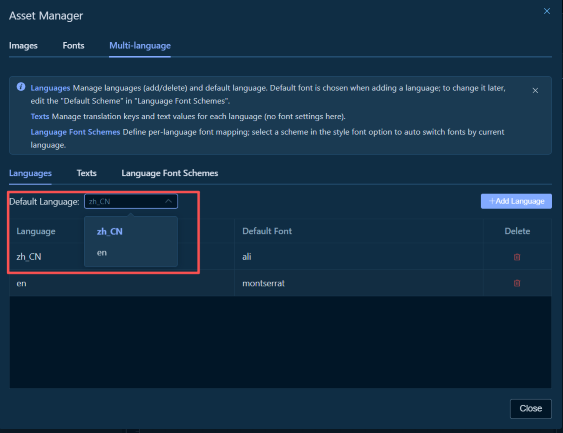
Setting Default Language
- In the "Languages" tab, find the "Default Language" dropdown
- Select the language to set as default from the dropdown list
- The default language will be saved automatically
Deleting a Language
- In the language list, find the language you want to delete
- Click the "Delete" button on the right side of the language row
- Confirm the deletion operation
Note: Deleting a language will also delete all translation content for that language. Please proceed with caution.
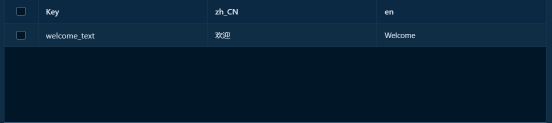
2. Text Translation
Used to manage all text content that needs translation and translations for each language.
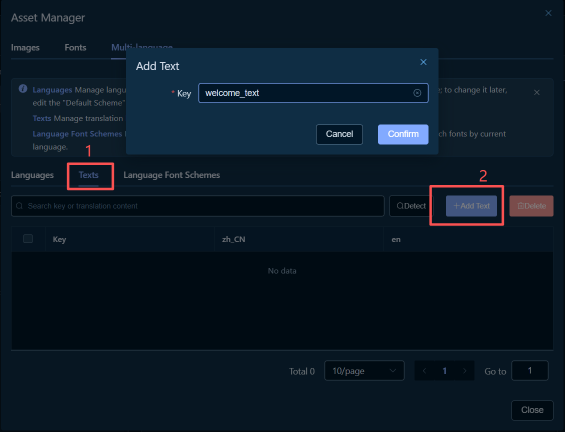
Adding a Translation Key
- In the "Text Translation" tab, click the "Add Text" button
- In the Add Text dialog, enter a translation key (e.g.,
welcome_text,button_ok) - Click the "Confirm" button to add
- In the multi-language table, add translations for the key in corresponding languages
Tips: - Translation keys should use meaningful names for easier maintenance - It is recommended to use underscore naming (e.g.,
welcome_text,button_ok)
Editing Translation Content
- In the translation list, find the translation key you want to edit
- Click the translation content in the corresponding language column (or click the "Edit" button)
- In the Edit Translation dialog, enter the translation text for that language
- Click the "Confirm" button to save

Tips: - You can set different translation content for each language - If a language has no translation, it will display as empty or use the default language translation
Editing Translation Key
- In the translation list, find the translation key you want to edit
- Click the content in the Key column (or click the "Edit" button)
- In the Edit Key dialog, modify the key name
- Click the "Confirm" button to save
Note: Modifying the key name will affect all components using that key. Please proceed with caution.
Deleting Translation Key
- In the translation list, find the translation key you want to delete
- Click the "Delete" button on the right side of the key row
- Confirm the deletion operation
Note: Deleting a translation key will also delete all translation content for all languages. Please proceed with caution.
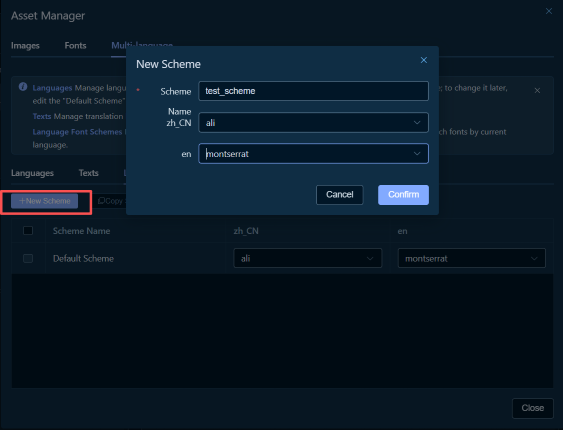
3. Language Font Schemes
Used to manage font schemes corresponding to different languages, enabling automatic font switching by language.
Adding Font Scheme
- In the "Language Font Schemes" tab, click the "New Scheme" button
- In the Add Scheme dialog, enter a scheme name (e.g.,
scheme_chinese,scheme_english) - Click the "Confirm" button to add the scheme
Tips: - Scheme names can only contain letters, numbers, and underscores - Scheme names cannot be the same as font names
Configuring Language Font Mapping
- In the font scheme list, find the scheme you want to configure
- In the dropdown for the corresponding language column, select the font to use for that language
- You can also select "Inherit" to use the default scheme's font settings

Tips: - You can set different fonts for each language - When selecting "Inherit", the default scheme's font settings will be used - If a language has no font set, the default font will be used
Editing Font Scheme
- In the font scheme list, find the scheme you want to edit
- Click the "Edit" button on the right side of the scheme row
- In the Edit Scheme dialog, modify the scheme name
- Click the "Confirm" button to save
Copying Font Scheme
- In the font scheme list, find the scheme you want to copy
- Click the "Copy" button on the right side of the scheme row
- The system will automatically create a new scheme with the name format
original_scheme_name_copy
Deleting Font Scheme
- In the font scheme list, find the scheme you want to delete
- Click the "Delete" button on the right side of the scheme row
- Confirm the deletion operation
Note: Deleting a font scheme will affect components using that scheme. Please proceed with caution.
🎨 Using I18n in Projects
Example 1: Enable Translation for Label Component Text
Step 1: Add Label Component
- In the component library, find the "Label" component
- Drag the Label component onto the canvas
- Select the Label component
Step 2: Enable Text Translation
- In the Properties Panel, find the "Properties" tab
- Expand the "Properties" group and find the "Text" property
- Click the "Enable Translation" button (or toggle switch) on the right side of the Text property input
- Enter a translation key (e.g.,
welcome_text)
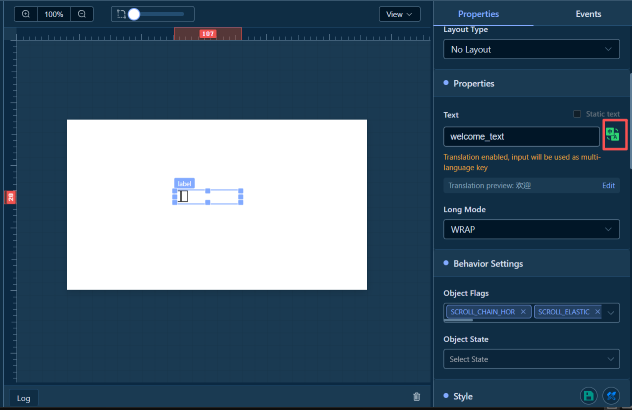
Tips: - After enabling translation, the entered content will be used as the I18n key - If the key does not exist, the system will prompt you to add a translation
Step 3: Select Font Scheme
- In the Properties Panel, in the "Style" tab
- Expand the "Font" style group
- In the "Font" property, select the font scheme to use
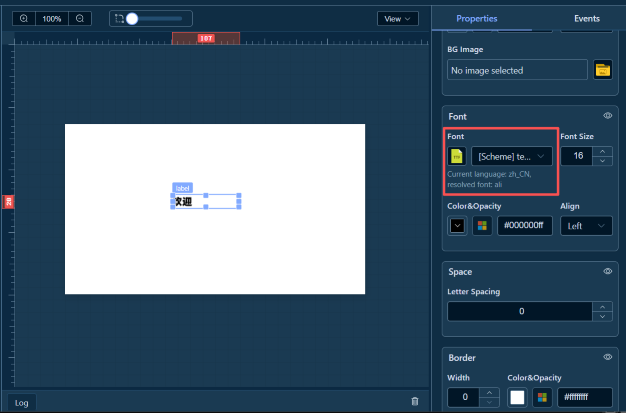
Tips: - After selecting a font scheme, the font will automatically switch based on the current language - If no scheme is selected, the default font will be used
Example 2: Enable I18n for Button Component Event Action
Step 1: Add Button Component
- In the component library, find the "Button" component
- Drag the Button component onto the canvas
- Select the Button component
Step 2: Add Click Event
- In the Properties Panel, switch to the "Events" tab
- Click the "Add Event" button
- Select event type: "LV_EVENT_CLICKED"
- Select action type: "Modify Property"
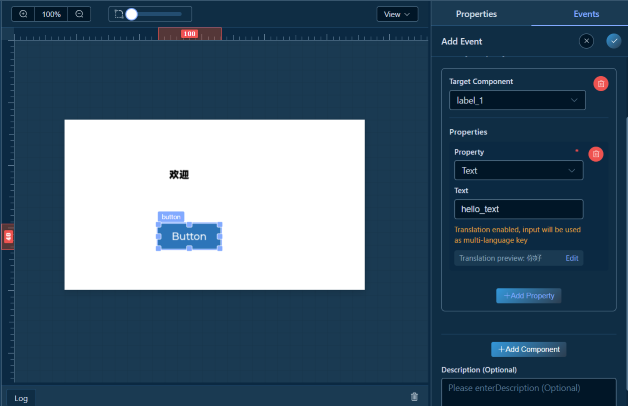
Step 3: Configure Modify Property Action
- In the action parameter configuration:
- Target Component: Select the component to modify (e.g., the Label component added earlier)
- Click the "Add Property" button
- Select the property to modify: "Text"
- In the property value input, click the "Enable Translation" button
- Enter a translation key (e.g.,
button_clicked_text)
Step 4: Add Translation Content
- If the key does not exist, follow Step 2 of Example 1 to add translation content
- Set different translation text for different languages
Example 3: Switch Language Event
The switch language event allows users to dynamically switch the display language of the project by clicking a button or other interactive methods.
Step 1: Add Button Component
- In the component library, find the "Button" component
- Drag the Button component onto the canvas
- Select the Button component
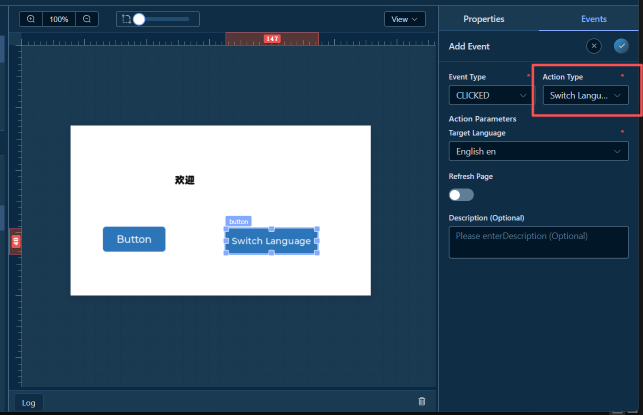
Step 2: Add Click Event
- In the Properties Panel, switch to the "Events" tab
- Click the "Add Event" button
- Select event type: "LV_EVENT_CLICKED"
- Select action type: "Switch Language"
Note: The "Switch Language" action type will only appear in the action list after I18n is enabled in the project settings.
Step 3: Configure Switch Language Parameters
- In the action parameter configuration:
- Target Language: Select the language to switch to from the dropdown list (e.g.,
zh_CN,en_US) - Refresh Page: Choose whether to refresh the page after switching language
- Enabled: After switching language, the current page will be refreshed, and the text in the new language will be displayed immediately
- Disabled: After switching language, the page will not be refreshed, and the text will switch on the next update
Tips: - The target language list comes from the languages you added in "Language Management" - If no languages are added to the project, the target language list will be empty - It is recommended to enable the "Refresh Page" option so users can immediately see the language switch effect
Step 4: Test Switch Language Function
- Save the project and run the preview
- Click the button configured with the switch language event
- Observe whether the interface text has switched to the target language
Tips: - After switching language, all component text using translation keys will automatically update - If components use font schemes, the font will also automatically switch according to the new language - You can view the switch language event connection in the canvas, which points to the language block (displayed in the upper right corner of the canvas)
💡 Usage Tips
1. Translation Key Naming Convention
It is recommended to use meaningful naming conventions for easier maintenance:
- Page-level text:
page_welcome,page_settings - Button text:
button_ok,button_cancel,button_save - Label text:
label_username,label_password - Tip text:
tip_loading,tip_success,tip_error
2. Font Scheme Management
- Default Scheme: Used to set the default font for each language
- Custom Schemes: Used for font configuration in special scenarios
- Inheritance Mechanism: Custom schemes can choose to inherit the default scheme's font settings
3. Translation Preview
In the Properties Panel, after enabling translation, you can view the translation preview:
- Below the property input, the translation preview for the current language will be displayed
- If the key does not exist or the translation is empty, a prompt message will be displayed
4. Batch Translation Management
In the "Text Translation" tab, you can:
- Use the search function to quickly find translation keys
- Batch edit translation content for multiple languages
- Export/import translation configuration (if supported)
🔗 Related Features
- Properties Panel - Enable translation in the Properties Panel
- Event System - Use I18n in event actions
- Asset Manager - Manage I18n configuration
- Project Settings - Enable I18n feature
Workspace Documentation: ← Back to Workspace | Canvas | Components | Tree | Properties | Events | Toolbar | Shortcuts