APP Download
Android
Scan the QR code to download and install.

Android download qr code
Account
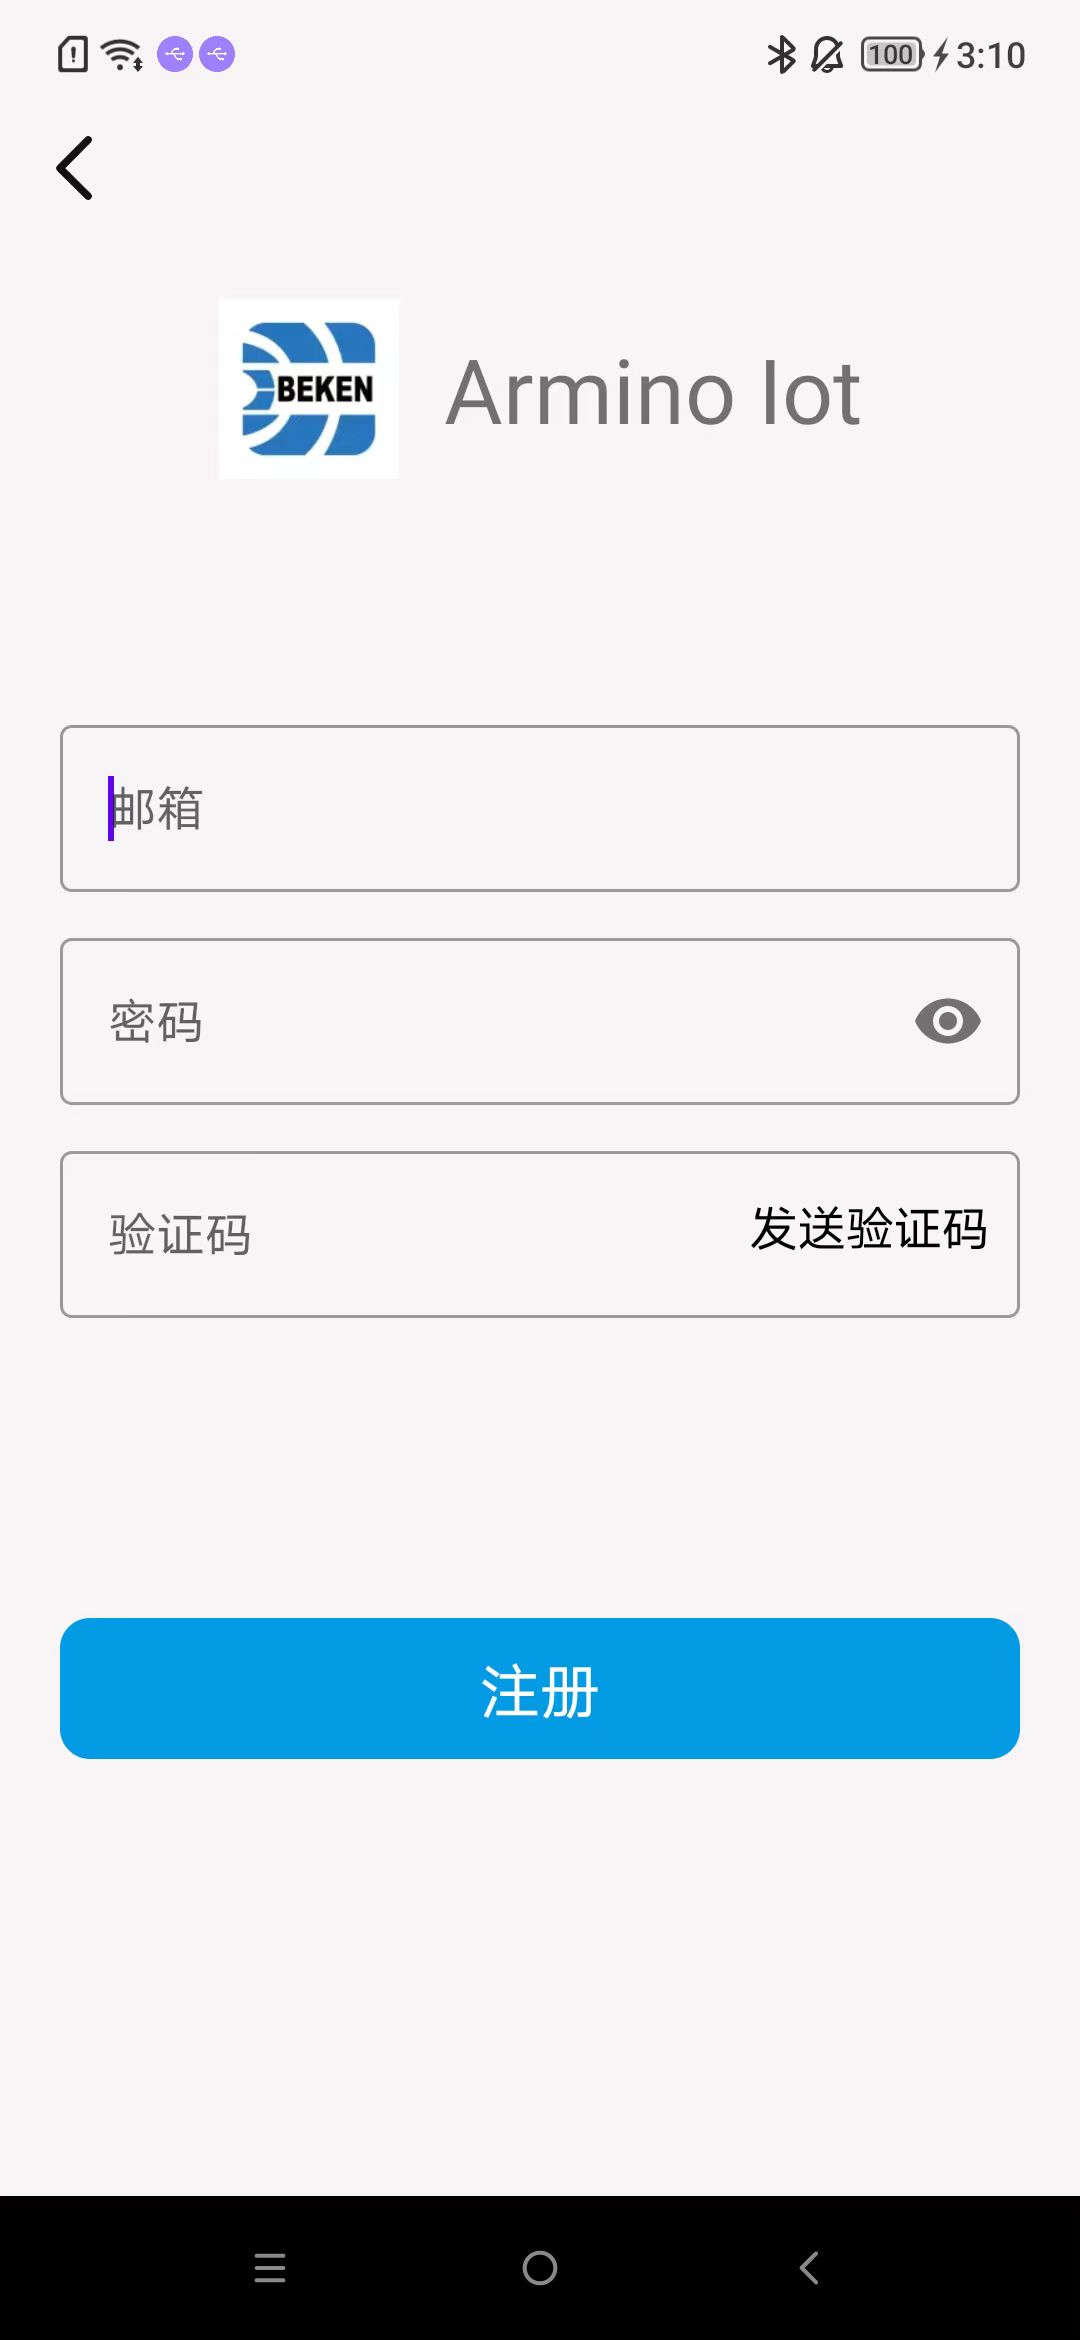
Registration
Register using your email. After entering your email and password, click “Send Verification Code”.
Enter the verification code received in your email and click “Register”.
As shown in the image.
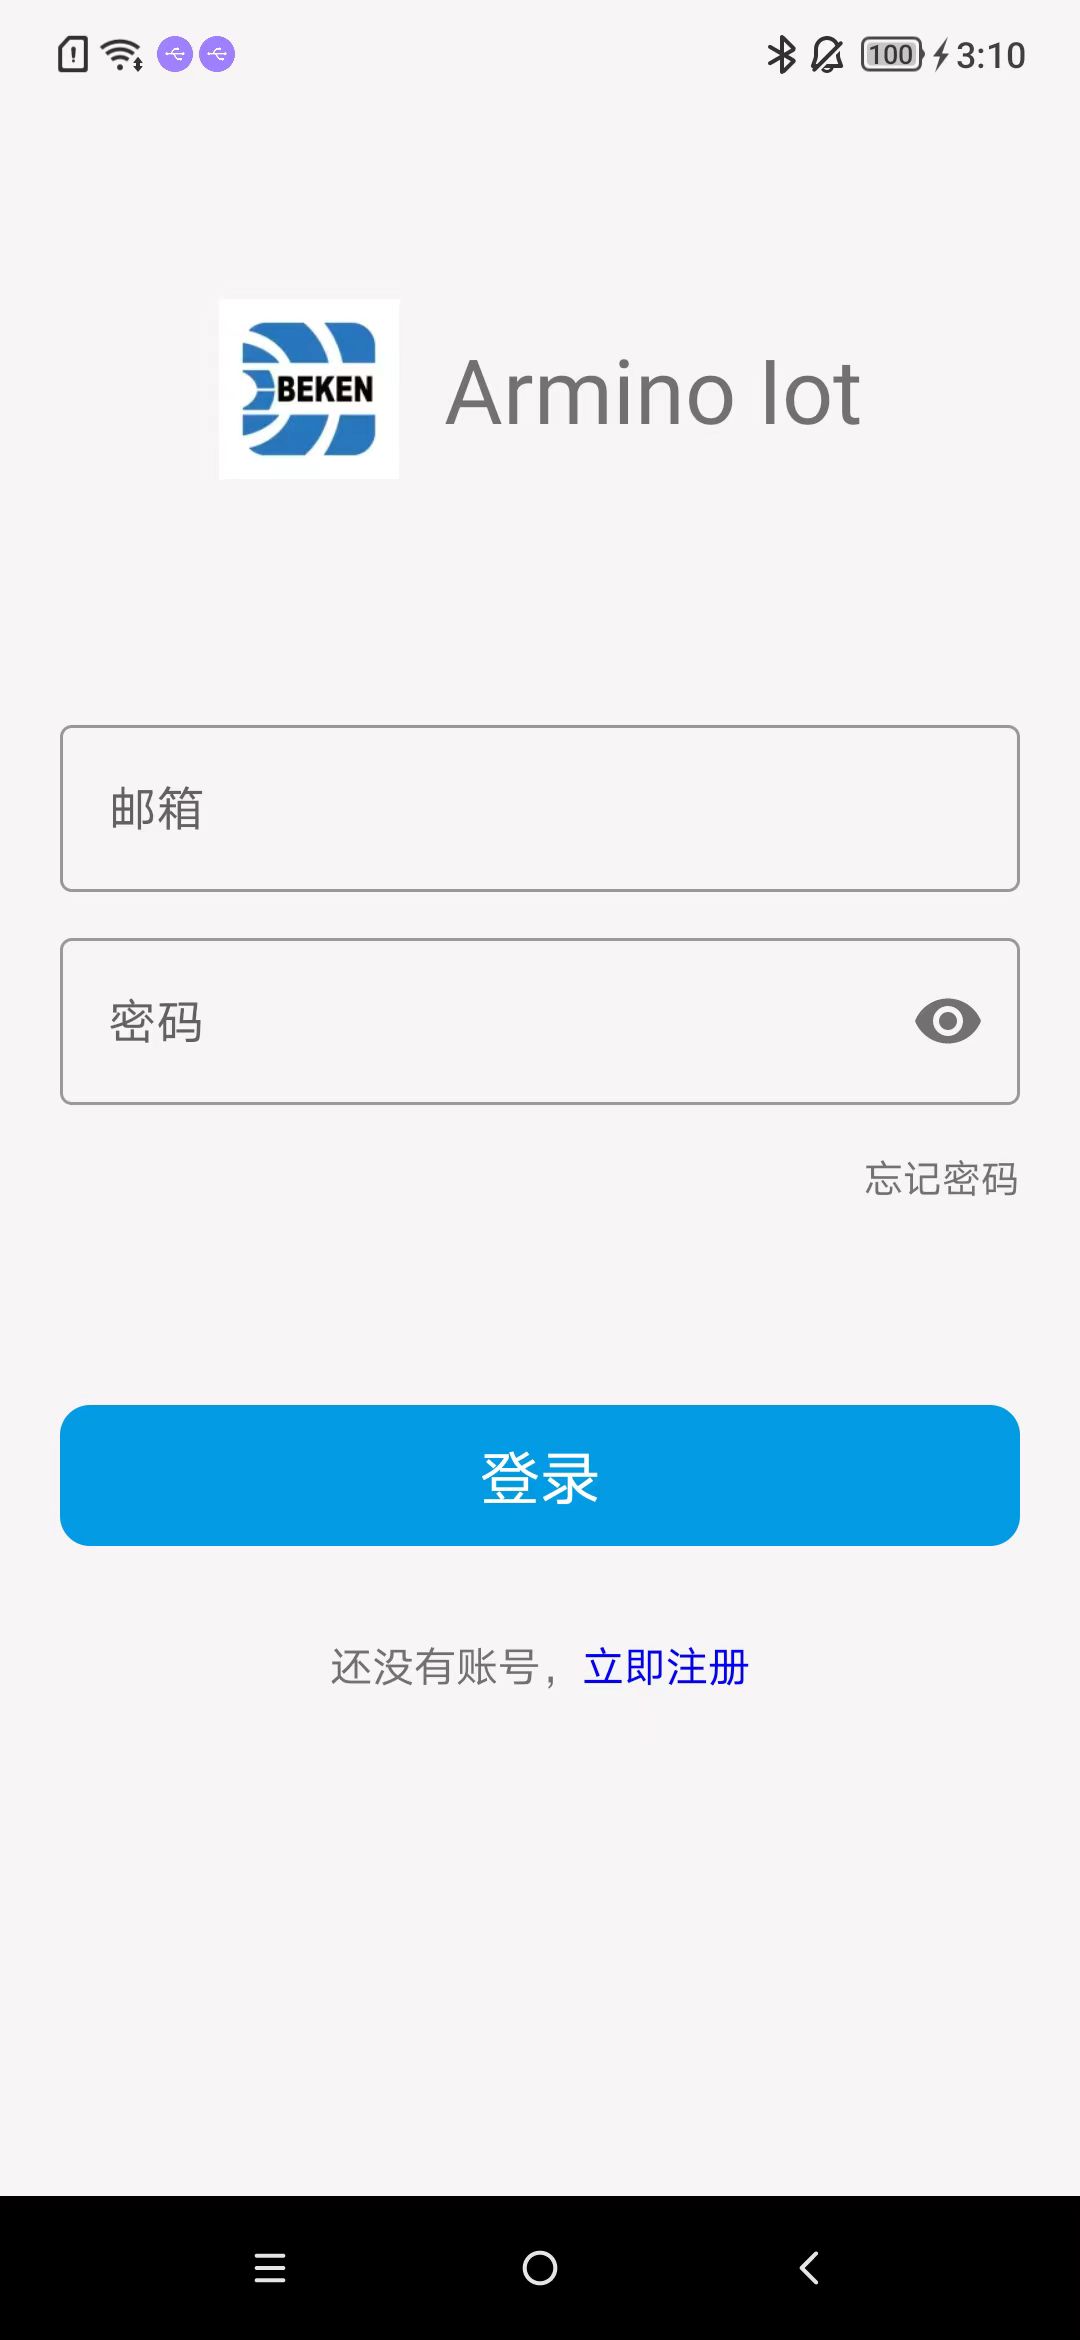
Email Login
Enter your complete email and password, then click “Login”. As shown in the image.

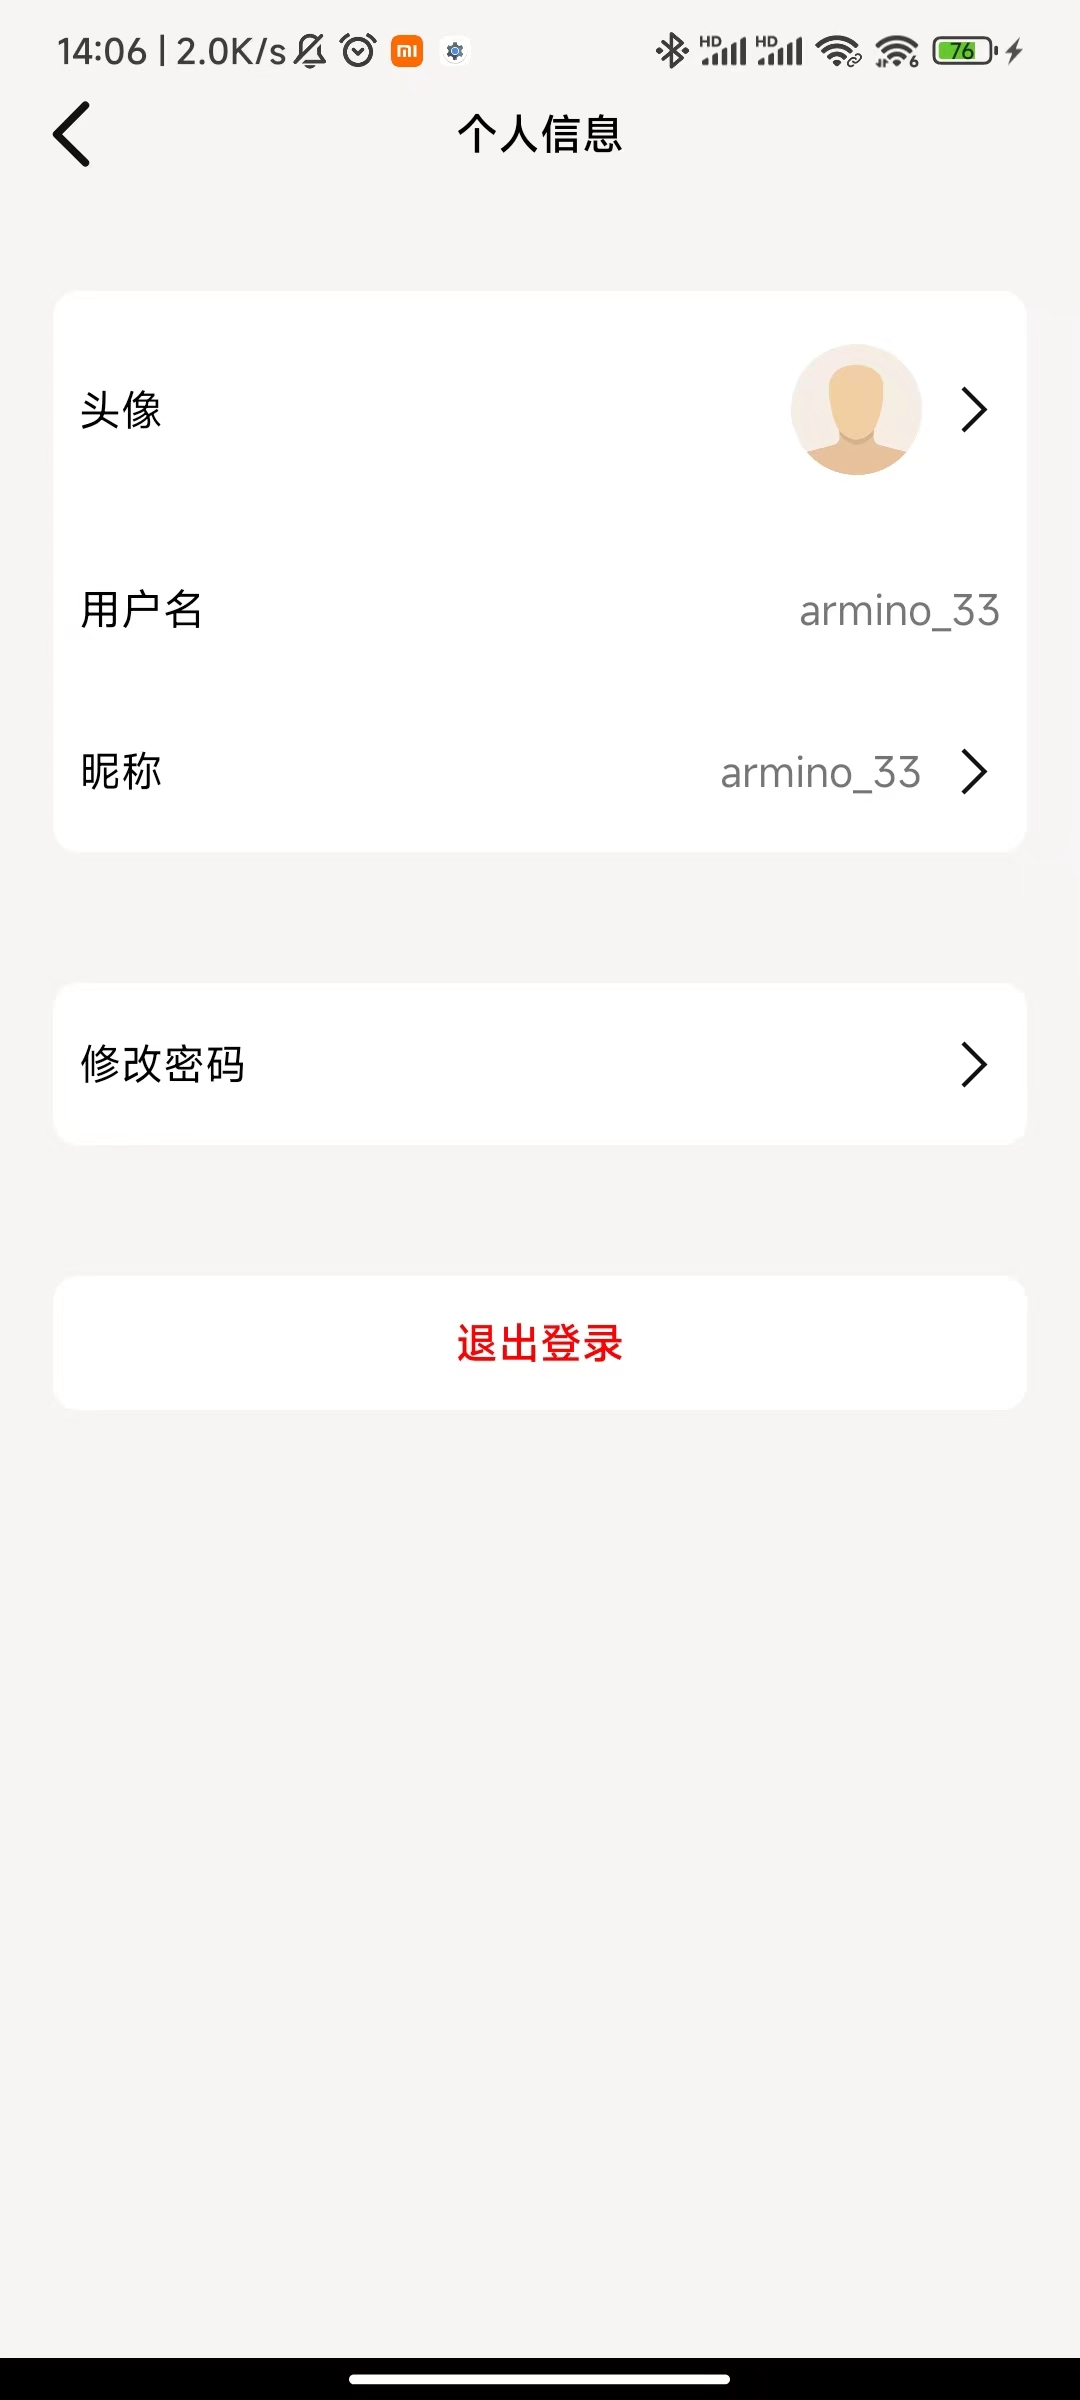
Change Password
Proceed with the modification as shown in the image.

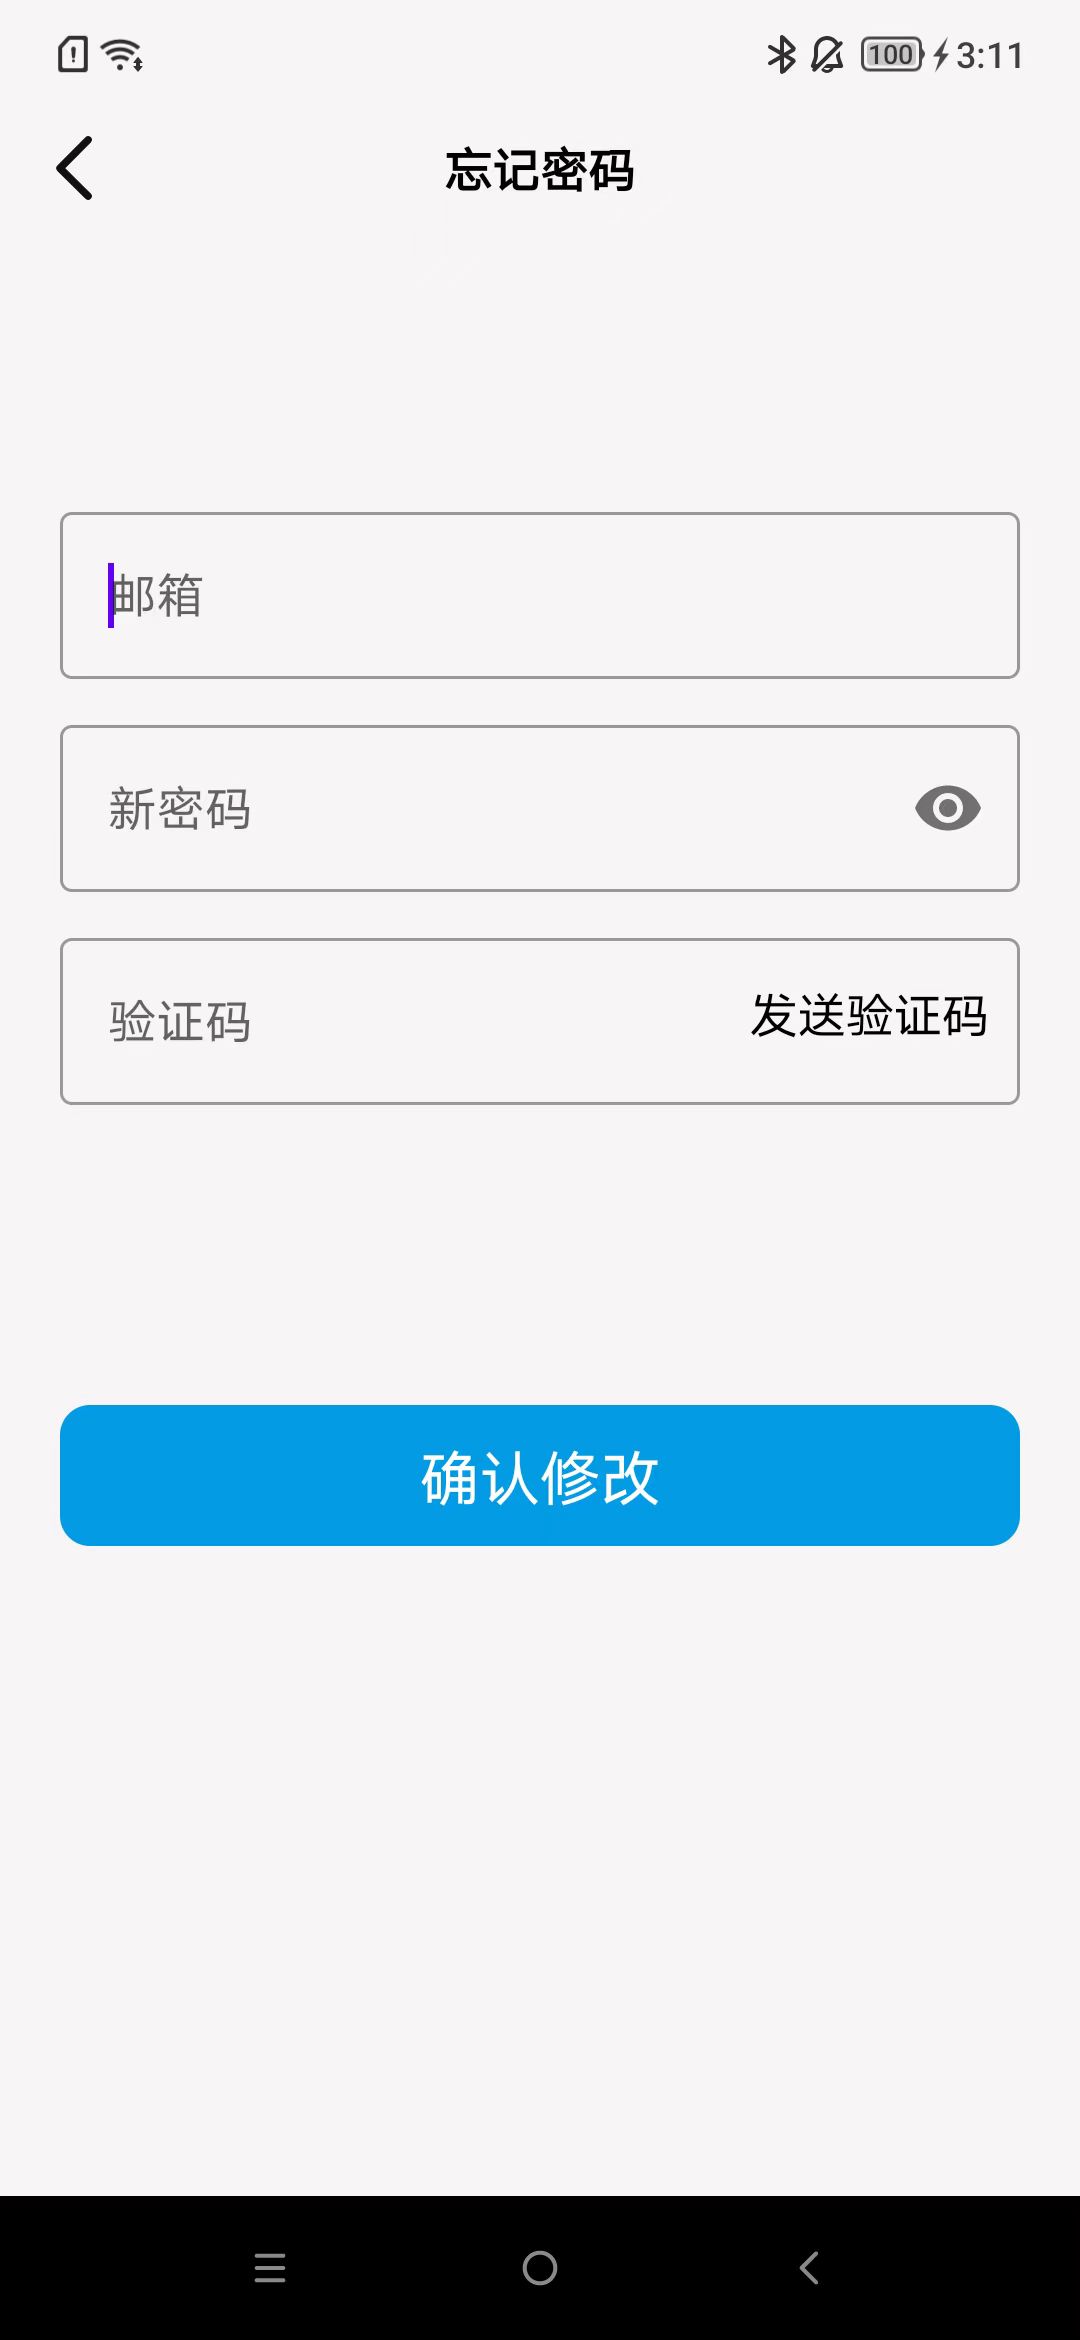
Forgot Password
Follow the instructions for modification as shown in the image.
Device
Multimedia Device
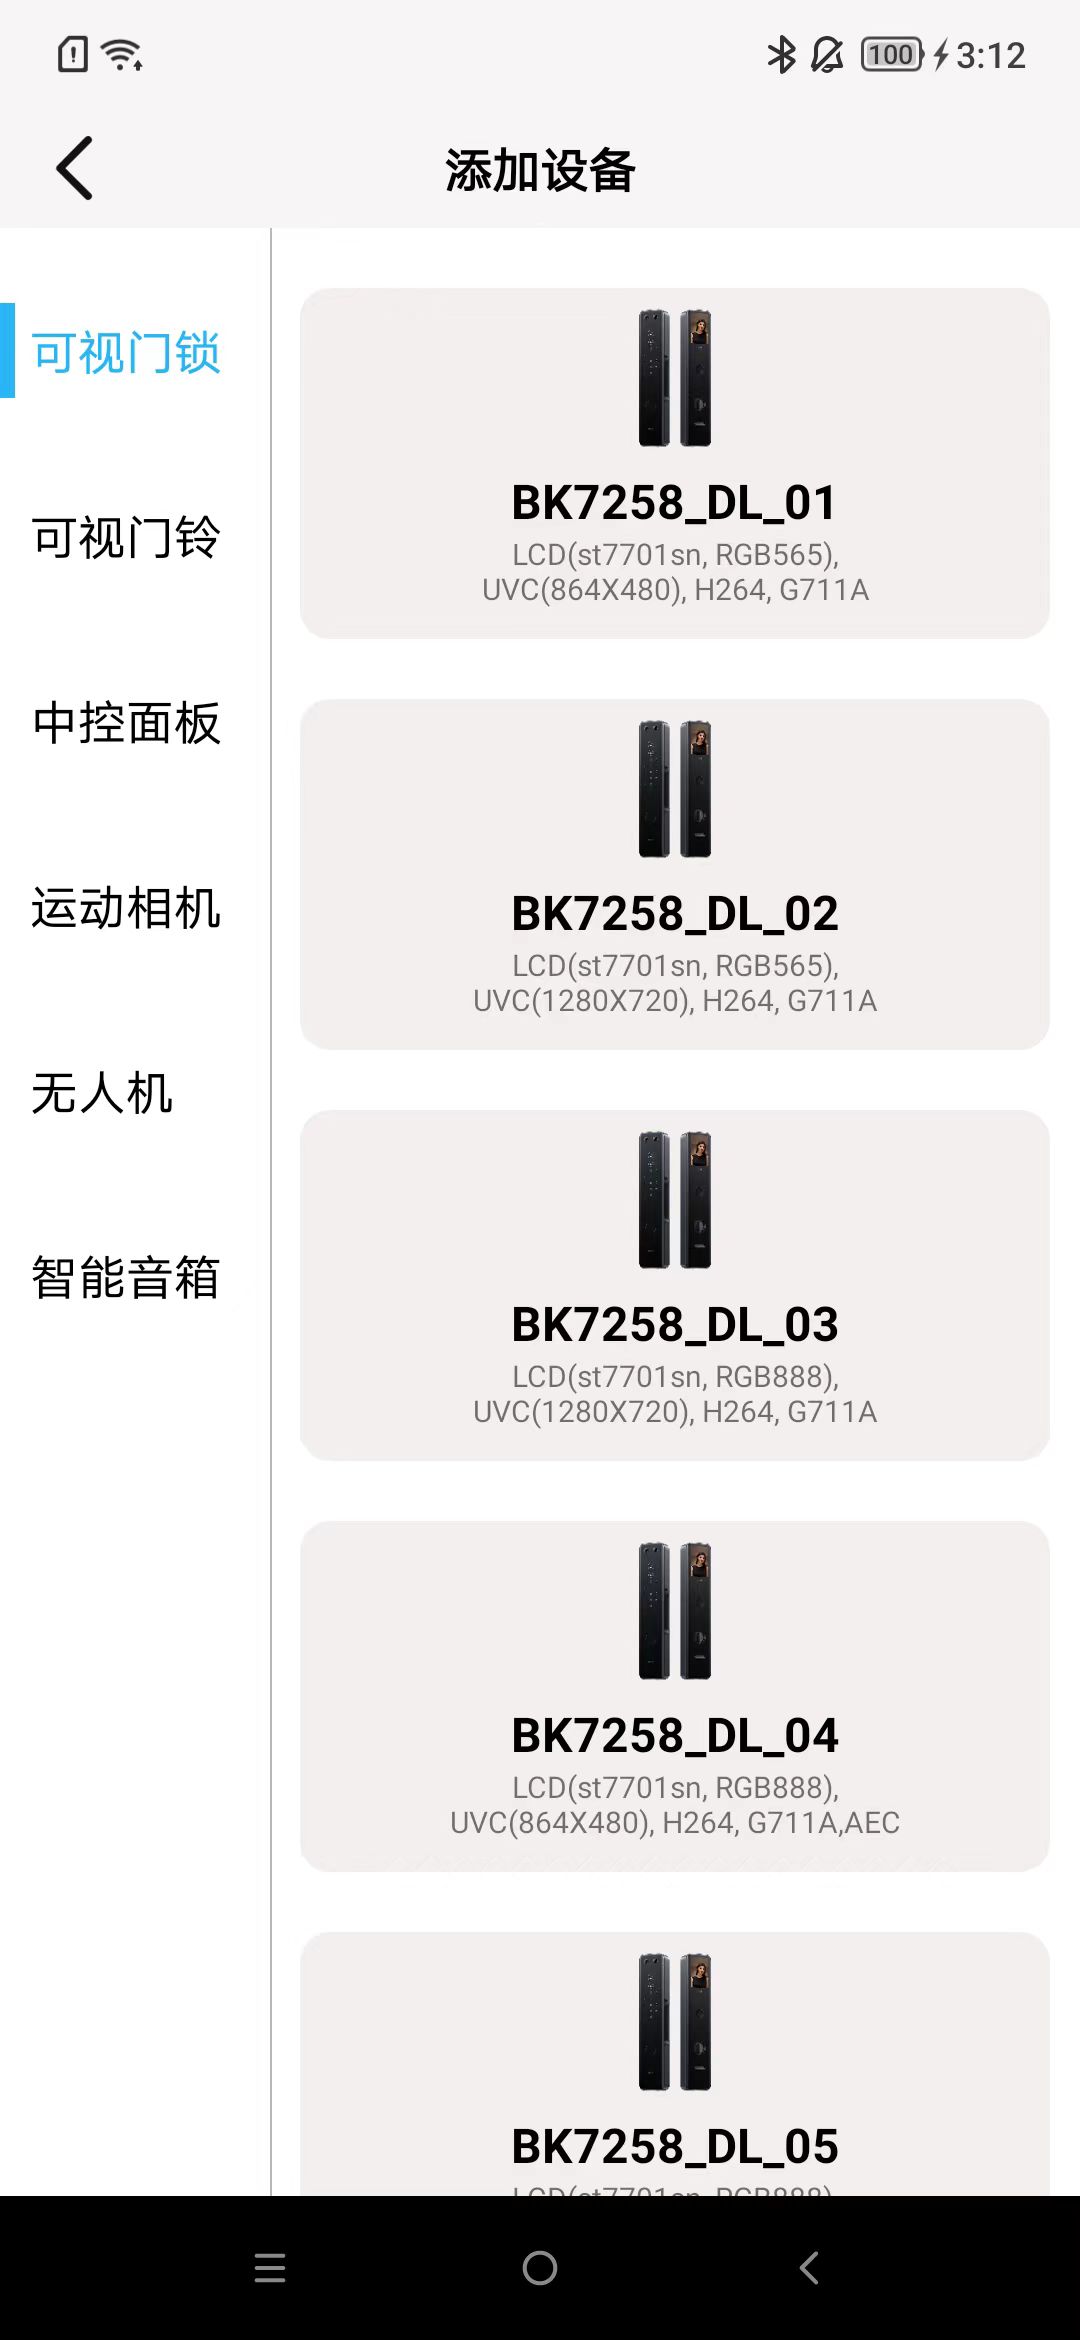
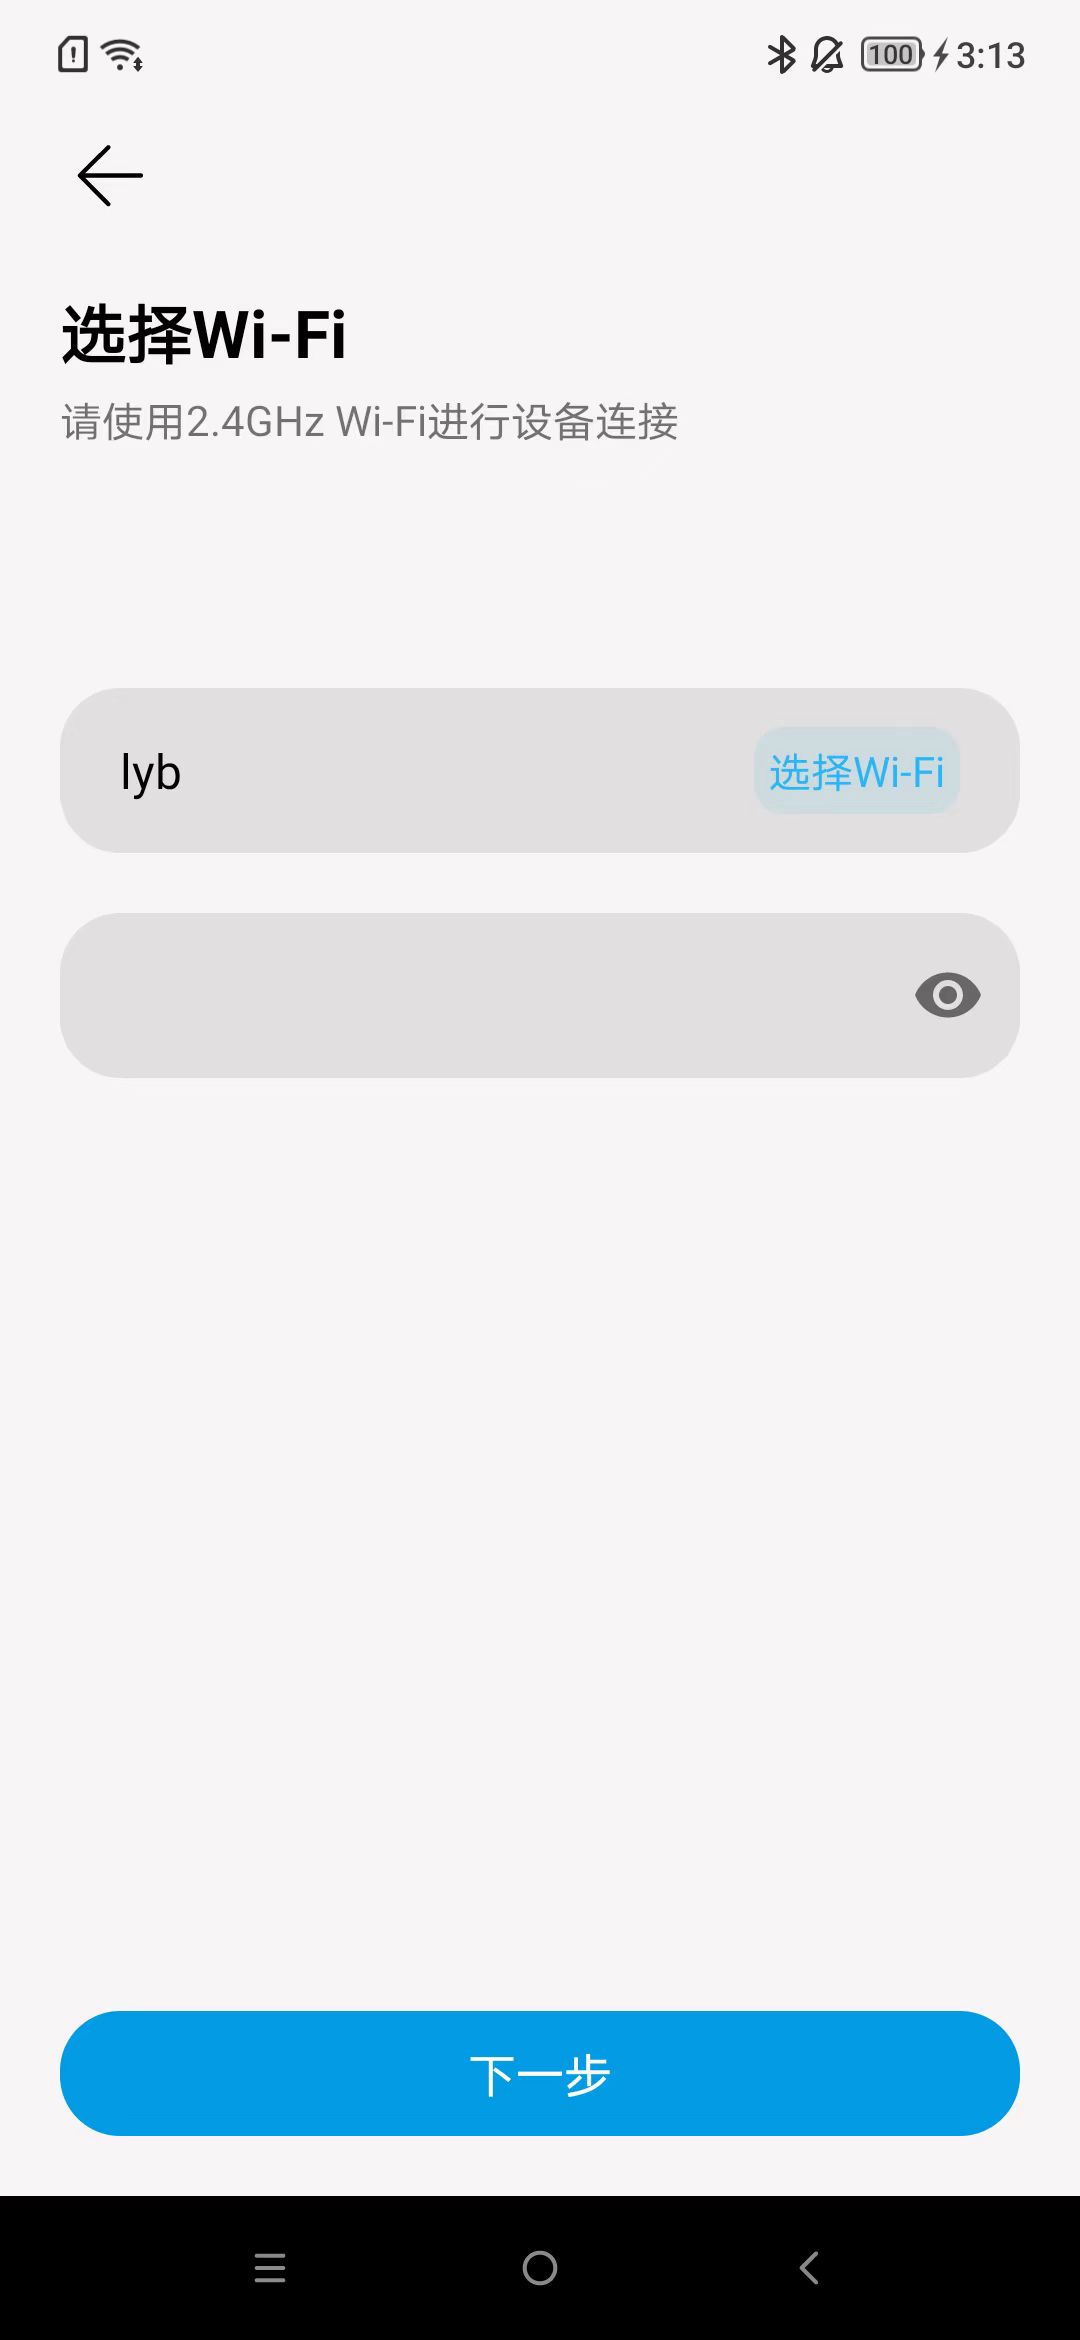
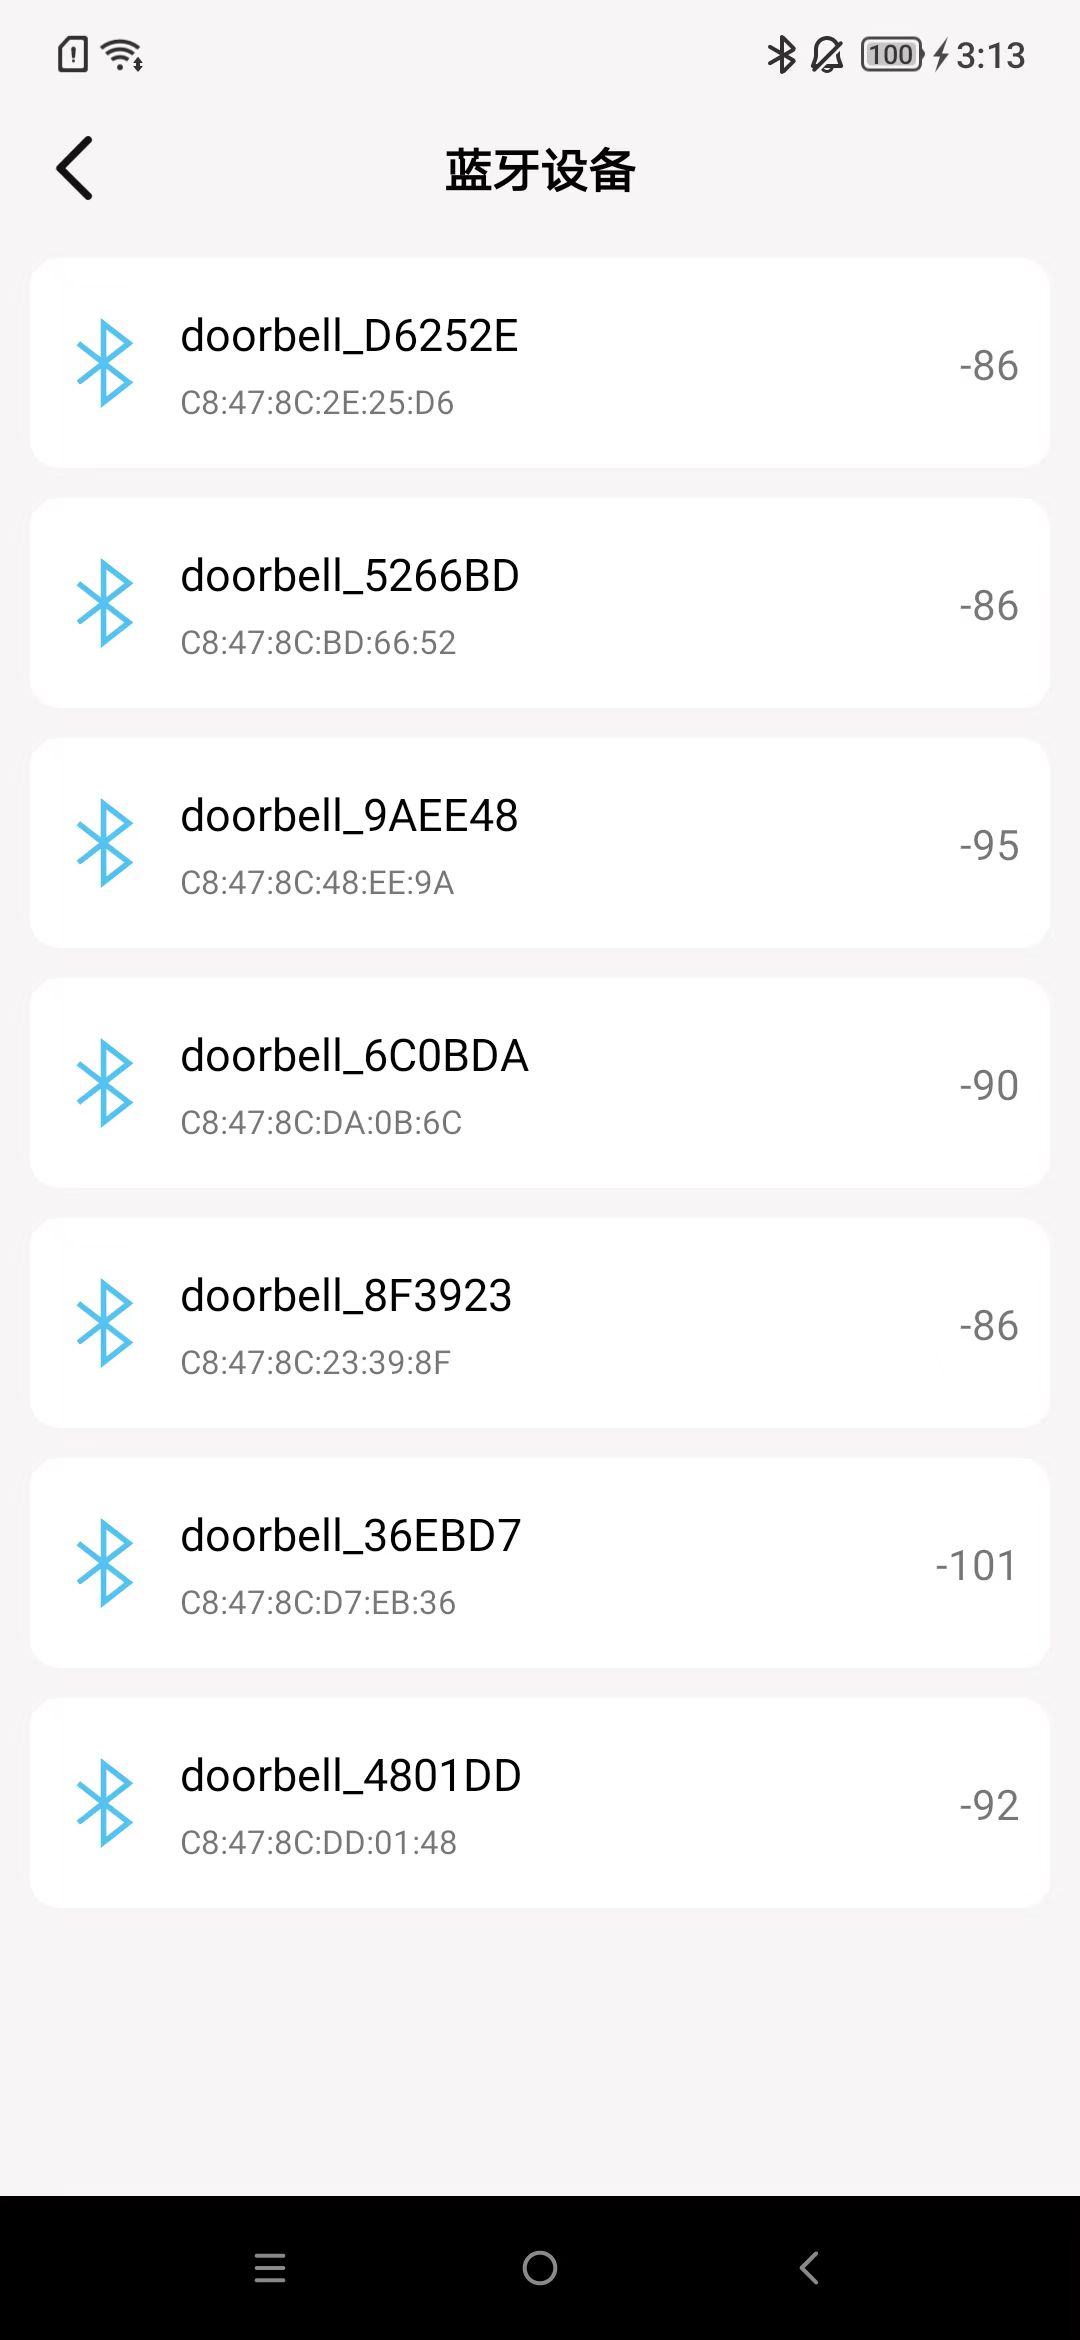
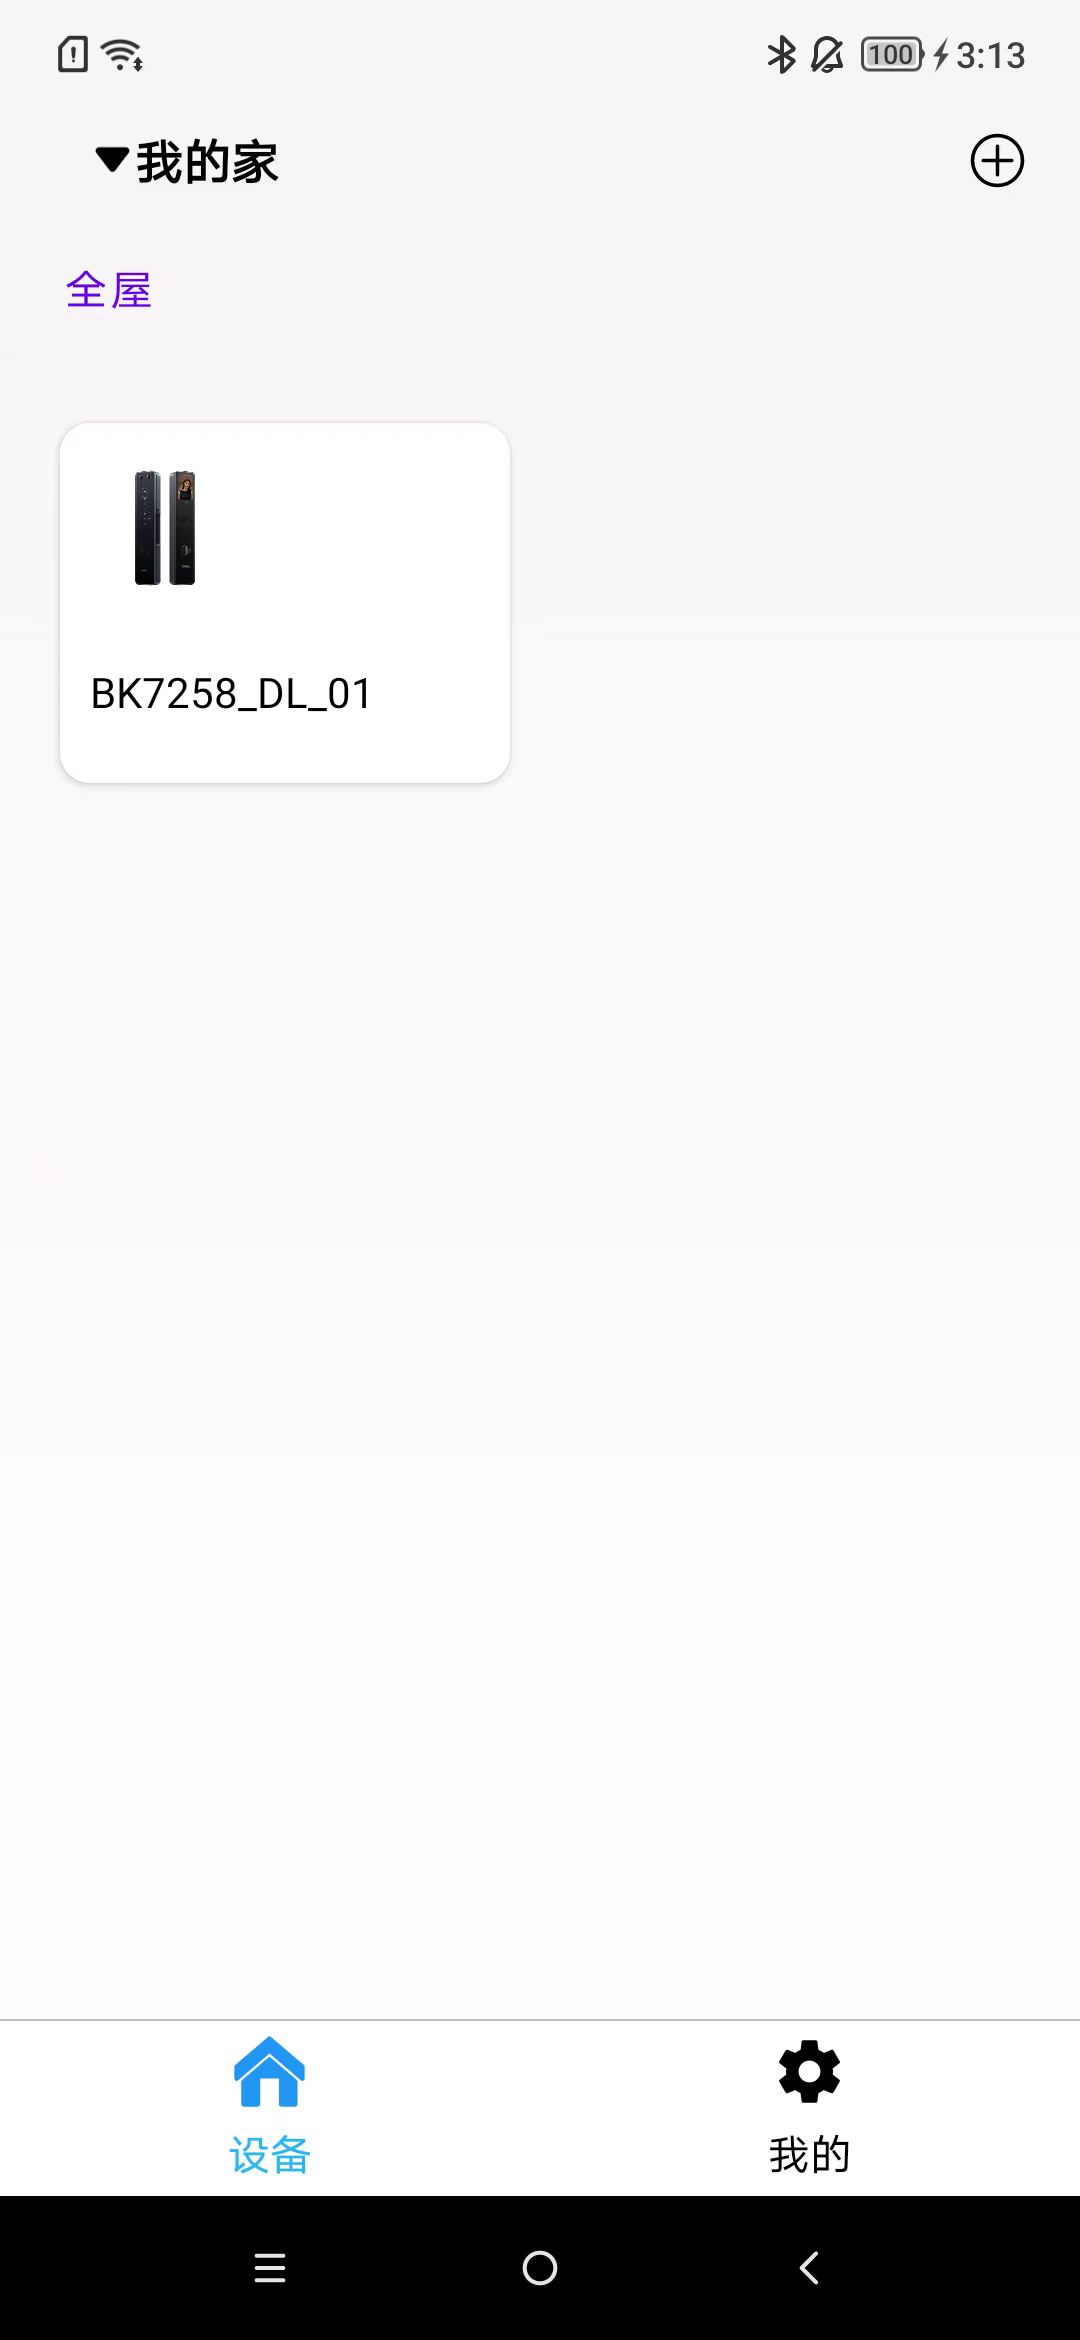
Add Device
Follow the steps as shown in the image, and by default, the room will be added to the entire house.
During usage, location services, Bluetooth, and the location permission for this app in settings need to be turned on.

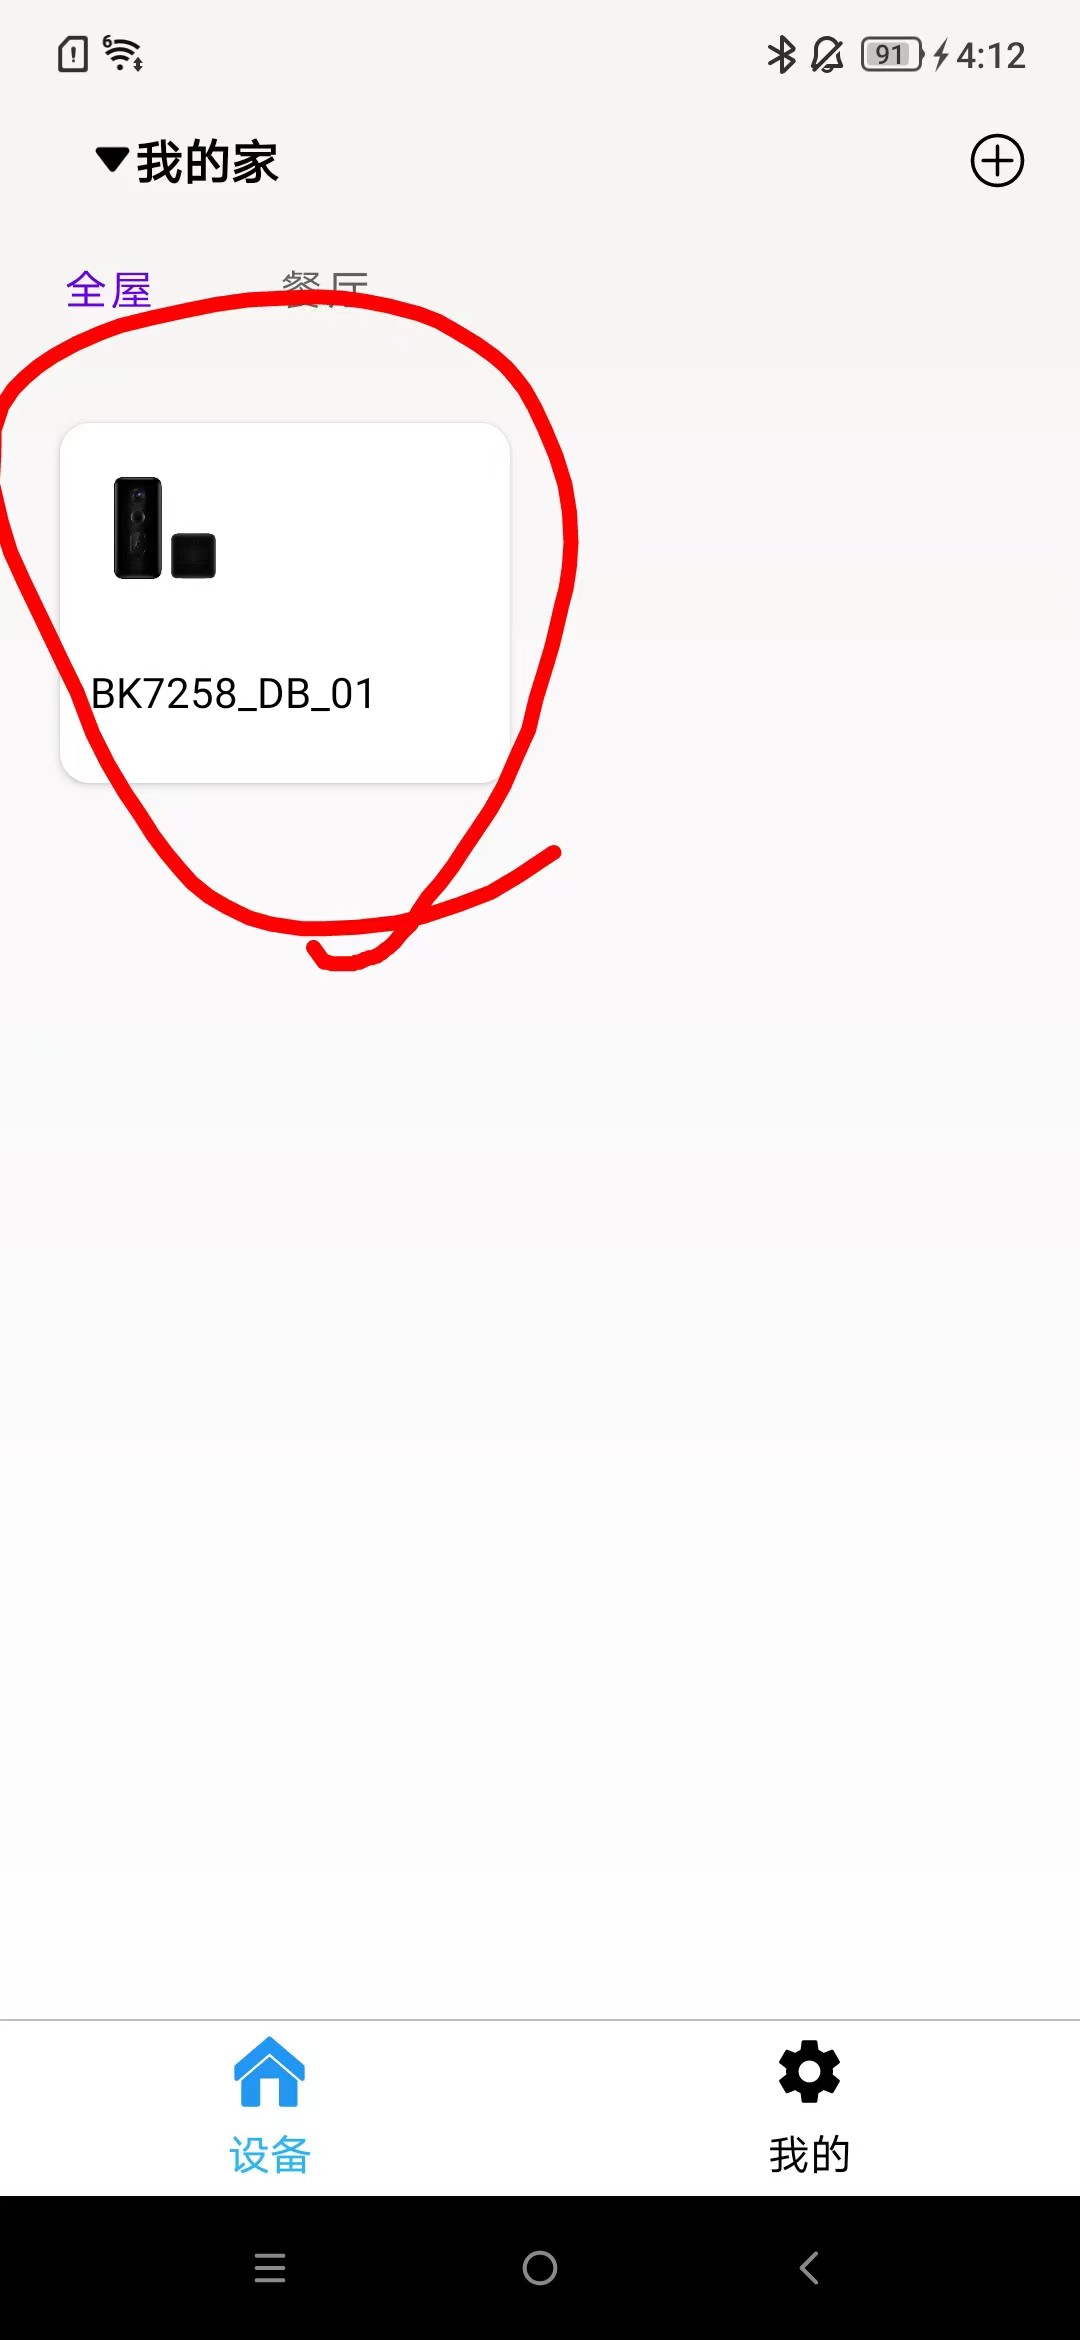
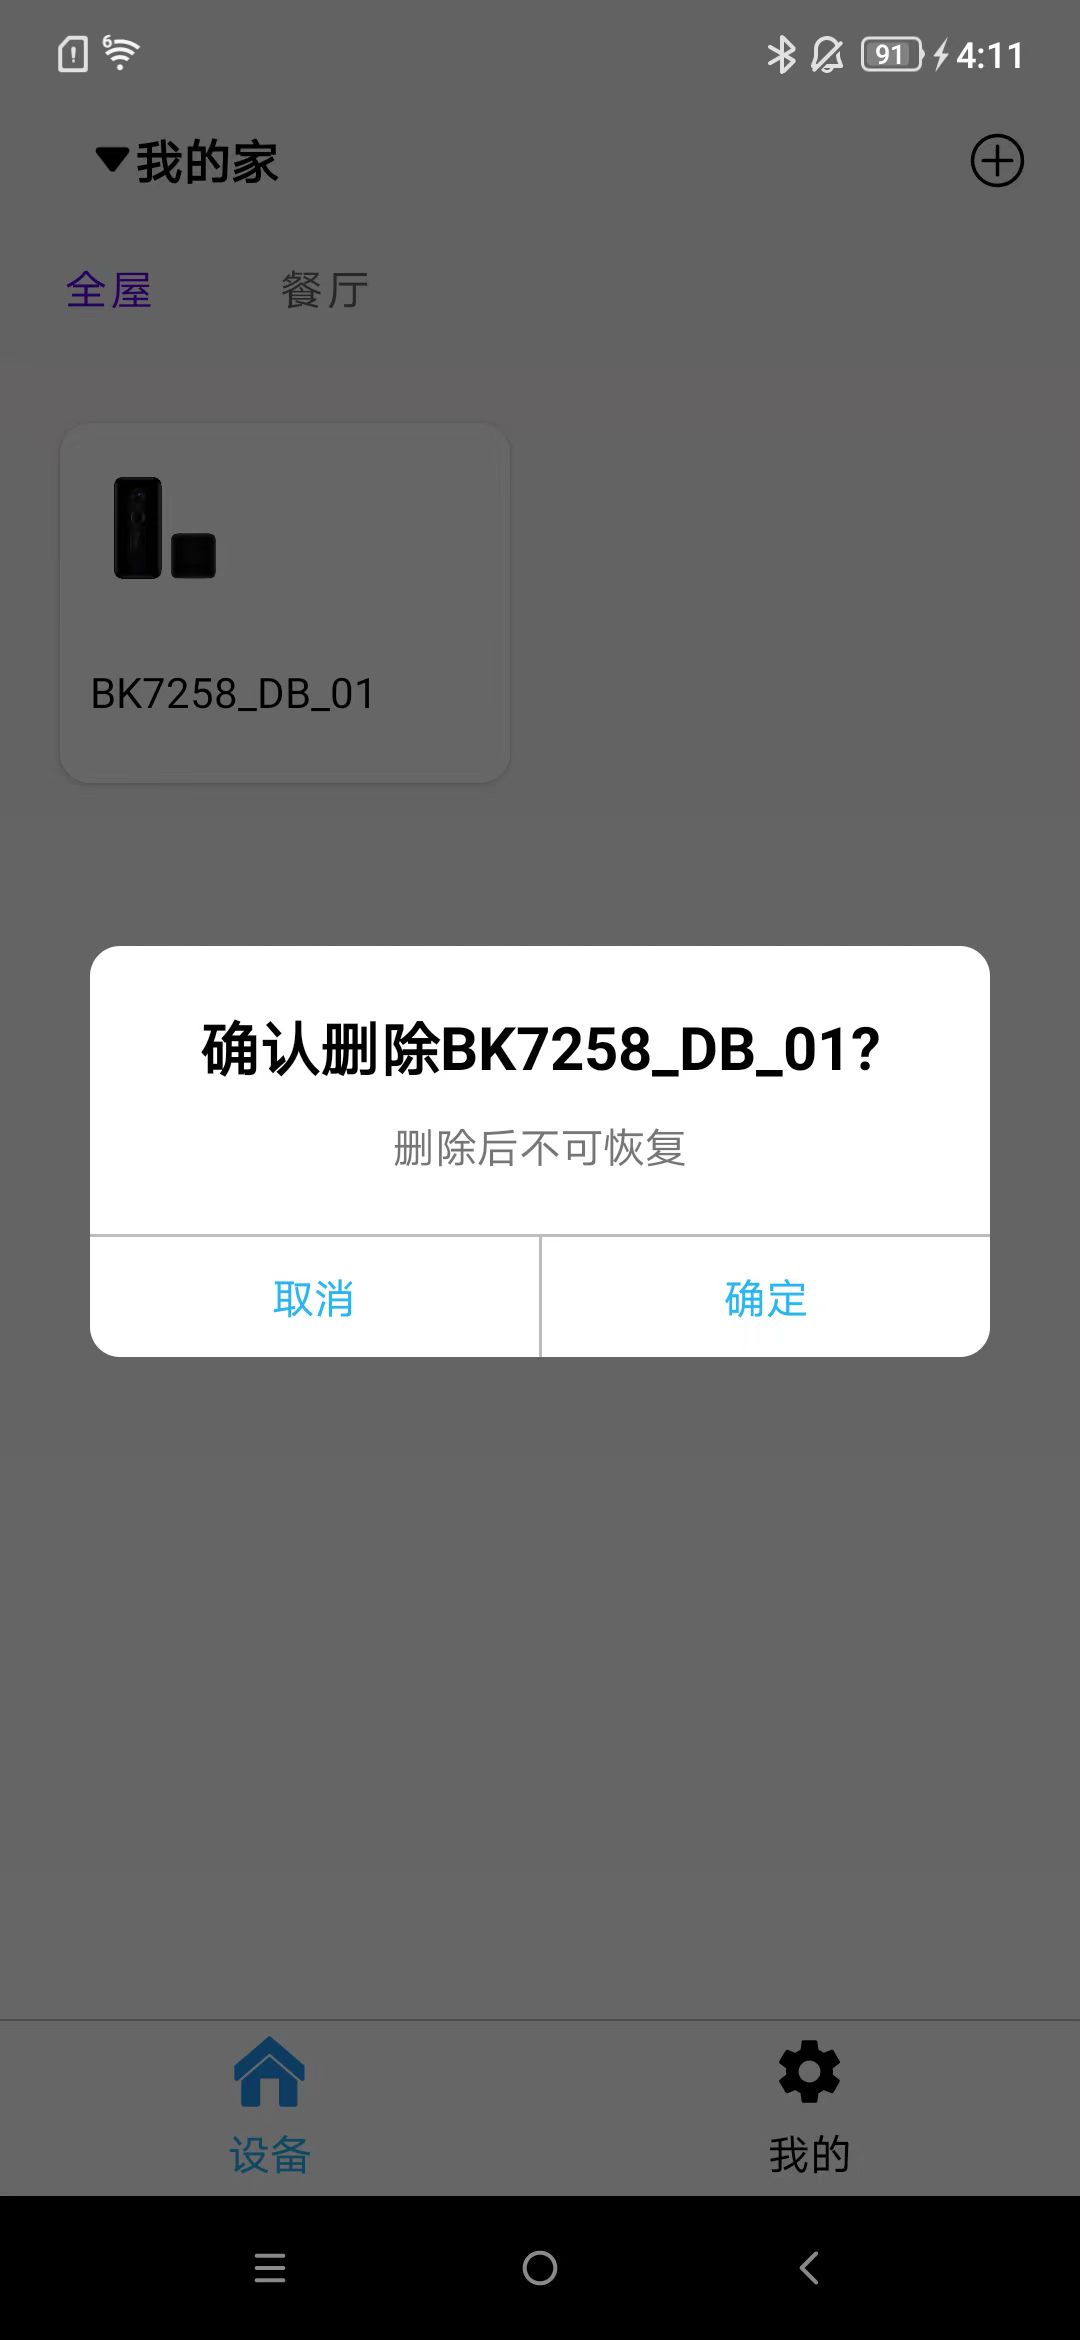
Remove Device
Long press the area as shown in the image, and a prompt box will appear.
Device Operation
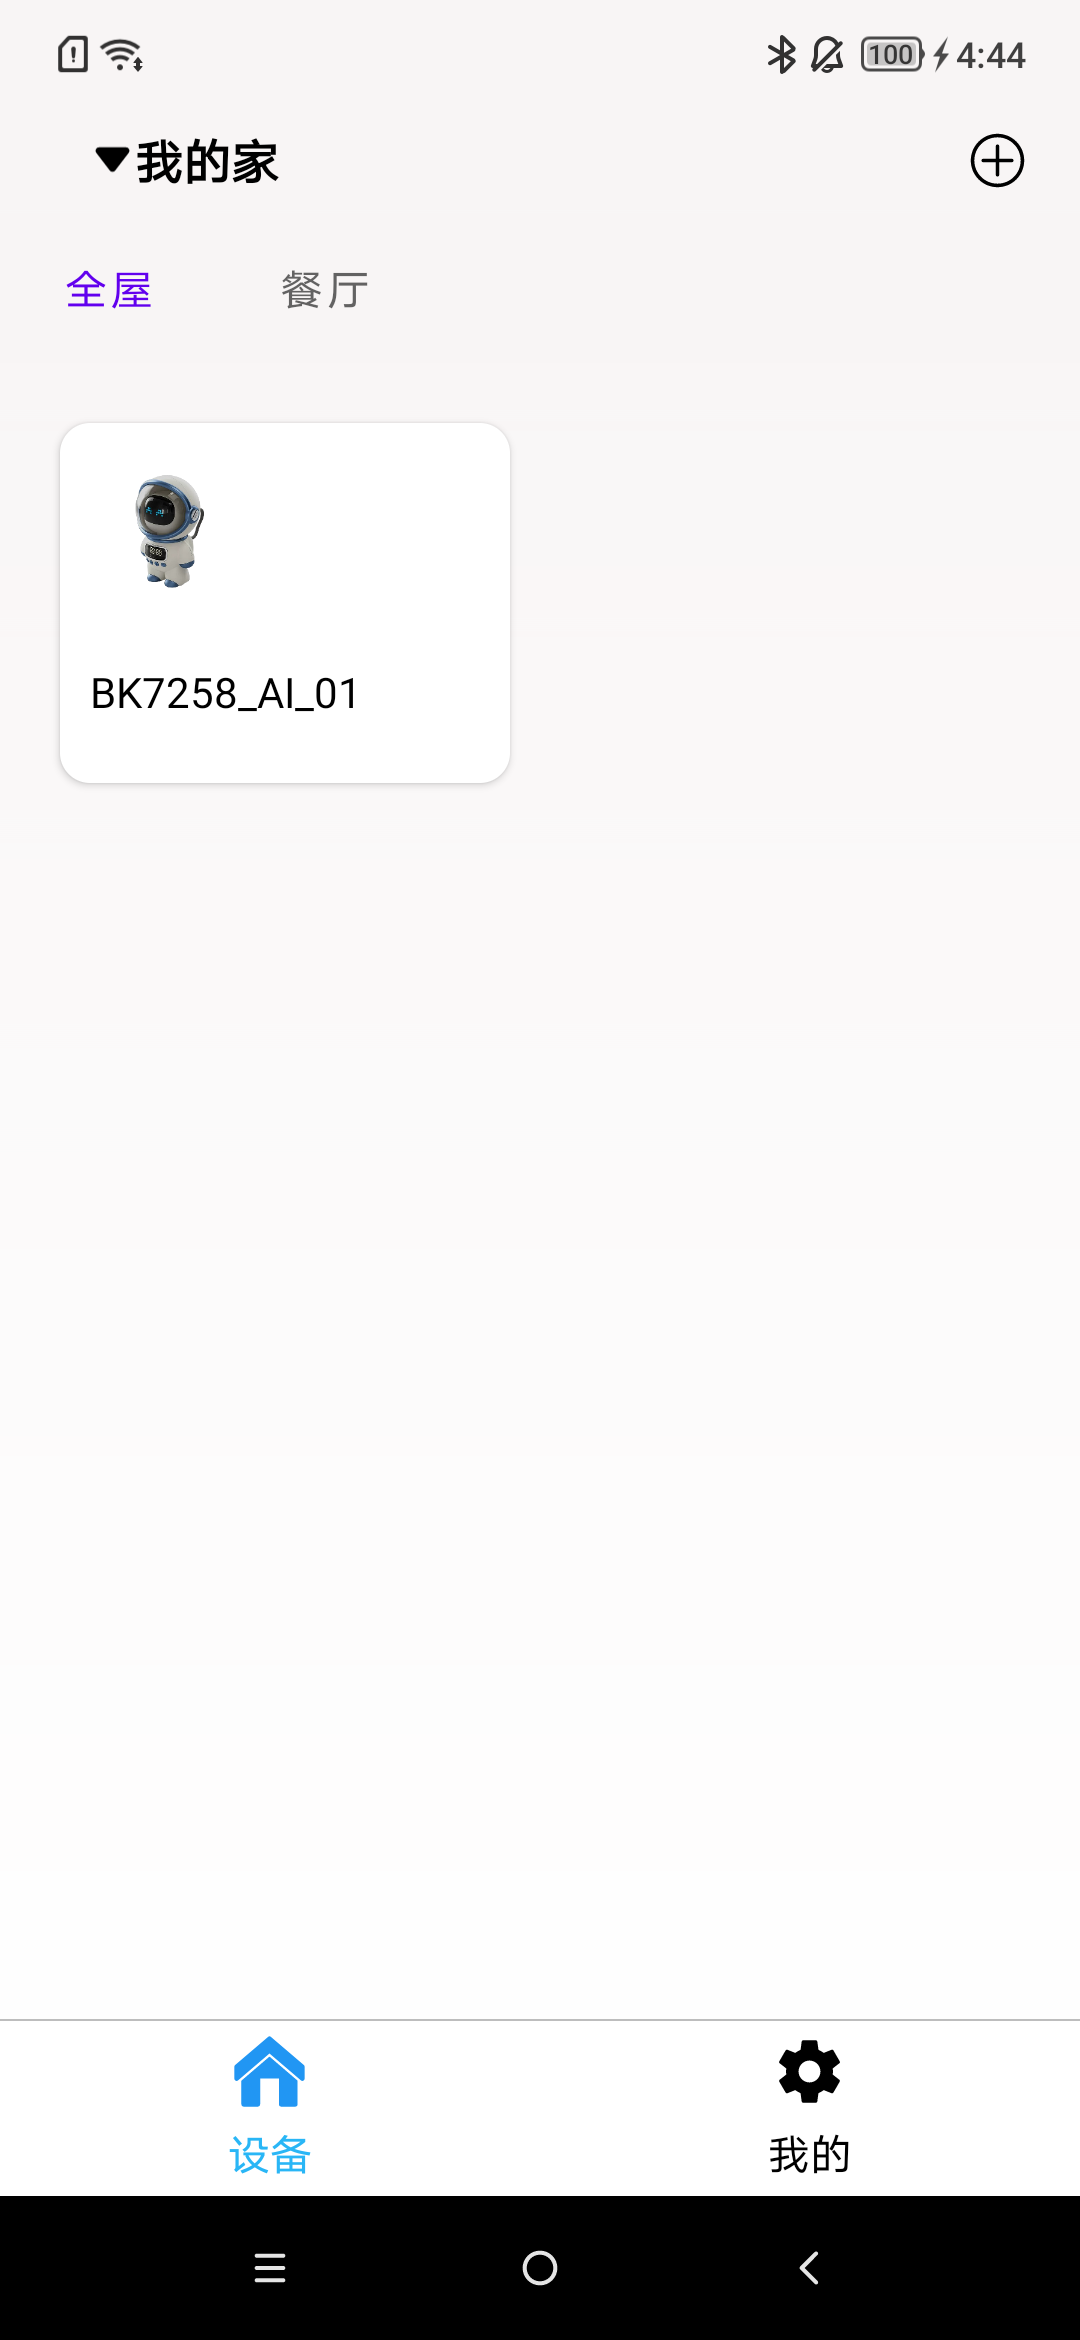
Click on the added device on the homepage to enter the operation interface of the device. It contains various functional control buttons. By default, the camera will be opened upon entry.

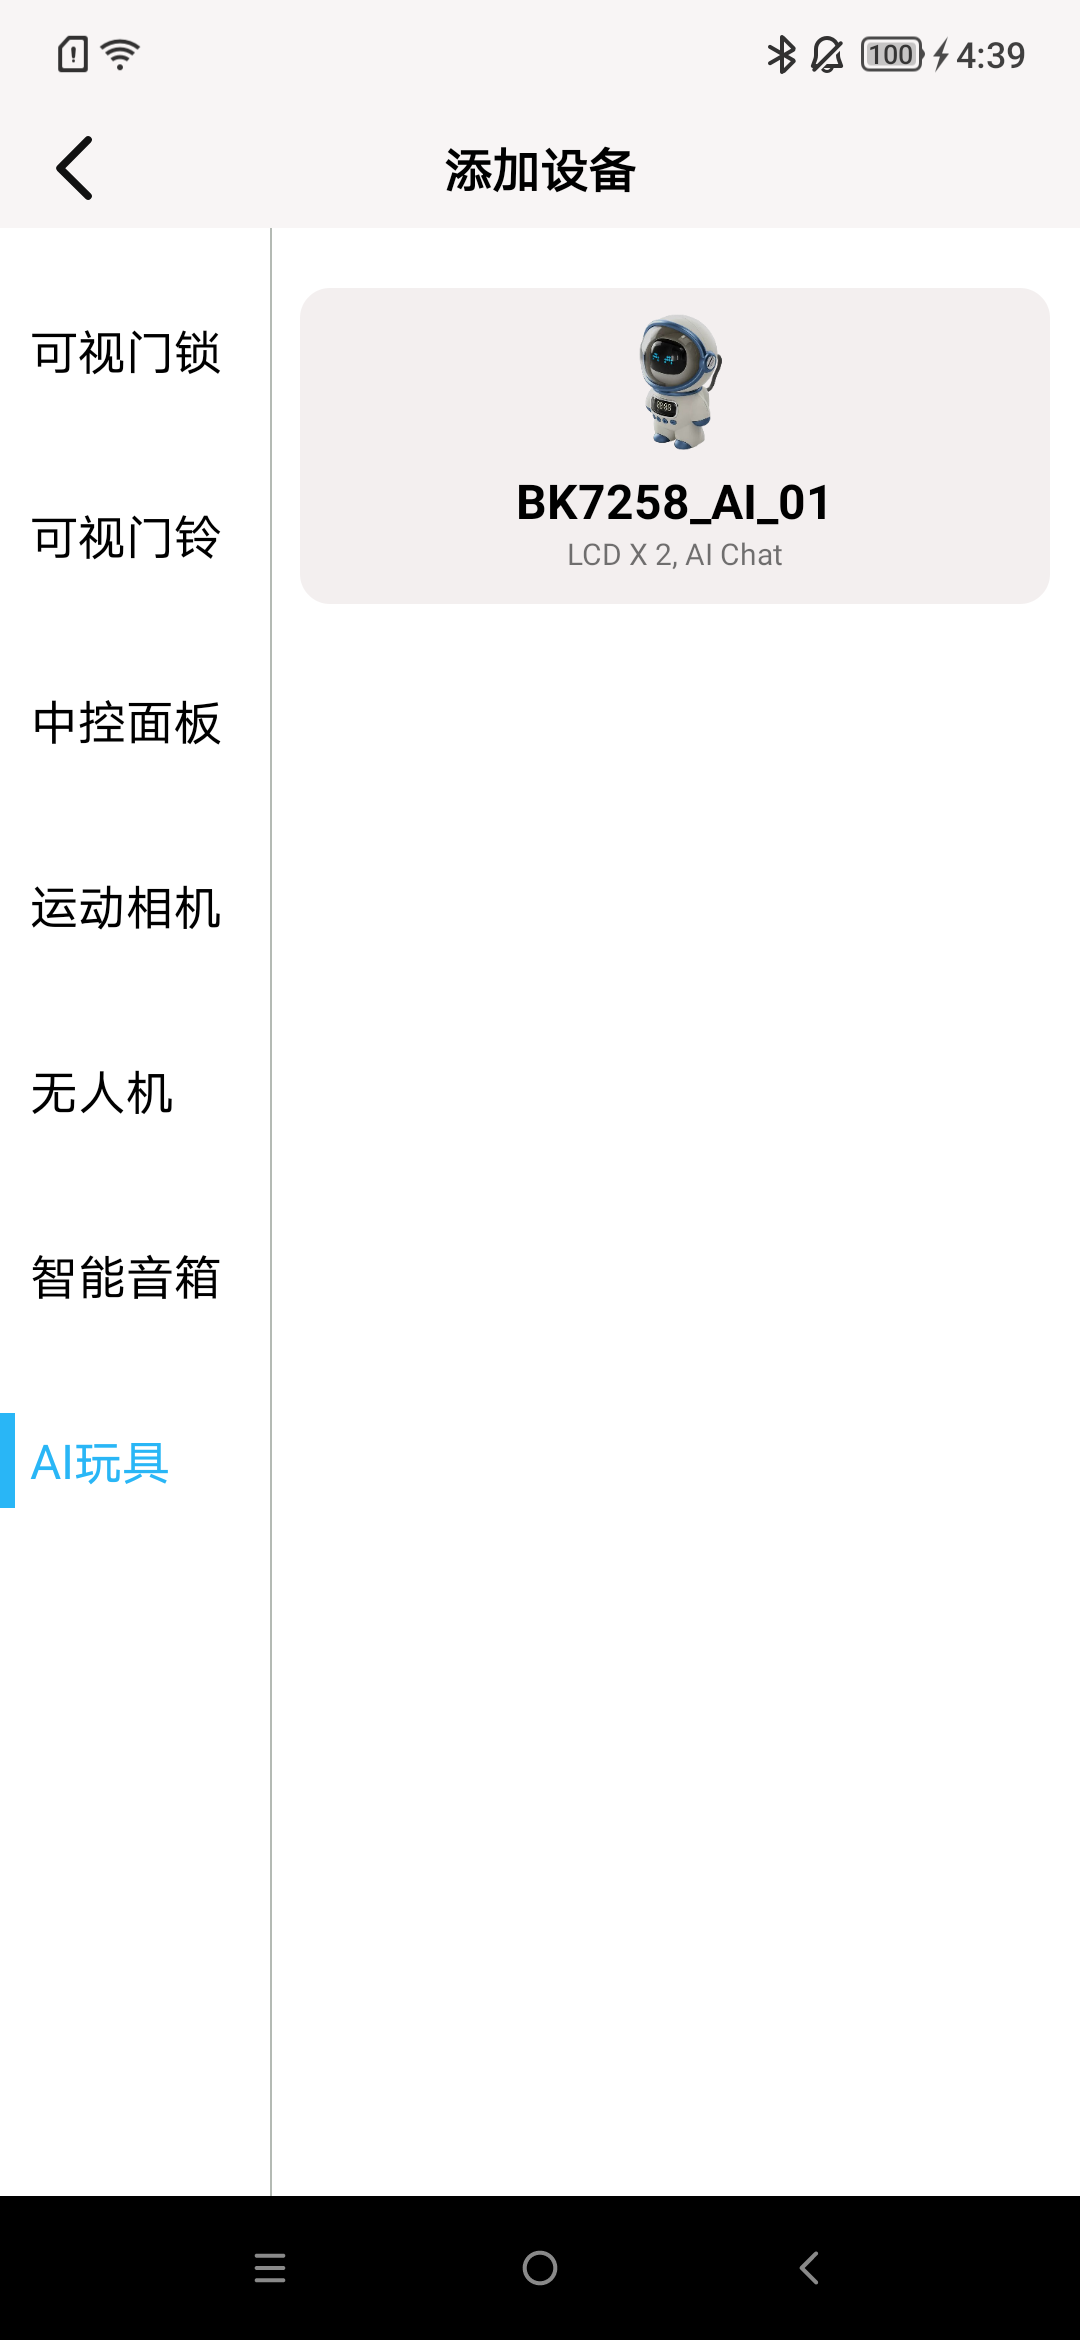
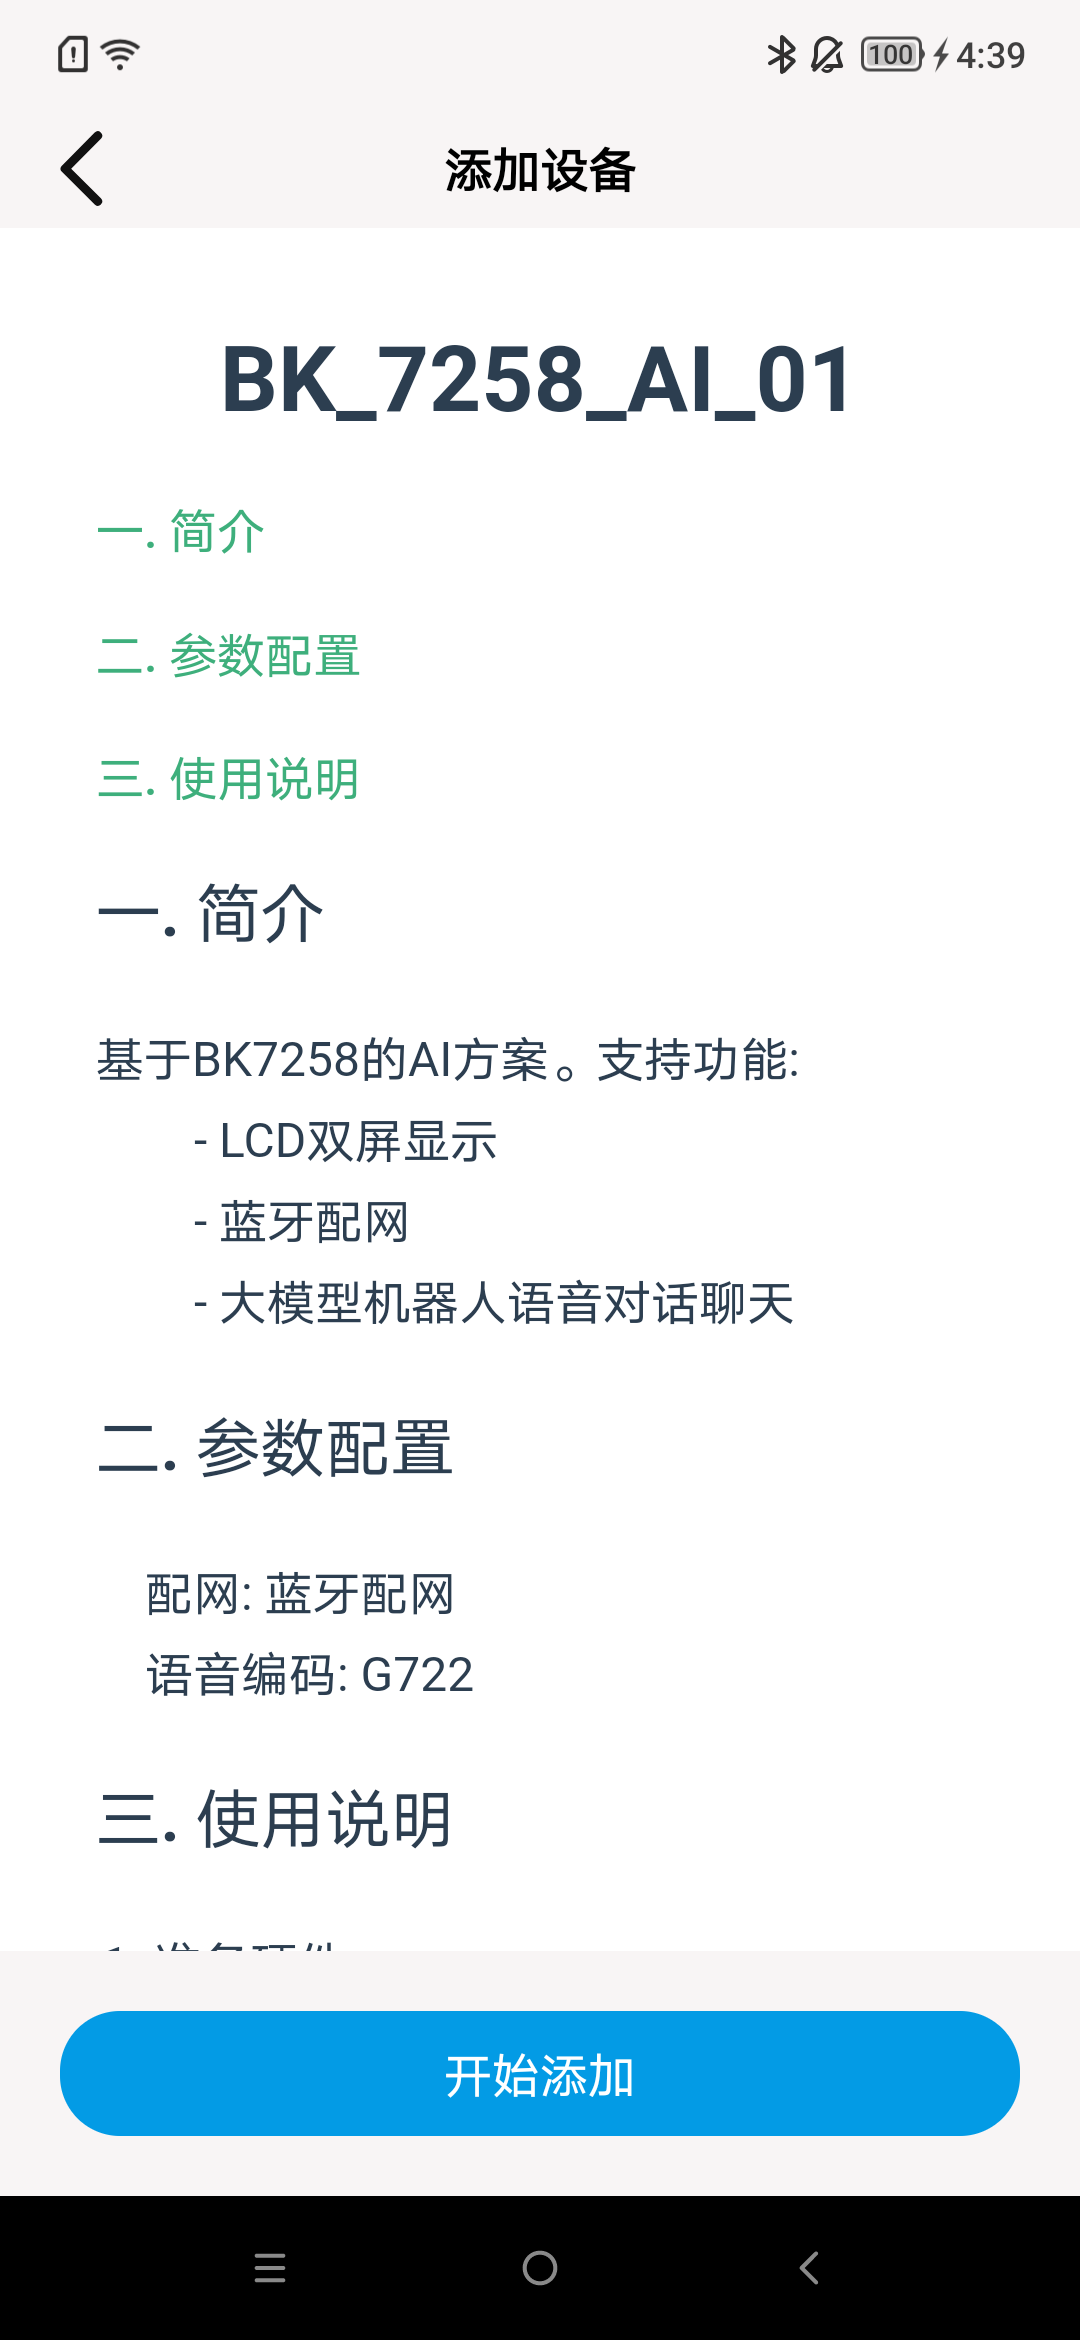
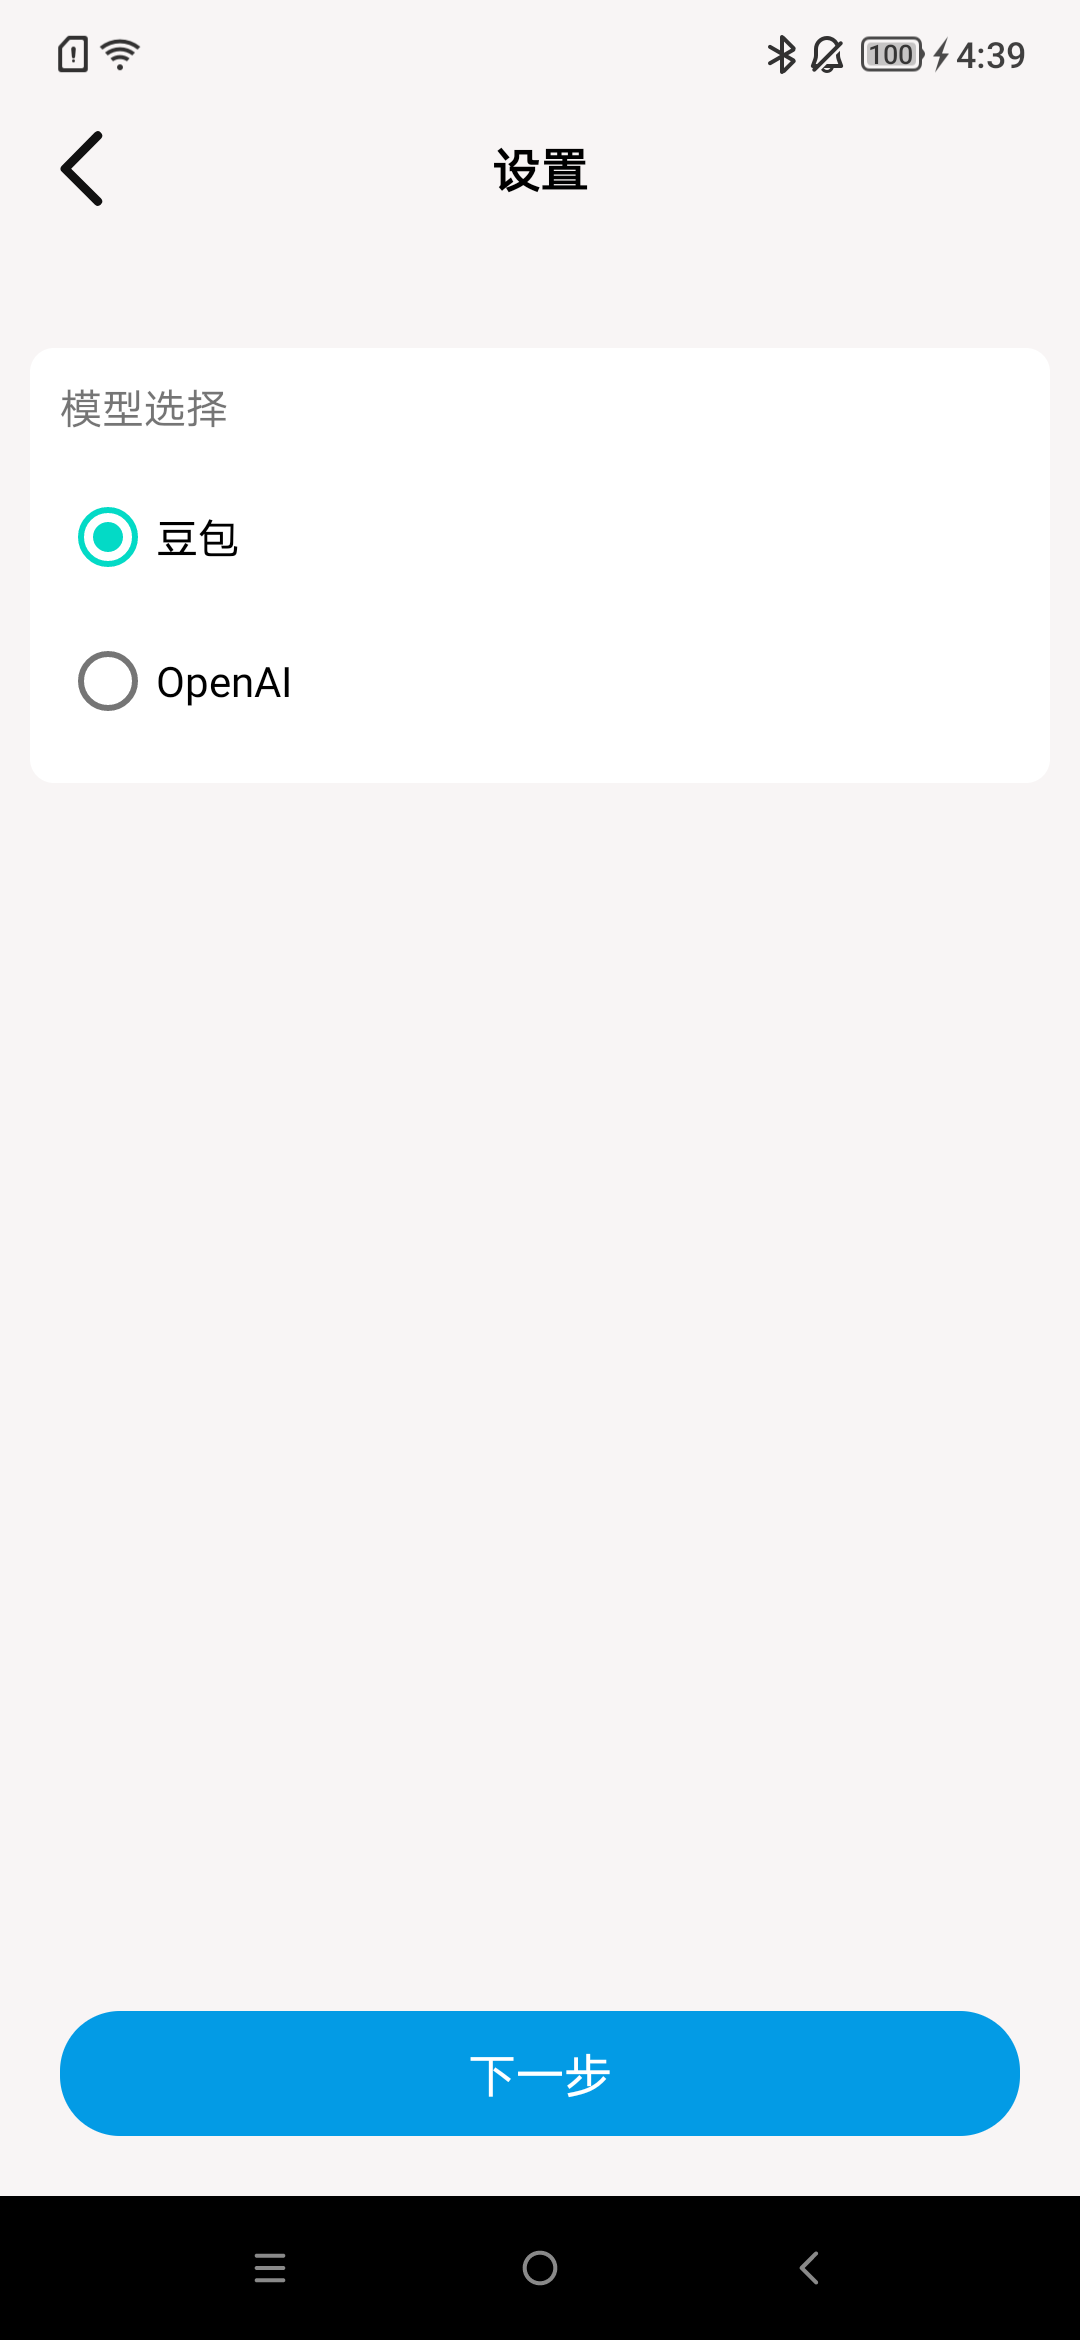
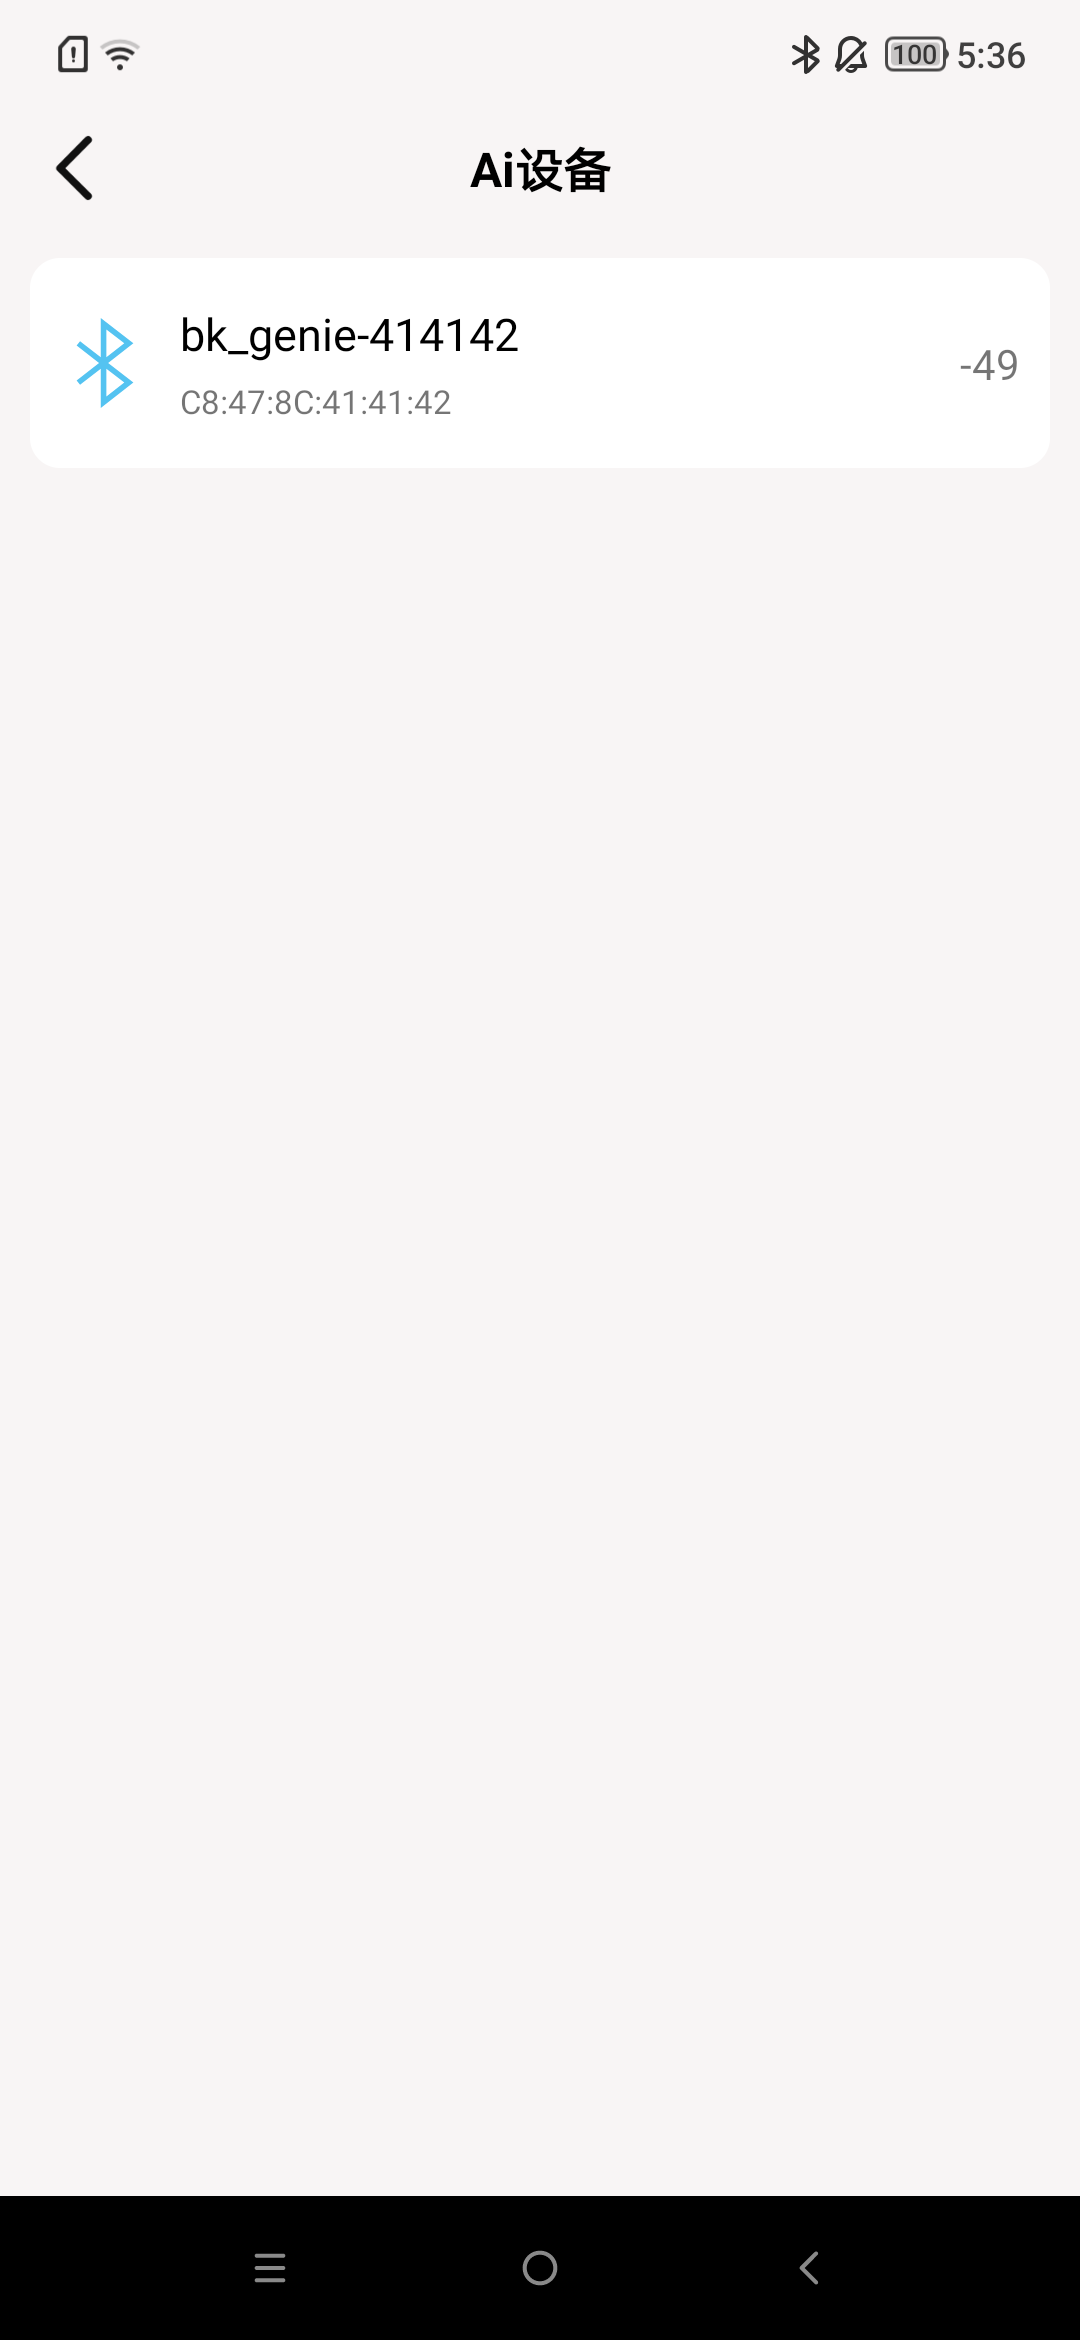
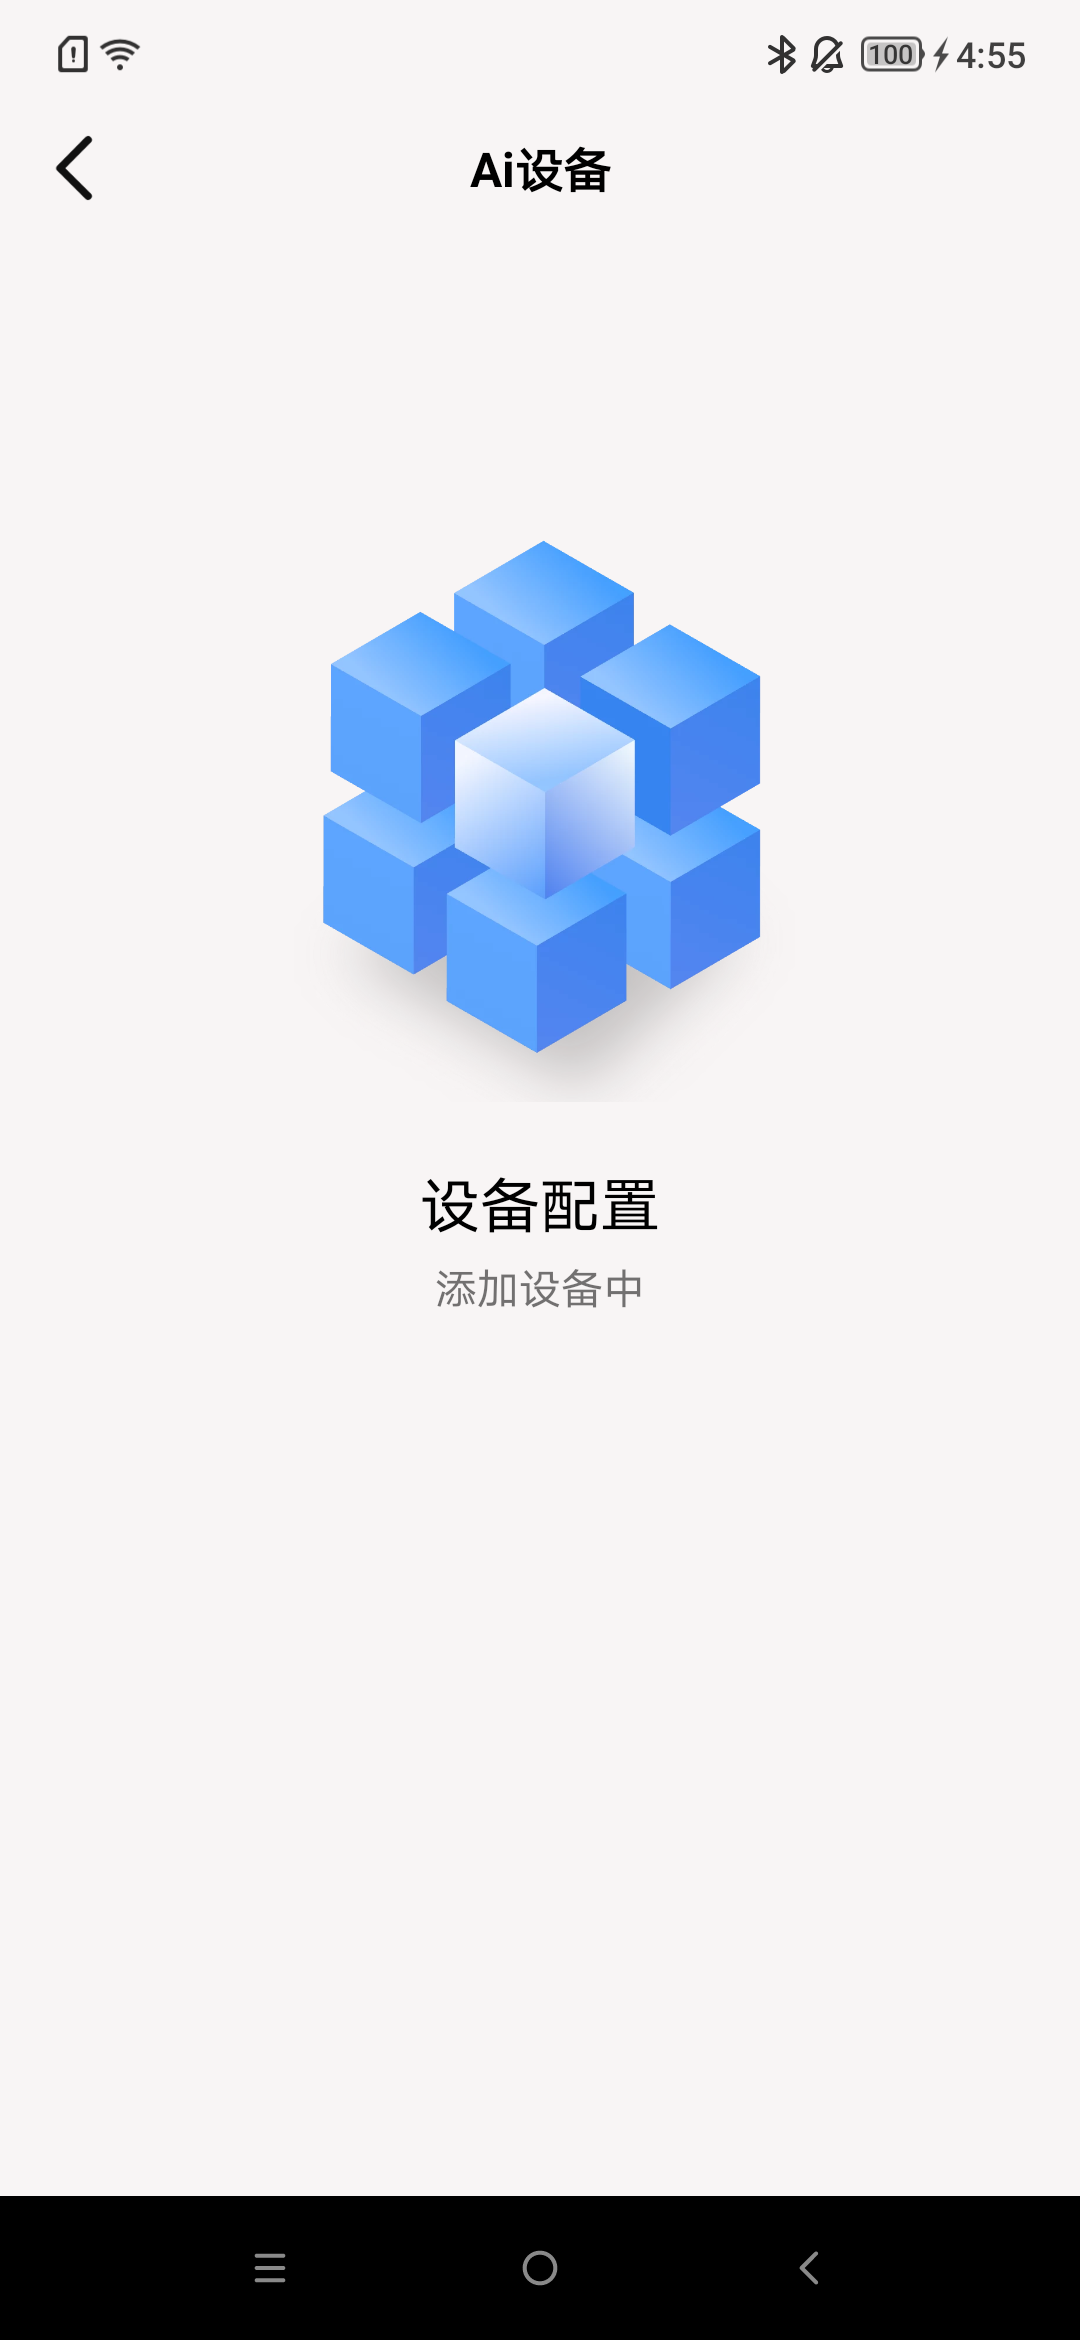
AI Device
Add Device
Follow the steps as shown in the image, and by default, the room will be added to the entire house.
Before adding a device, make sure it has been removed. (See the next section: Remove Device)
During usage, location services, Bluetooth, and the location permission for this app in settings need to be turned on.

Remove Device
Long press the area as shown in the image, and a prompt box will appear.


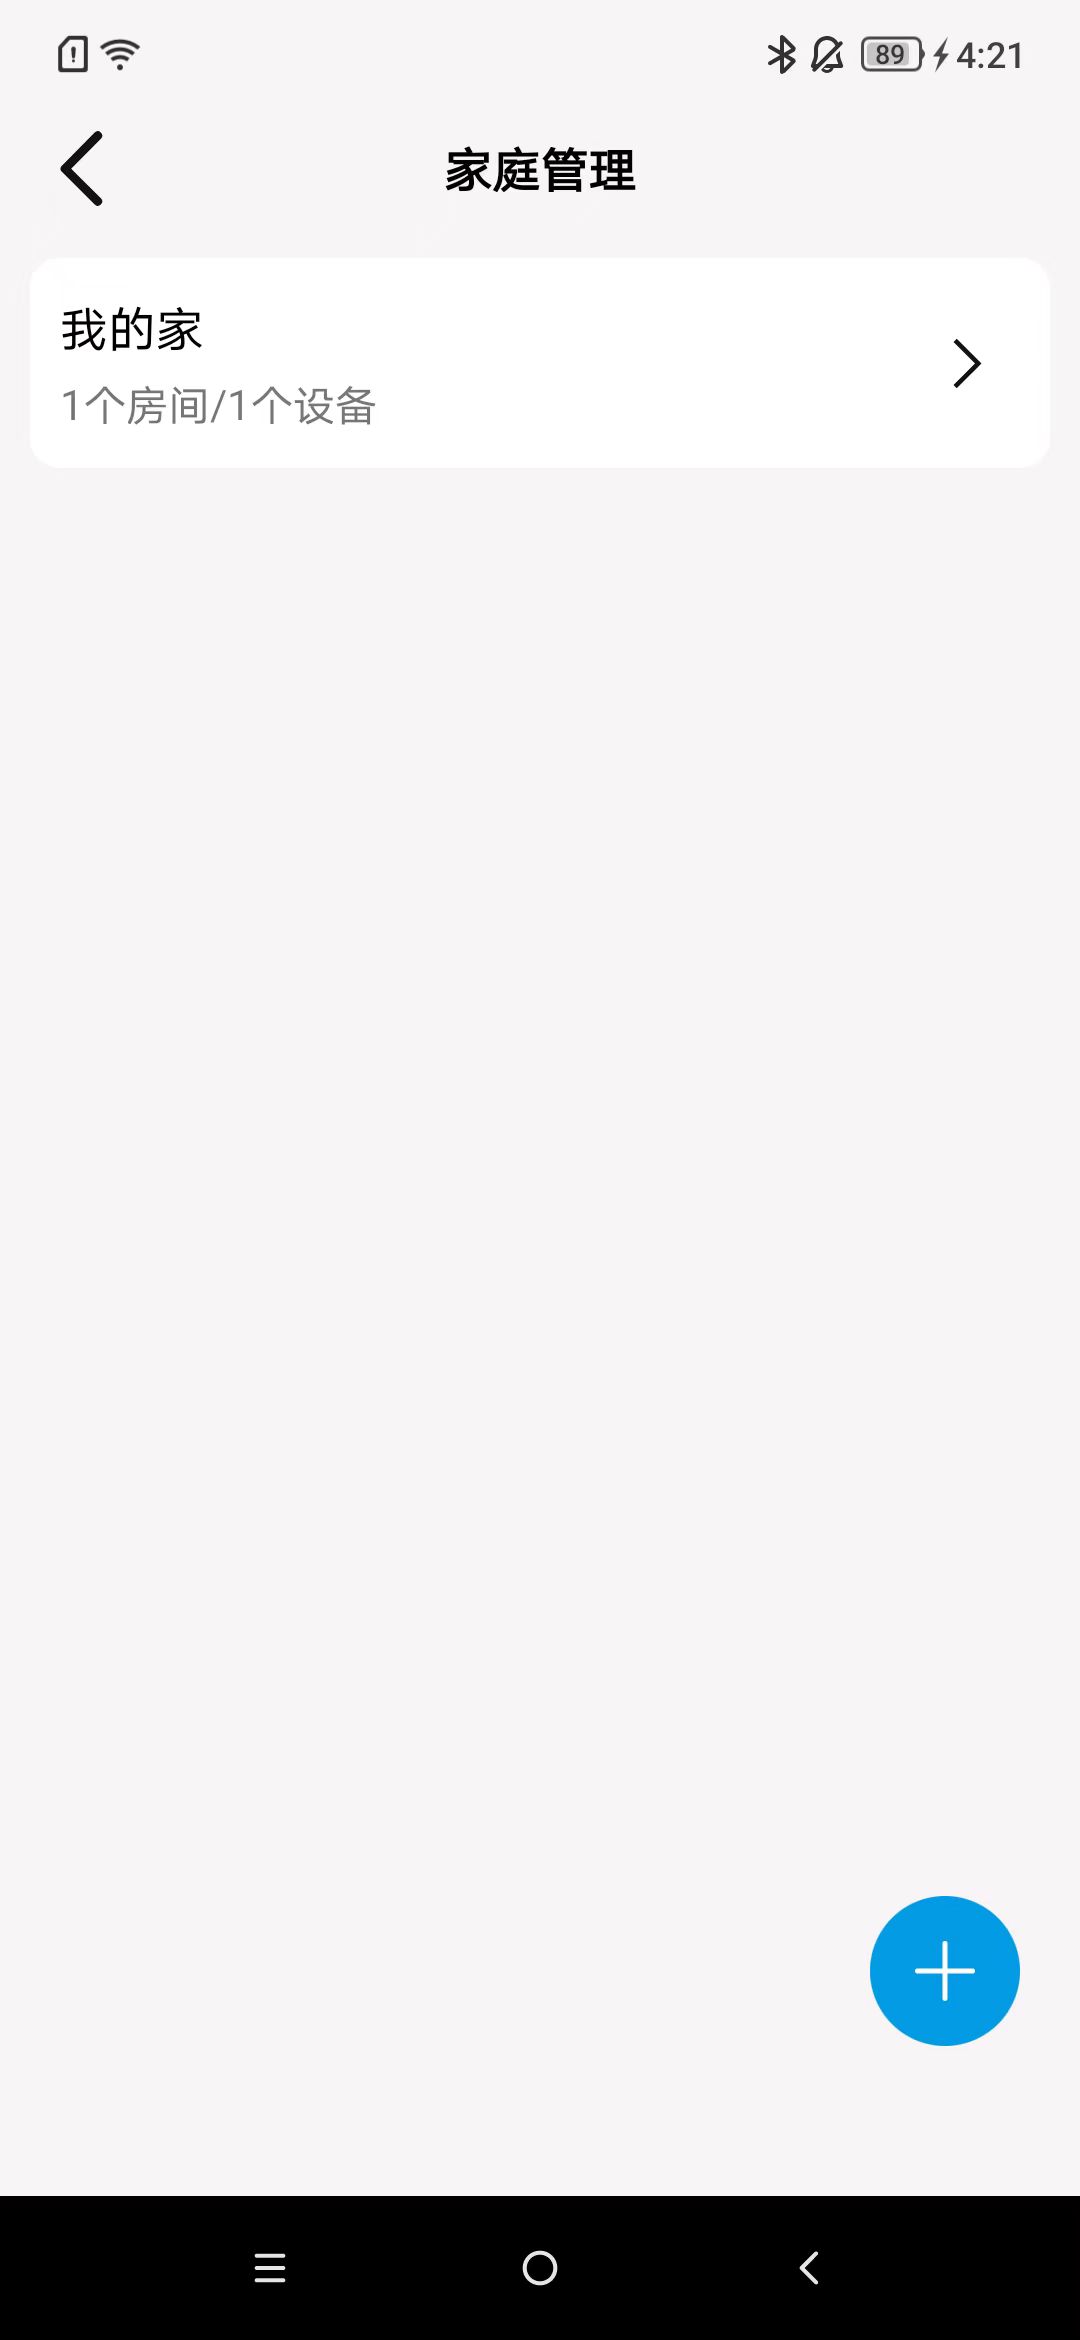
Home
The default home is: My Home. The default home cannot be deleted.
Create Home
Click on “+”, enter the home name and location as shown in the image.

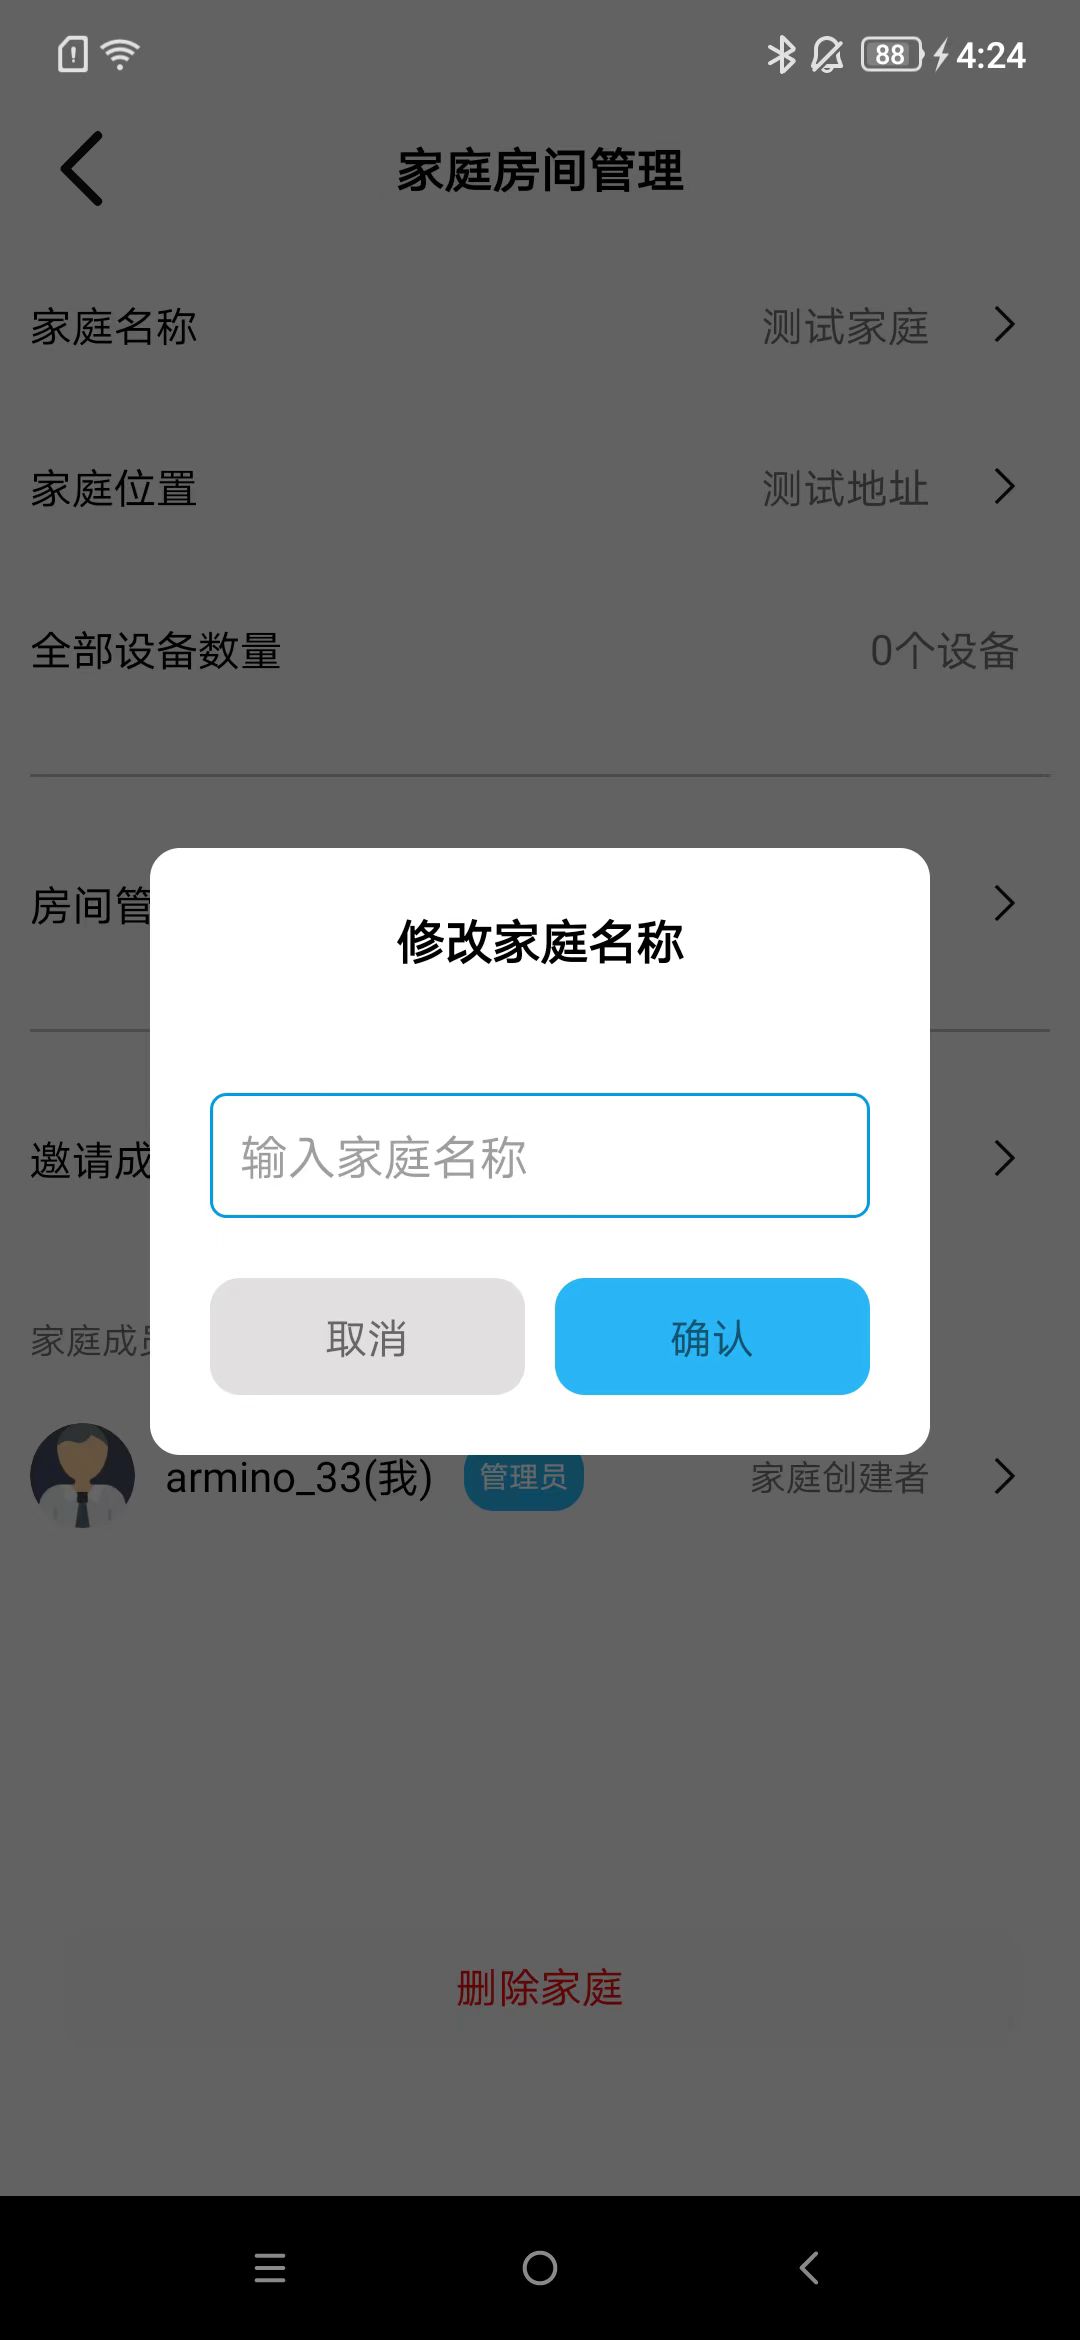
Modify Home Name
As shown in the image.
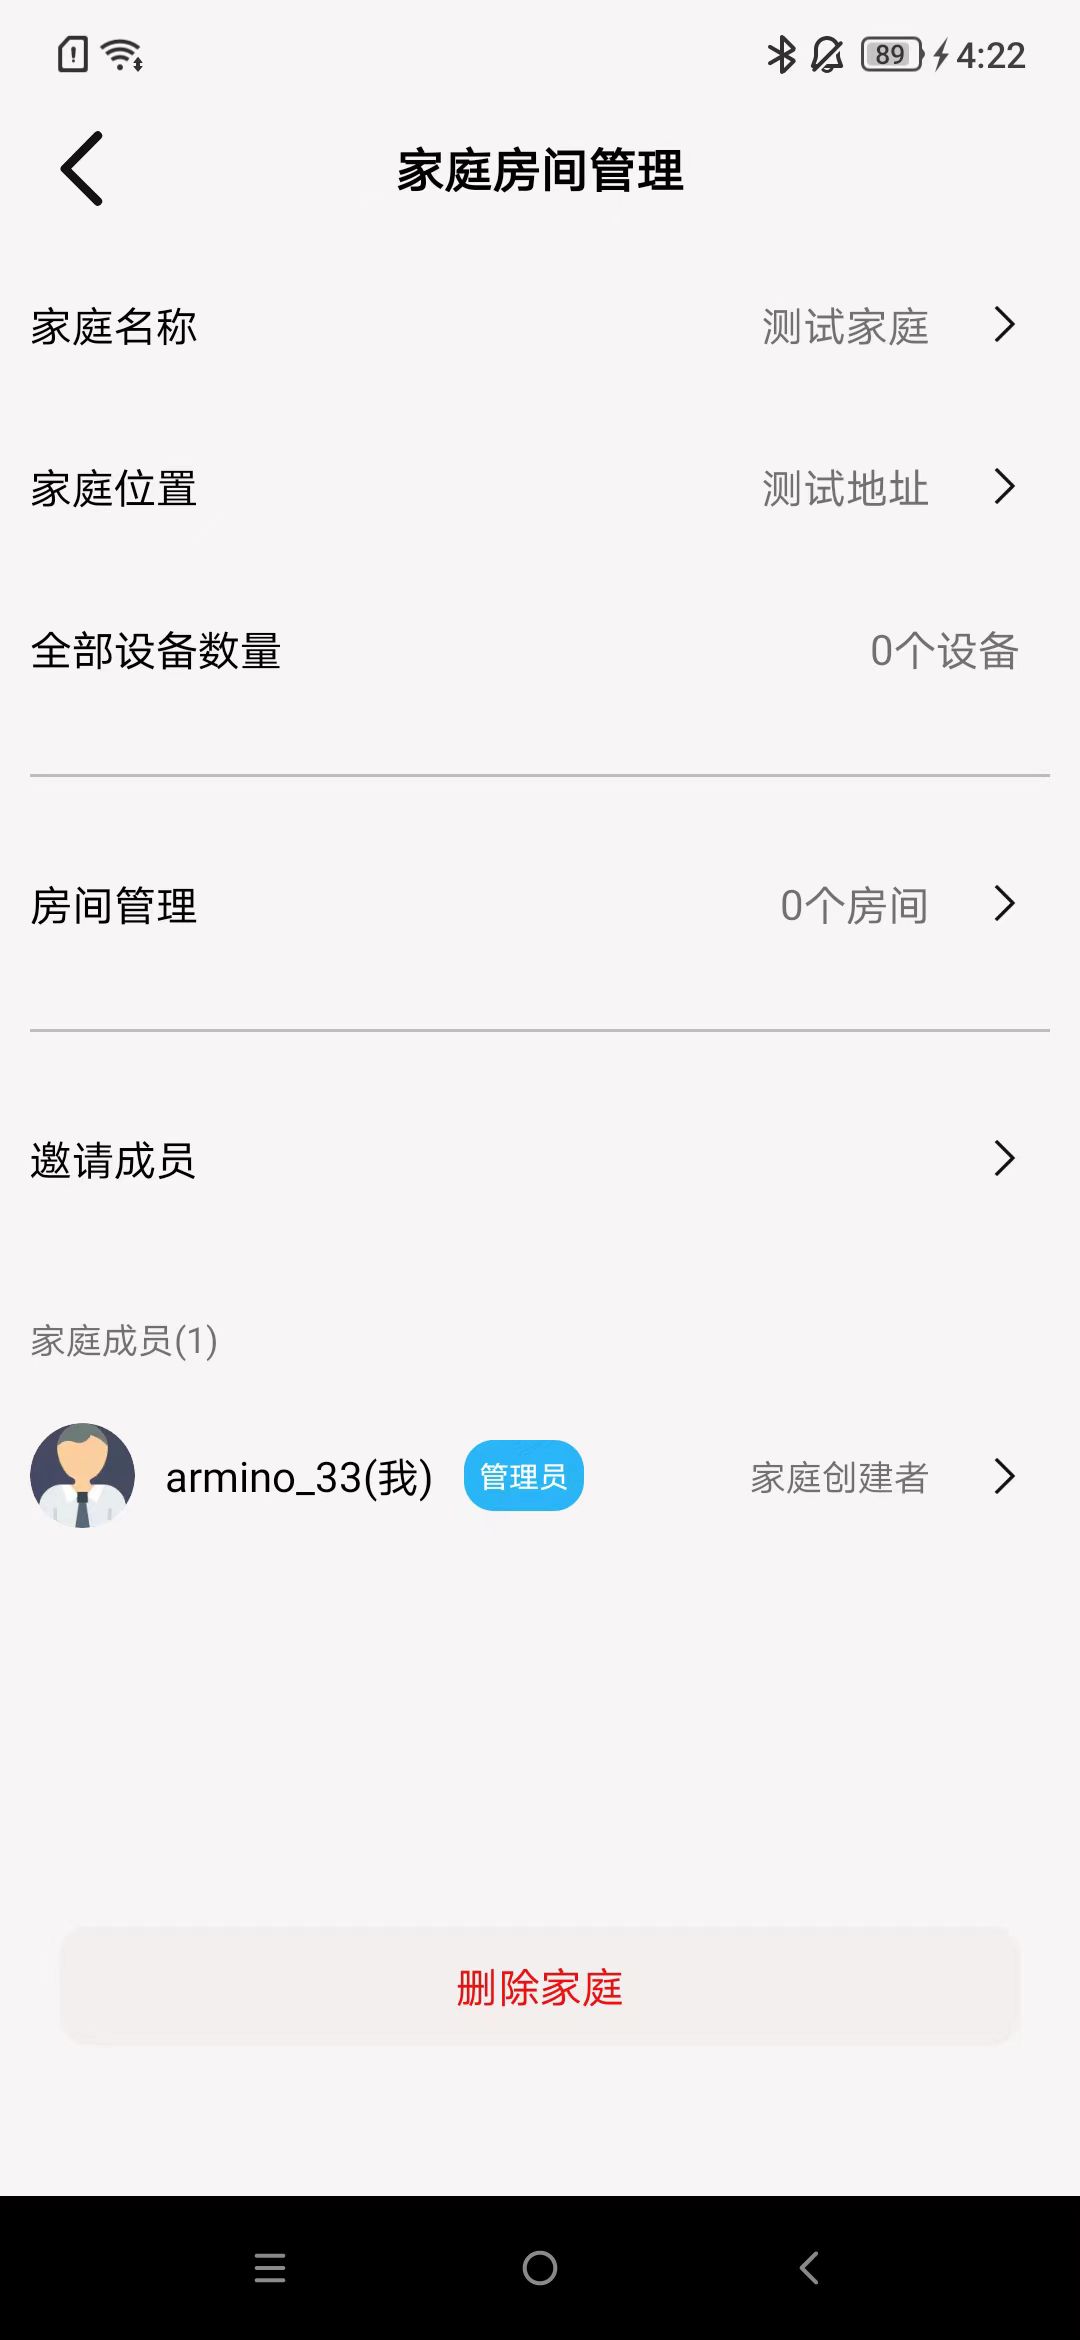
Delete Home
As shown in the image.
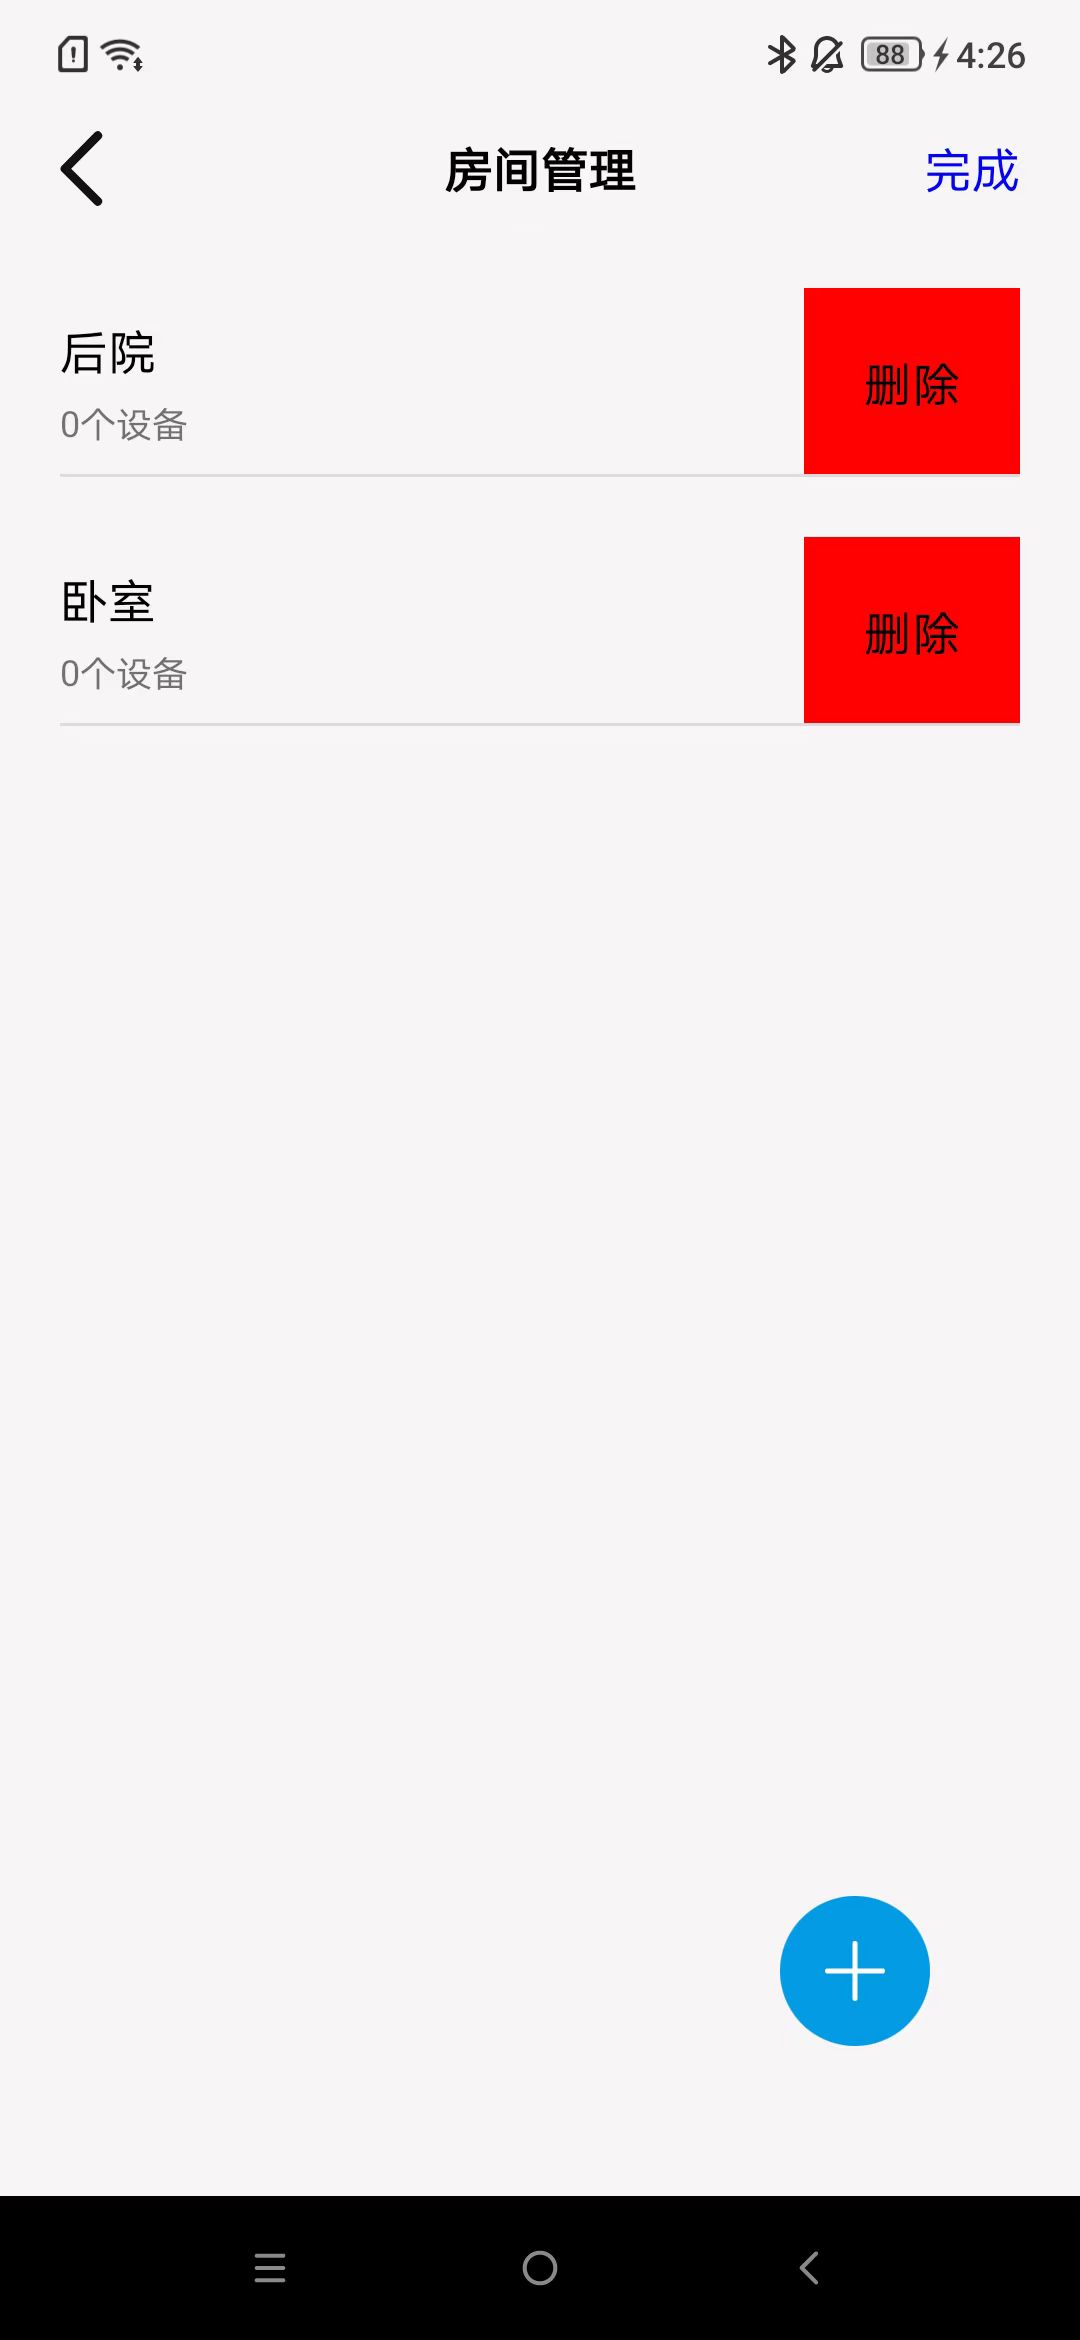
Room
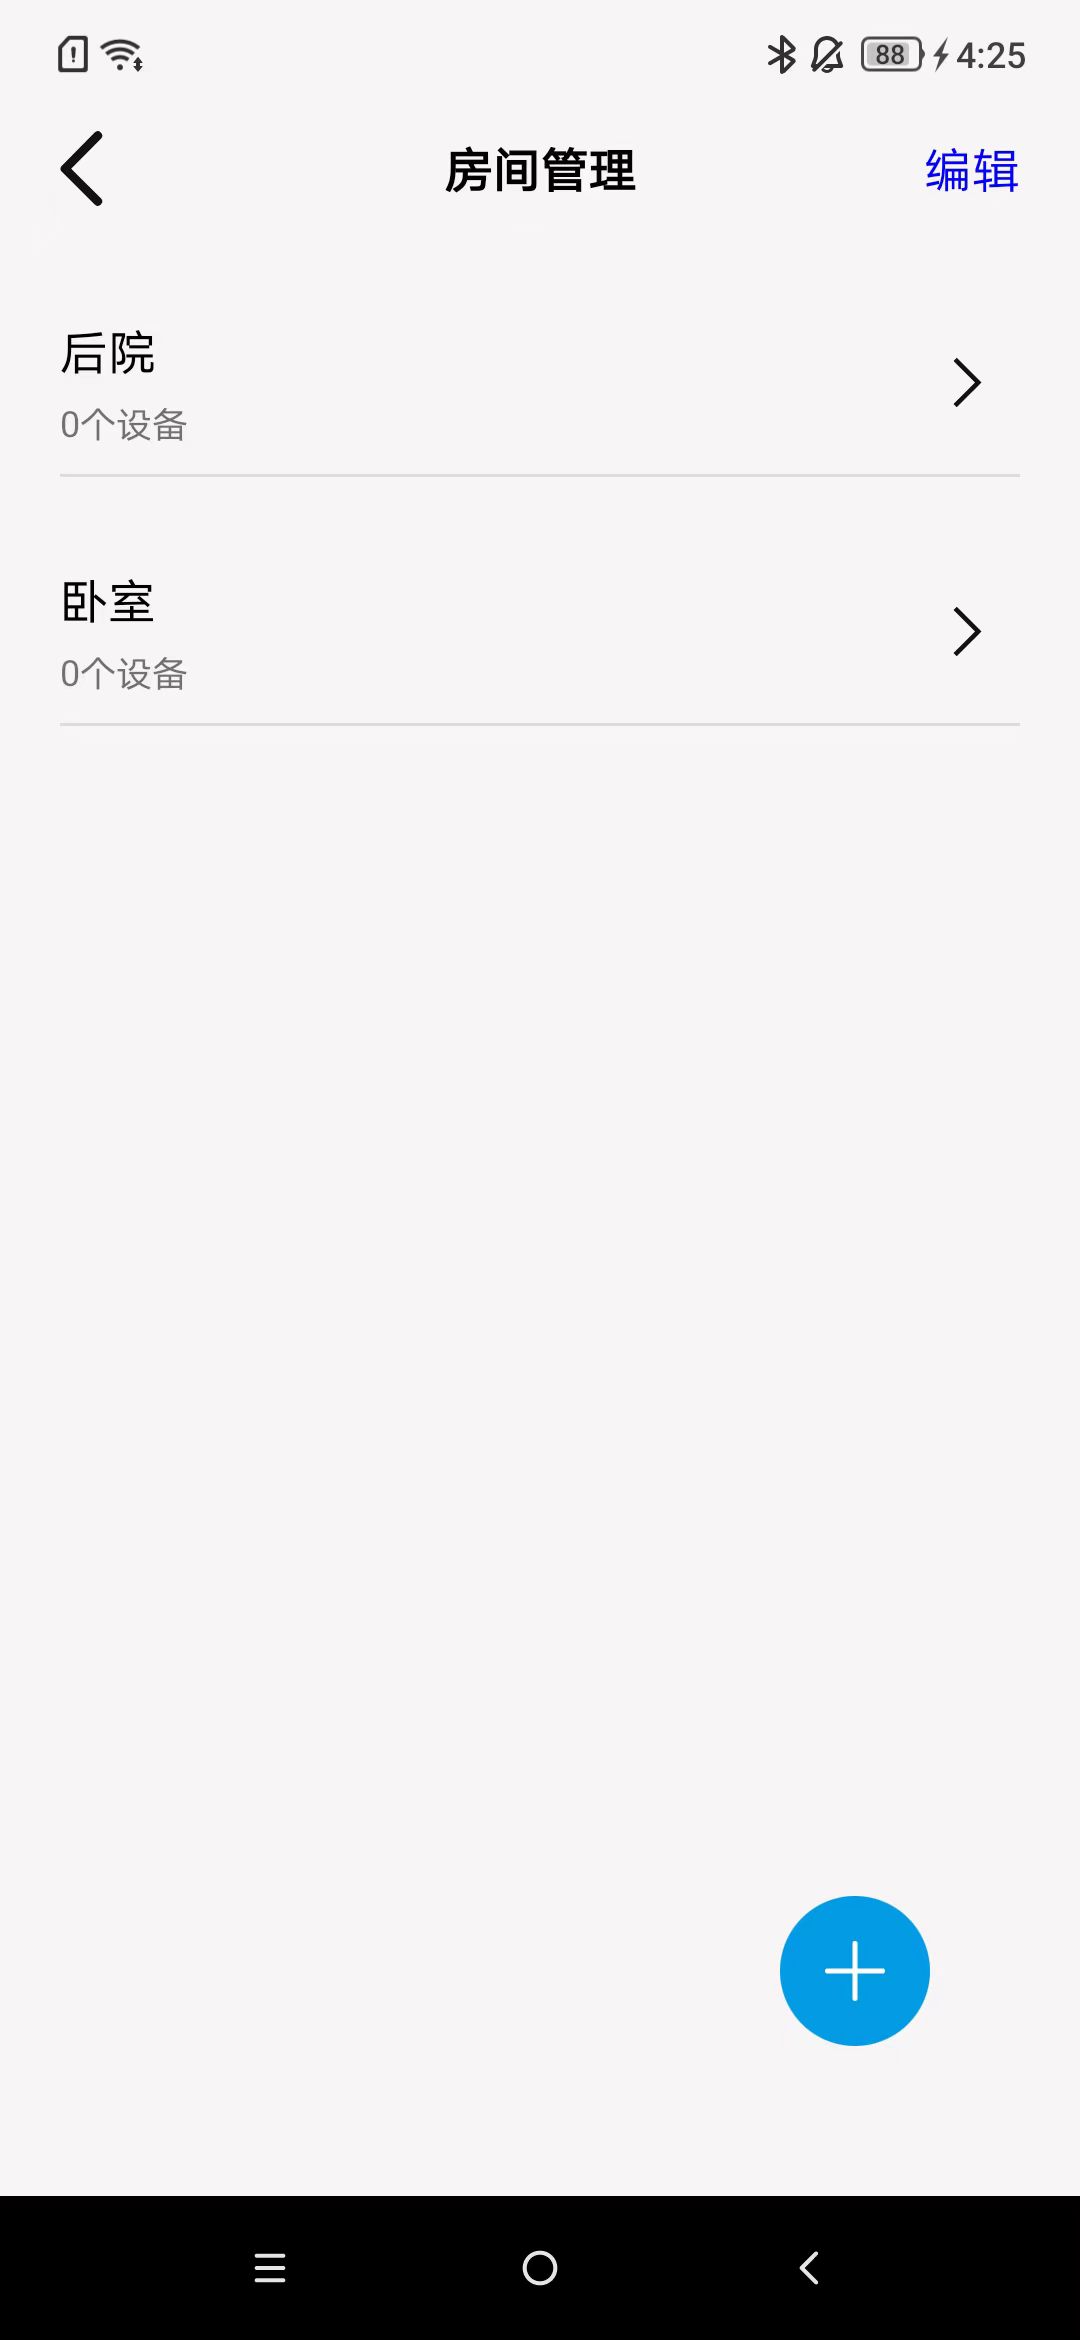
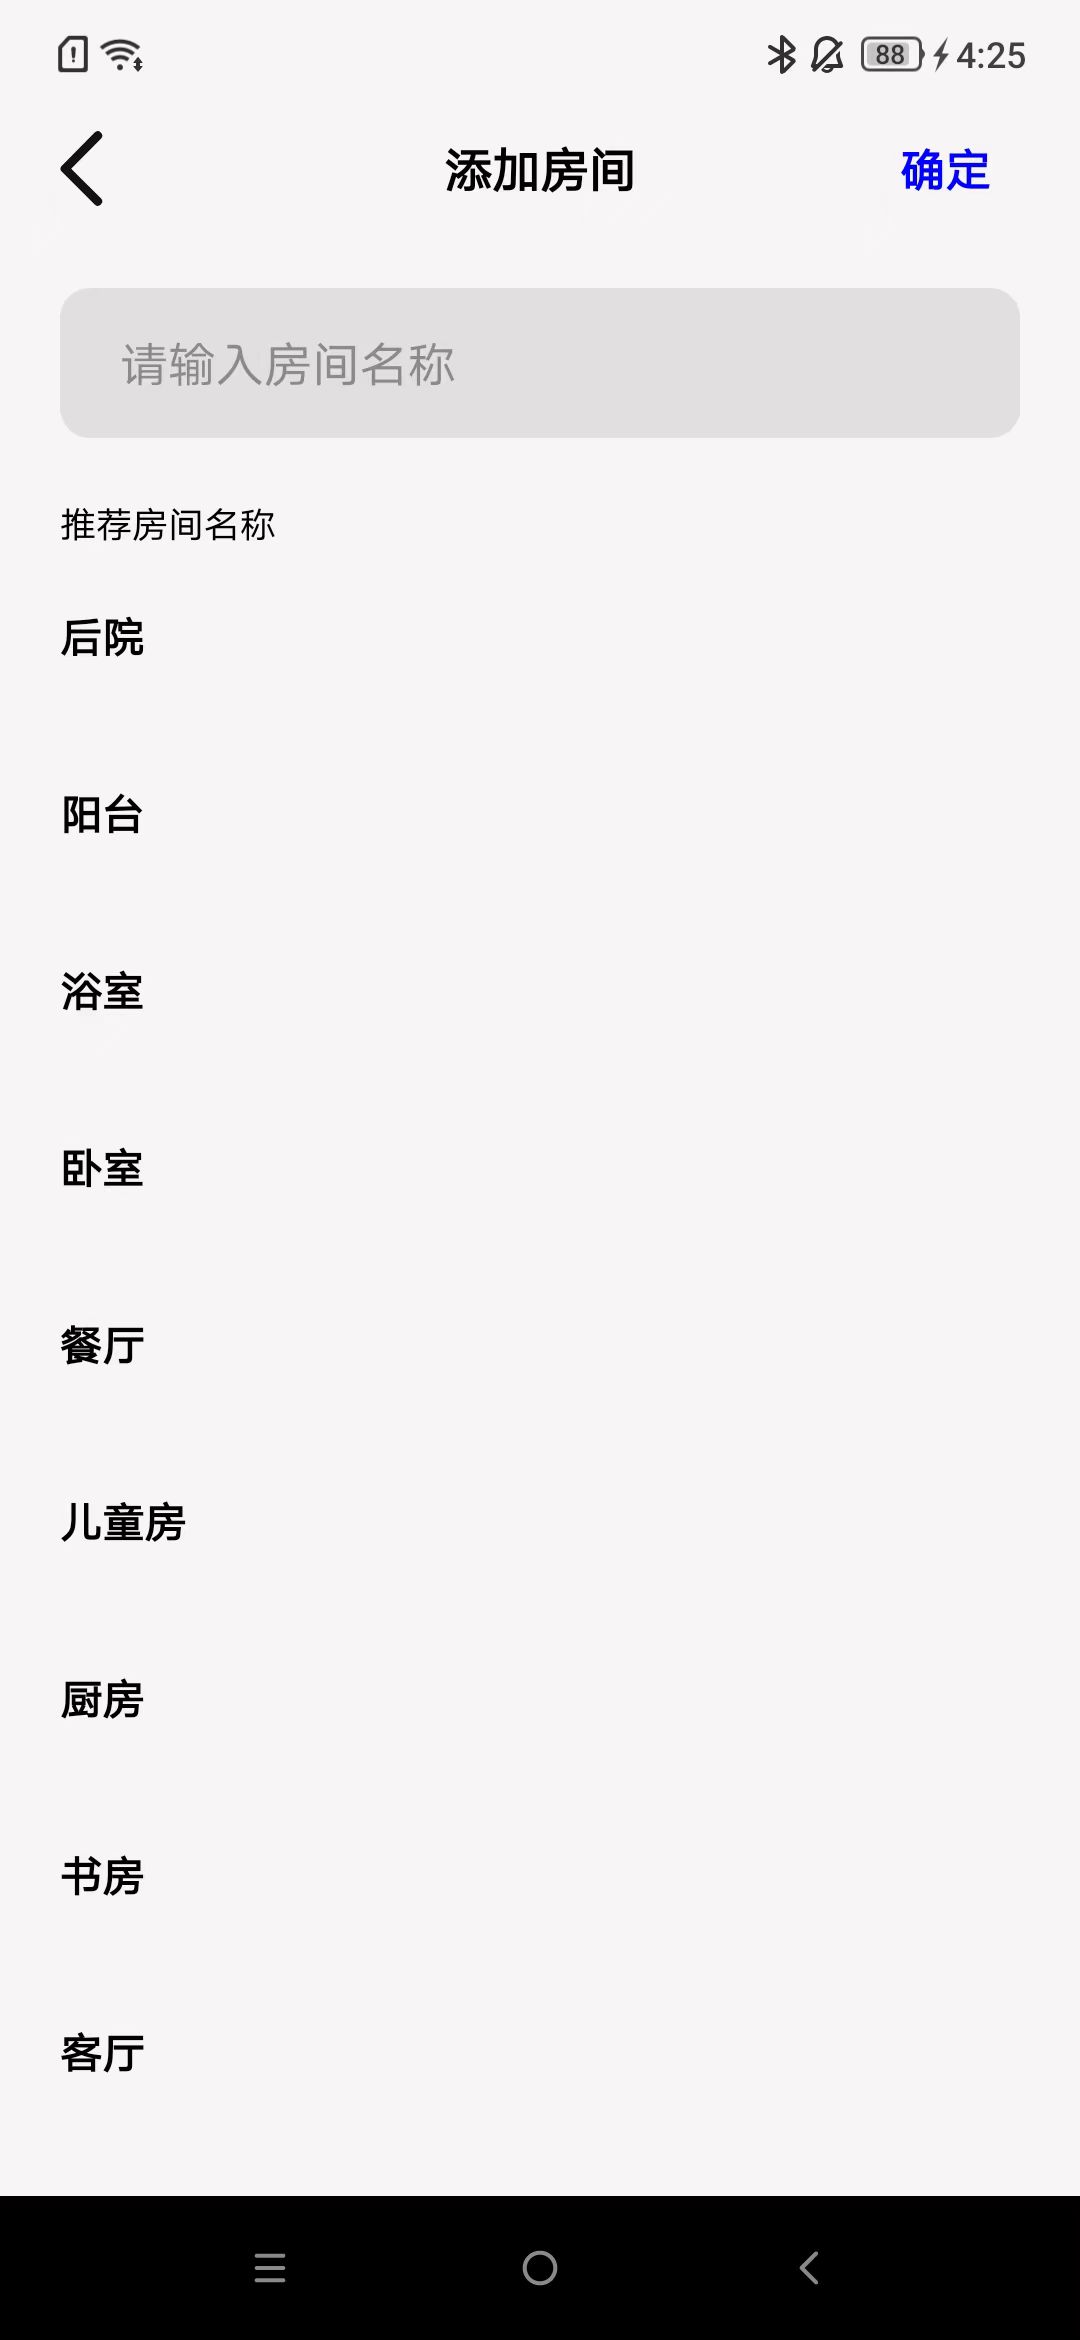
Add Room
As shown in the image.
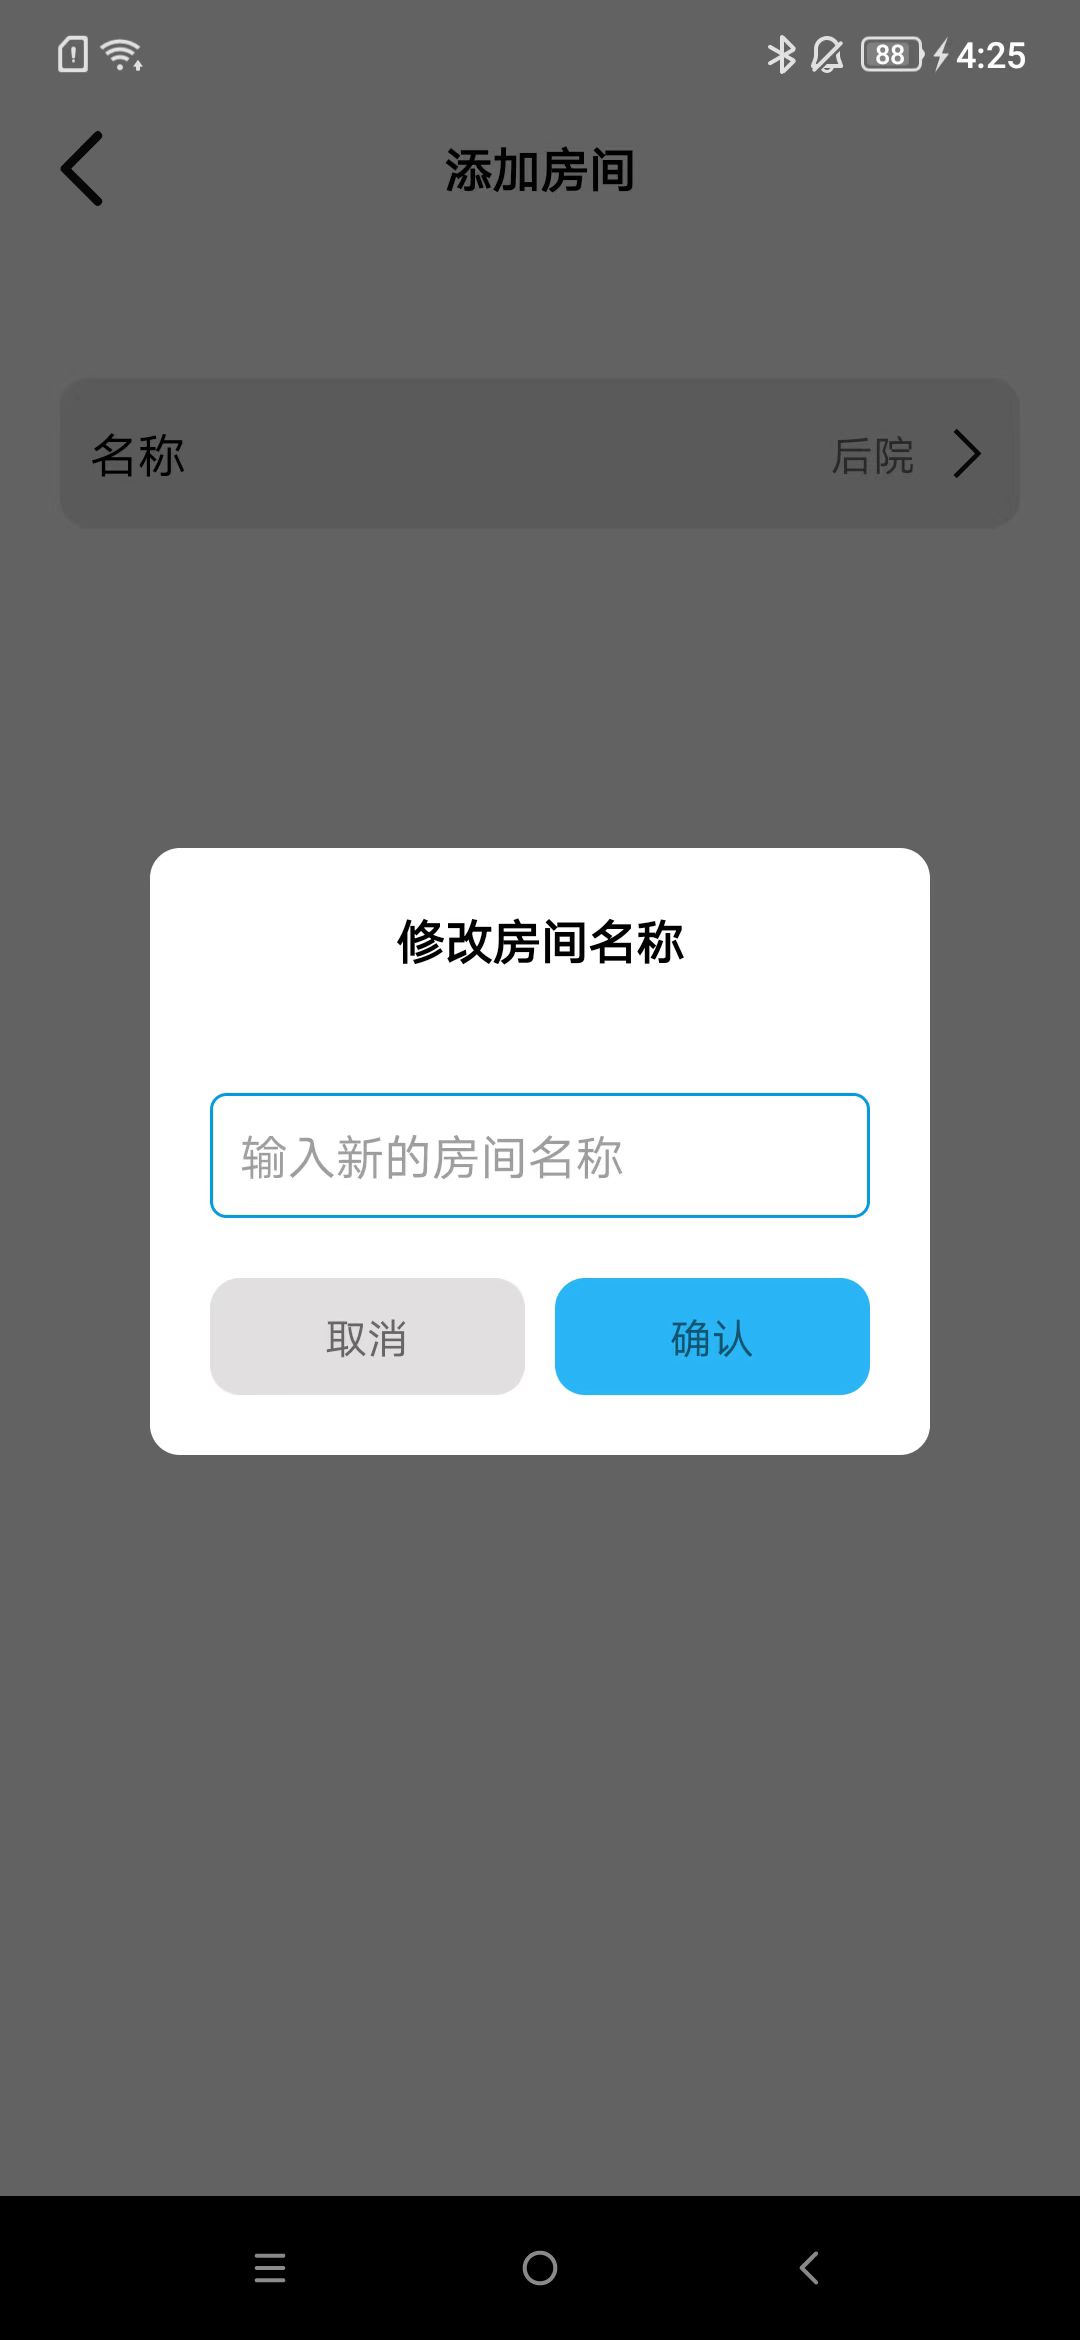
Modify Room Name
As shown in the image.

Delete Room
As shown in the image.
Home Members
Roles and Permissions
Divided into 3 roles: creator, administrator, and member, with different permissions.
Ro le |
I nvite Admin |
Invite Member |
DeleteOt heMembers |
Ex itH ome |
De lete Home |
ModifyH omeInfo |
ModifyM emberRole |
|---|---|---|---|---|---|---|---|
C re at or |
yes |
yes |
yes |
no |
yes |
yes |
yes |
A dm in |
no |
yes |
no |
yes |
no |
yes |
no |
Me mb er |
no |
no |
no |
yes |
no |
no |
no |
Invite Home Members
As shown in the image.

Remove Home Members
As shown in the image.
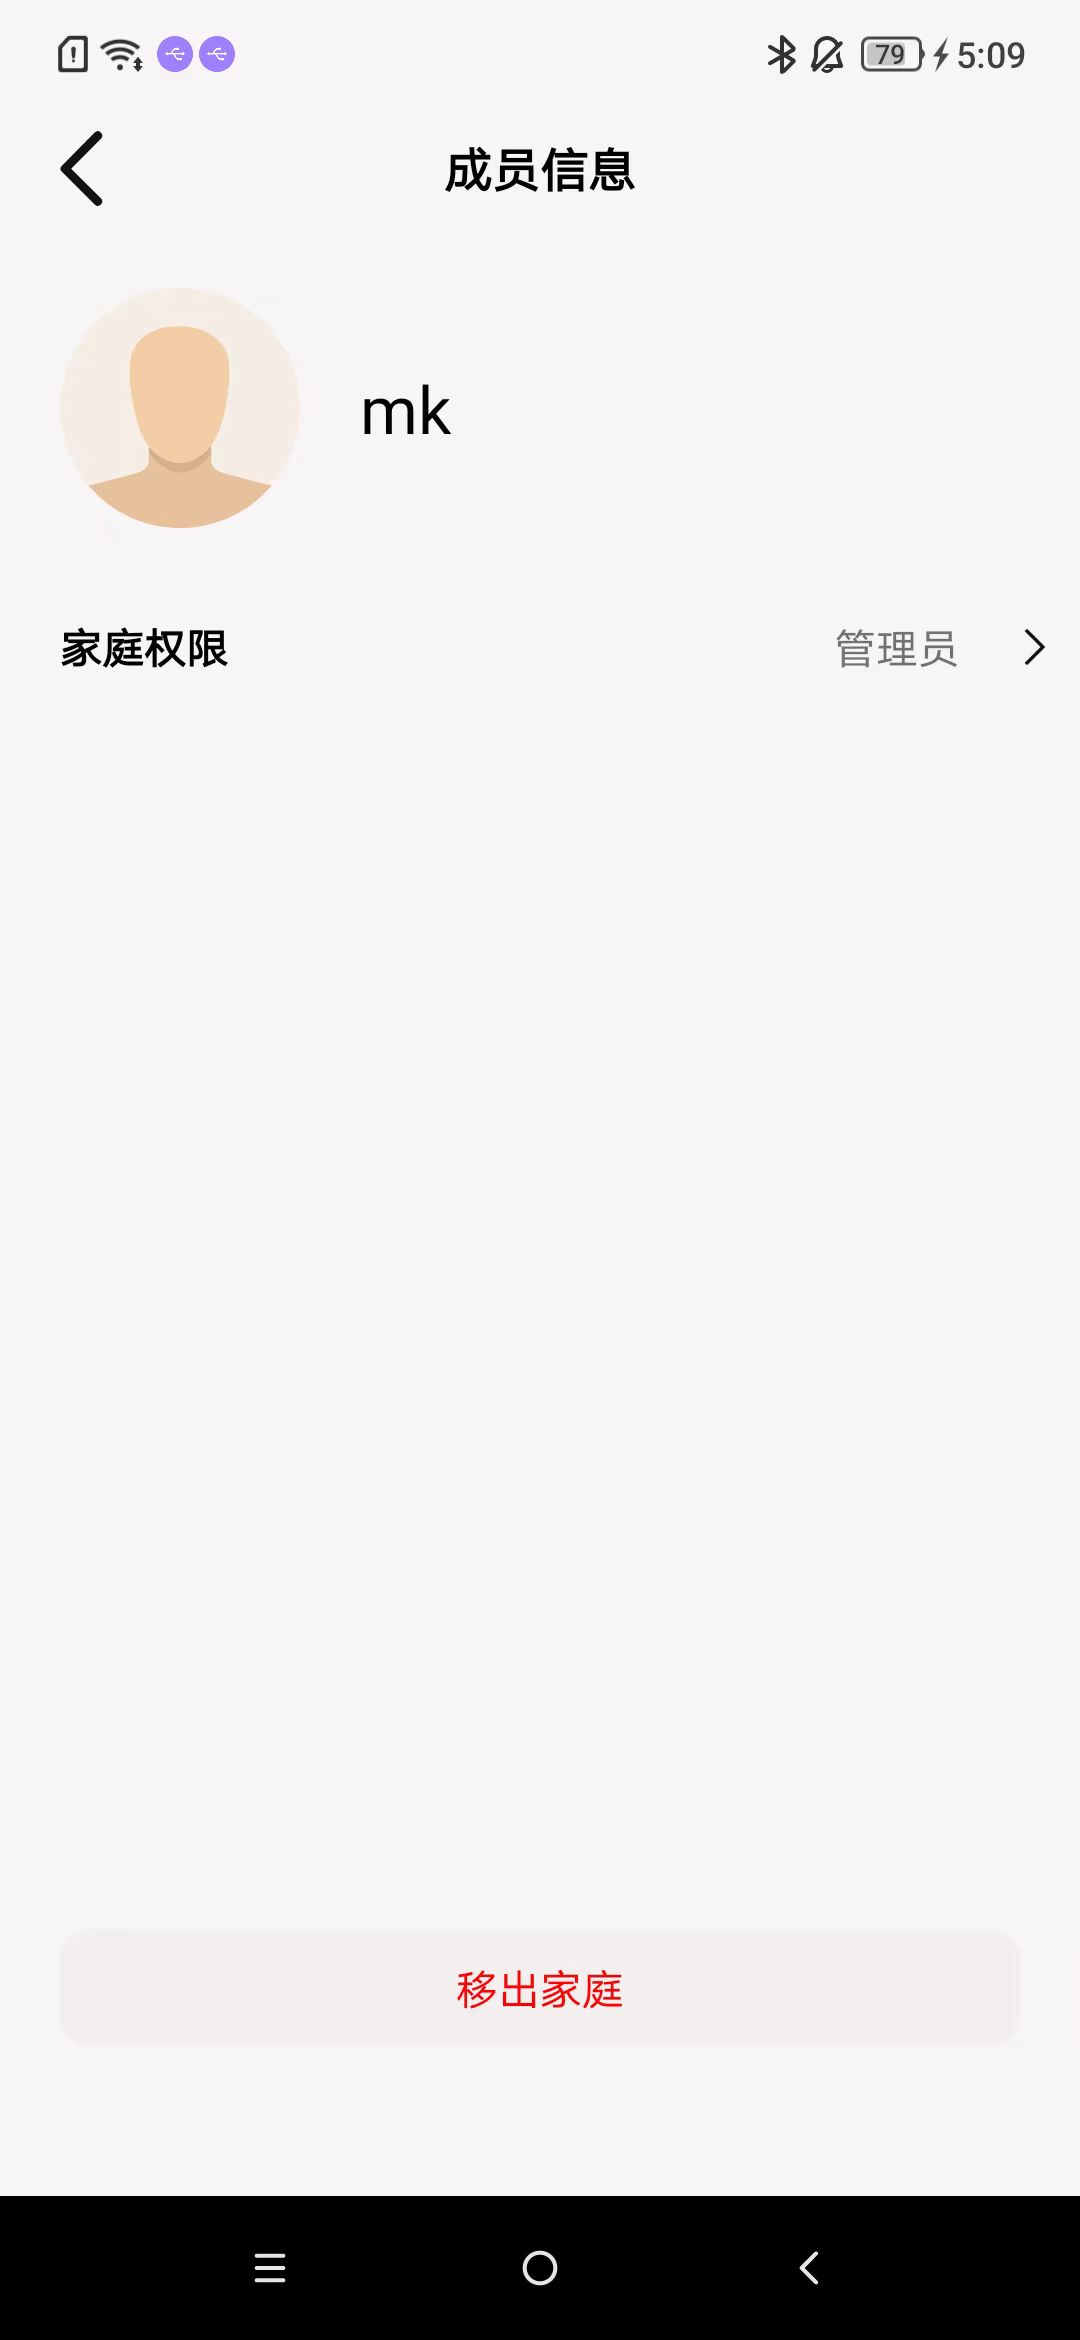
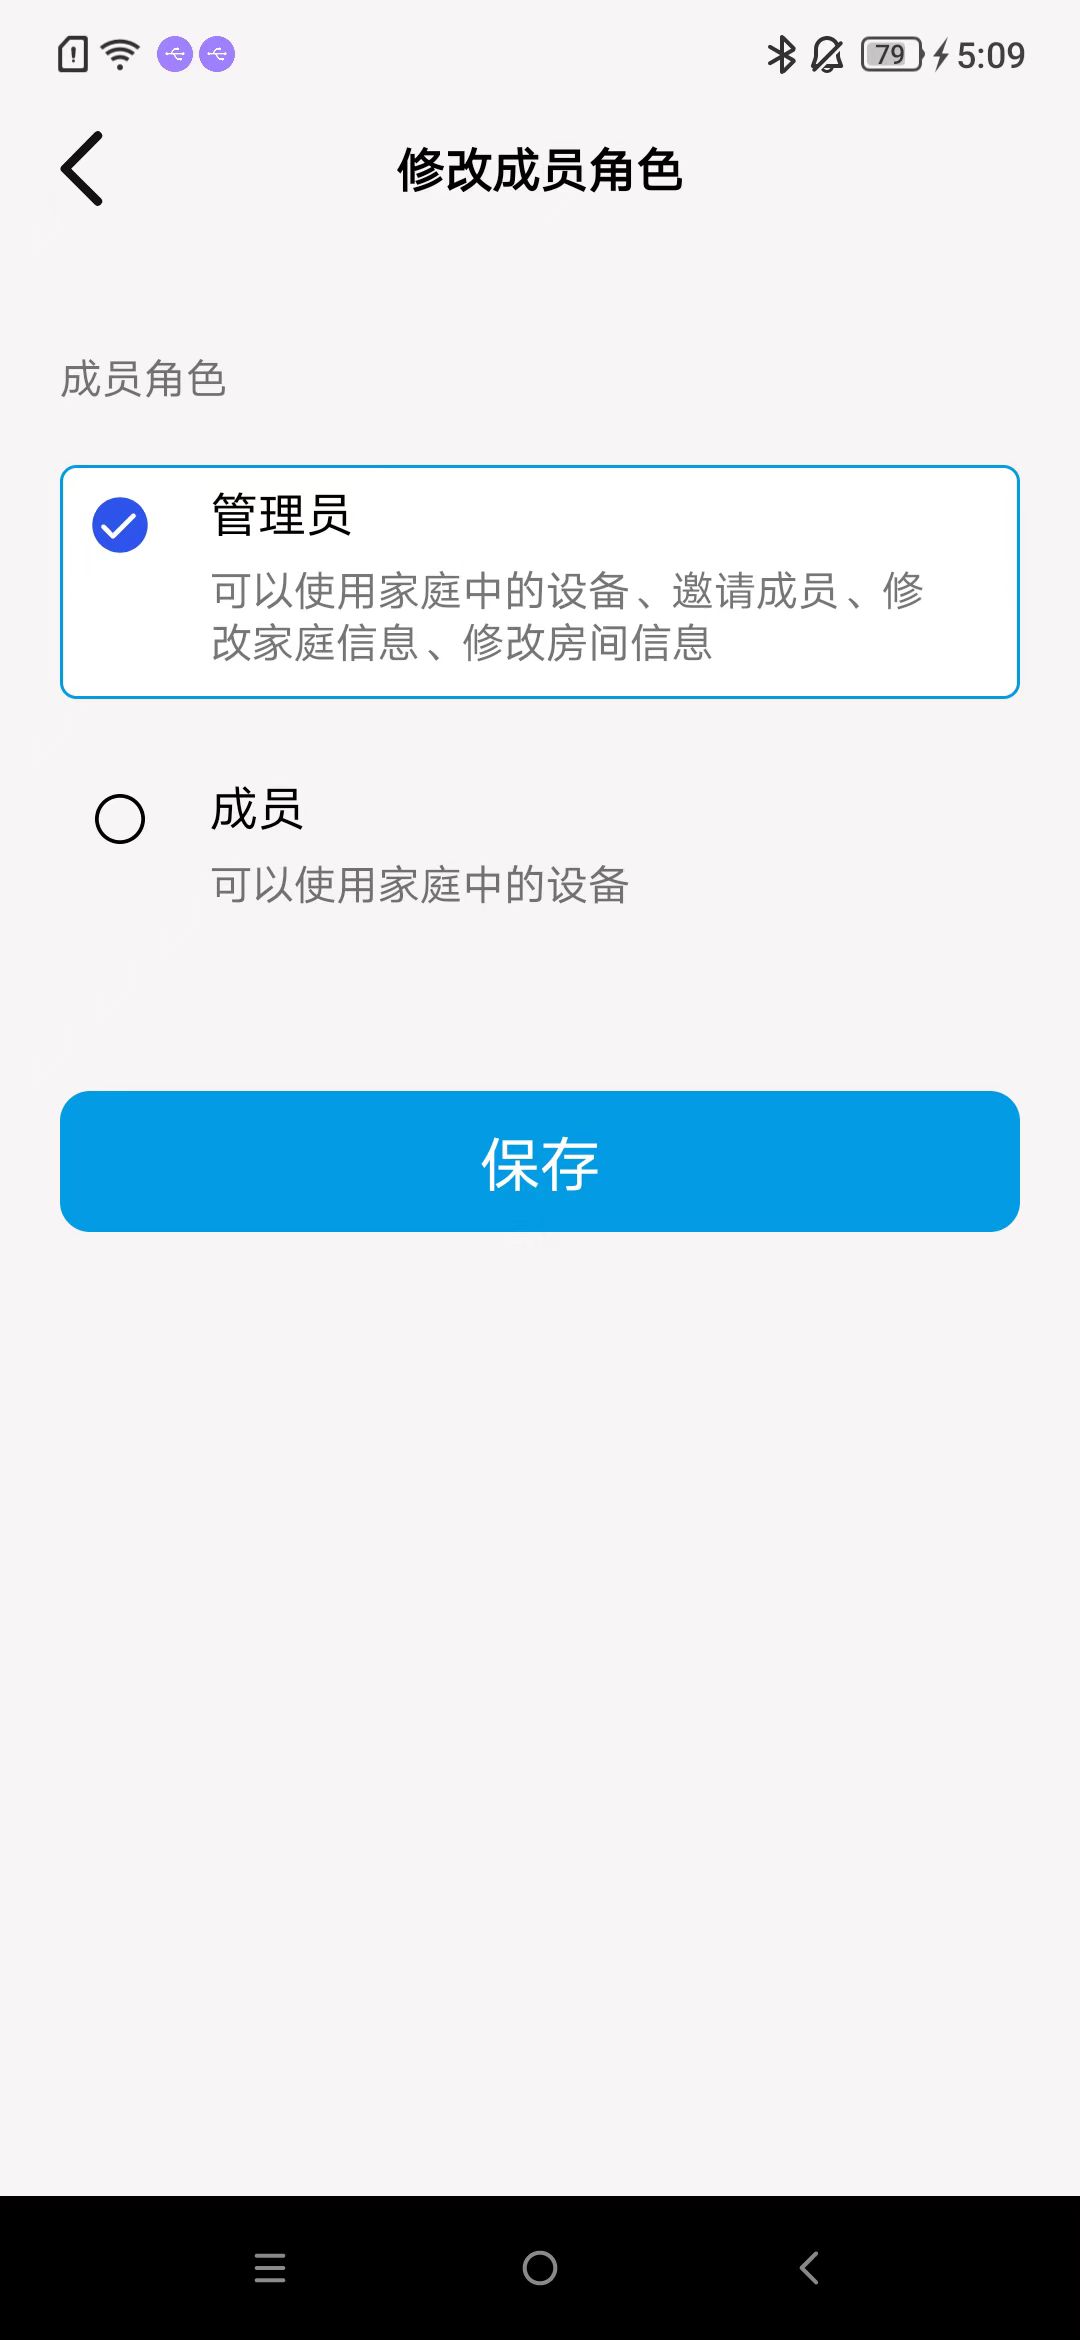
Change Roles of Other Members
As shown in the image.
Debug Mode
Enter debug mode
As shown in the image.
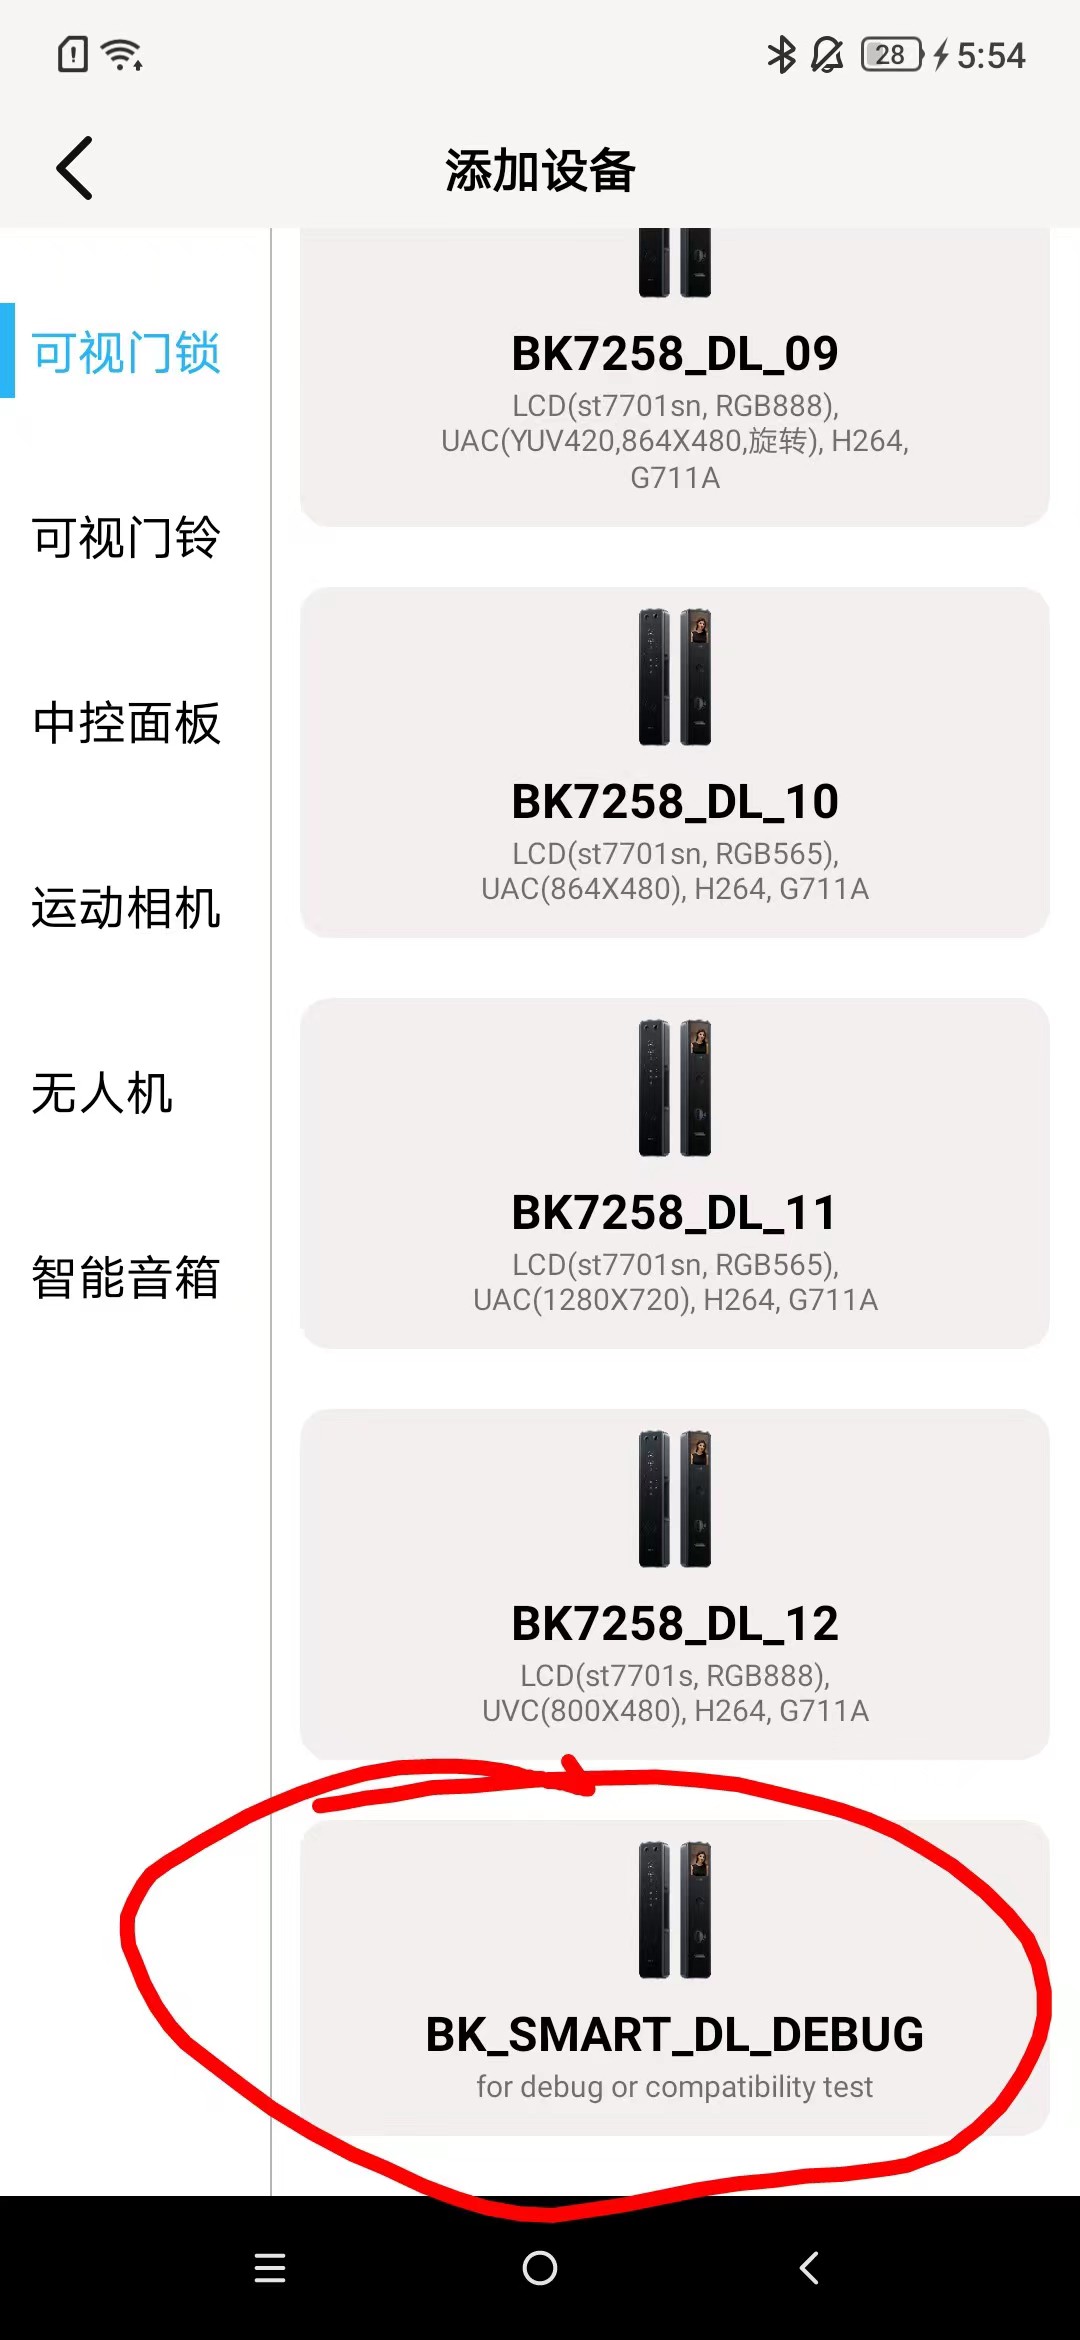
Select Configuration
As shown in the image,select the configurations you need.


Scan and Activate
As shown in the image.

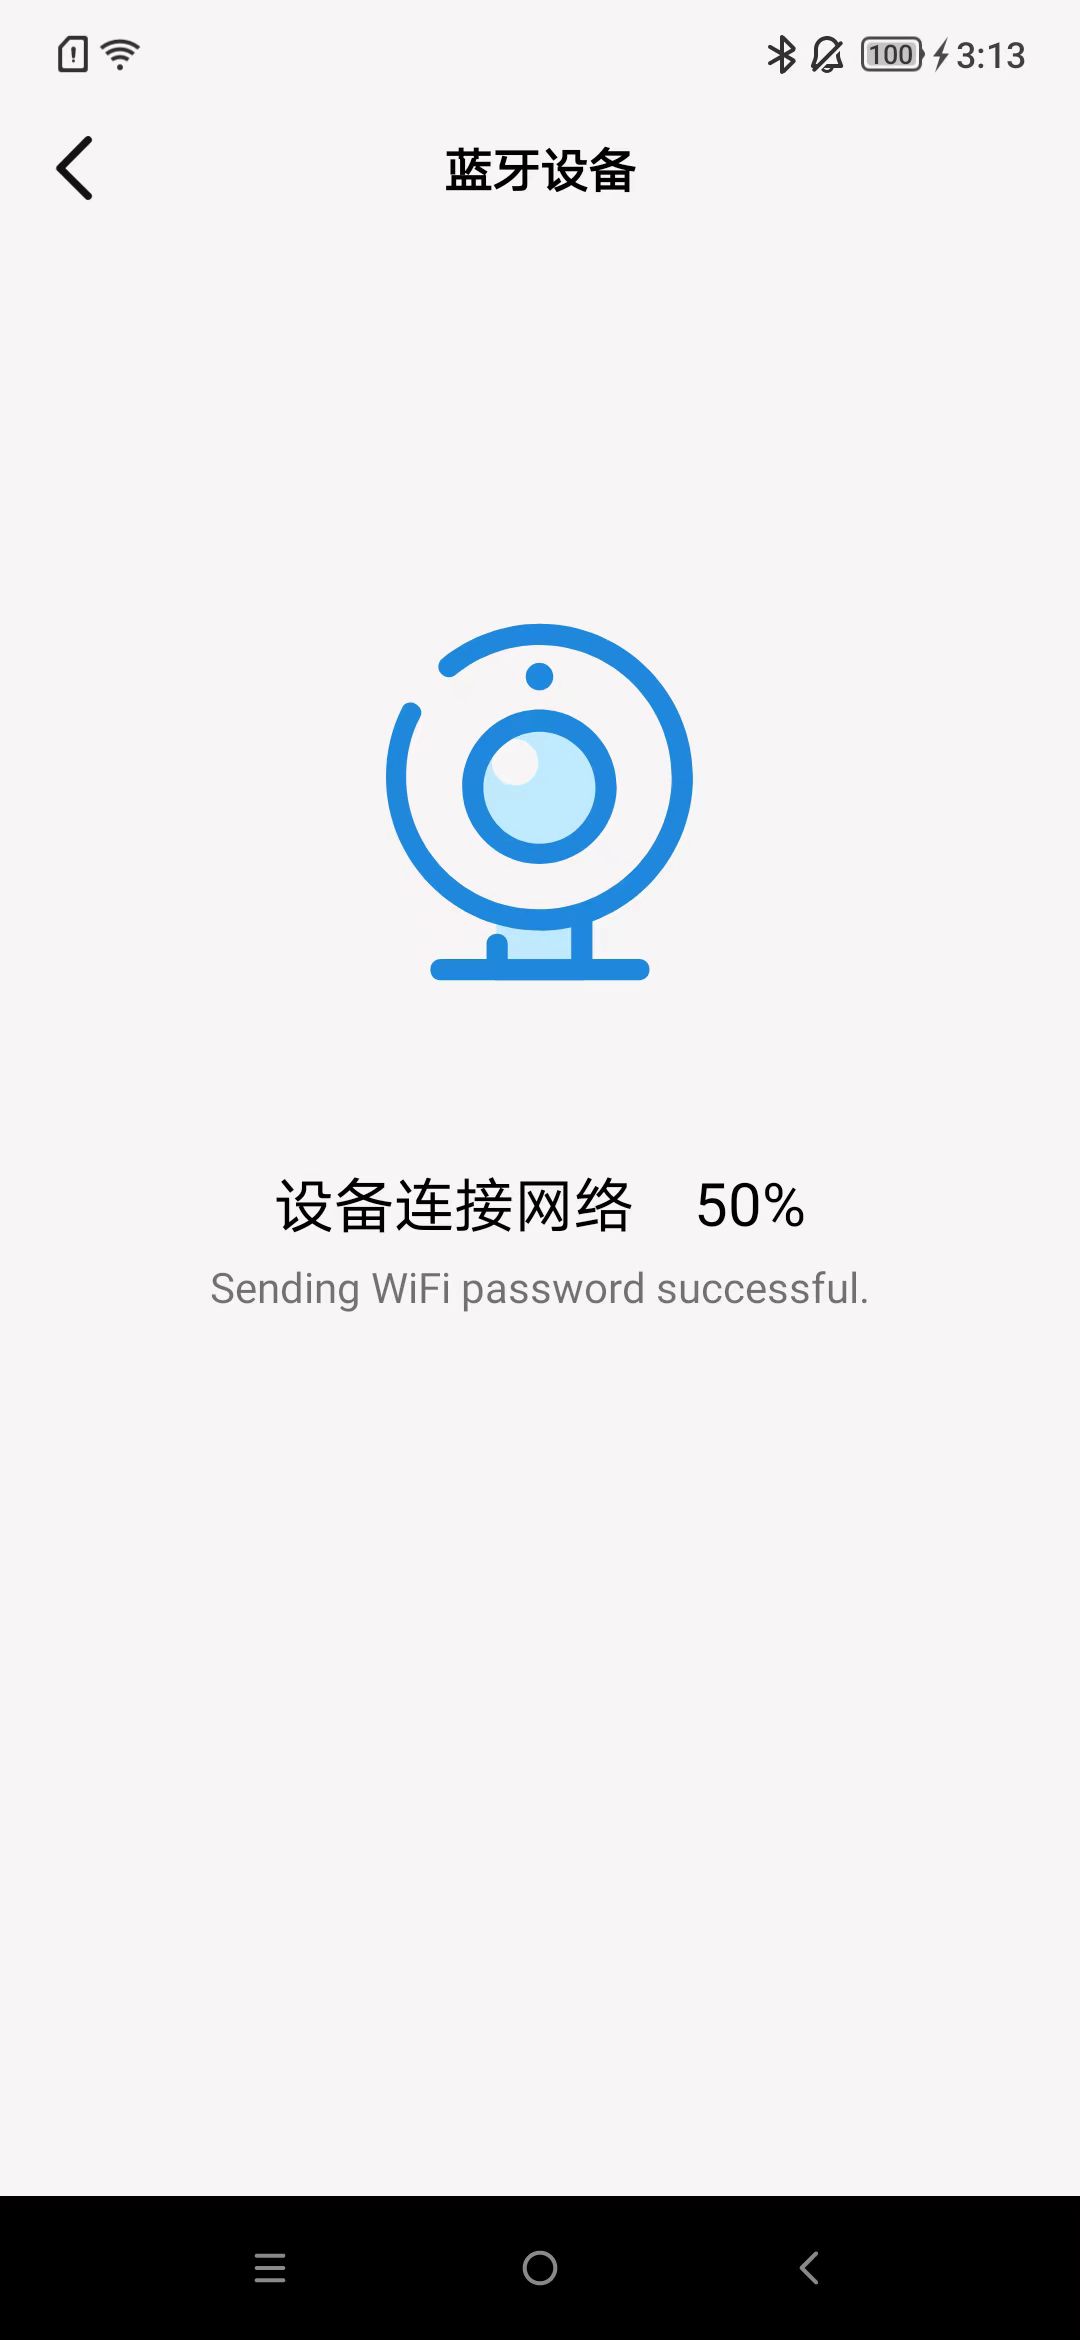
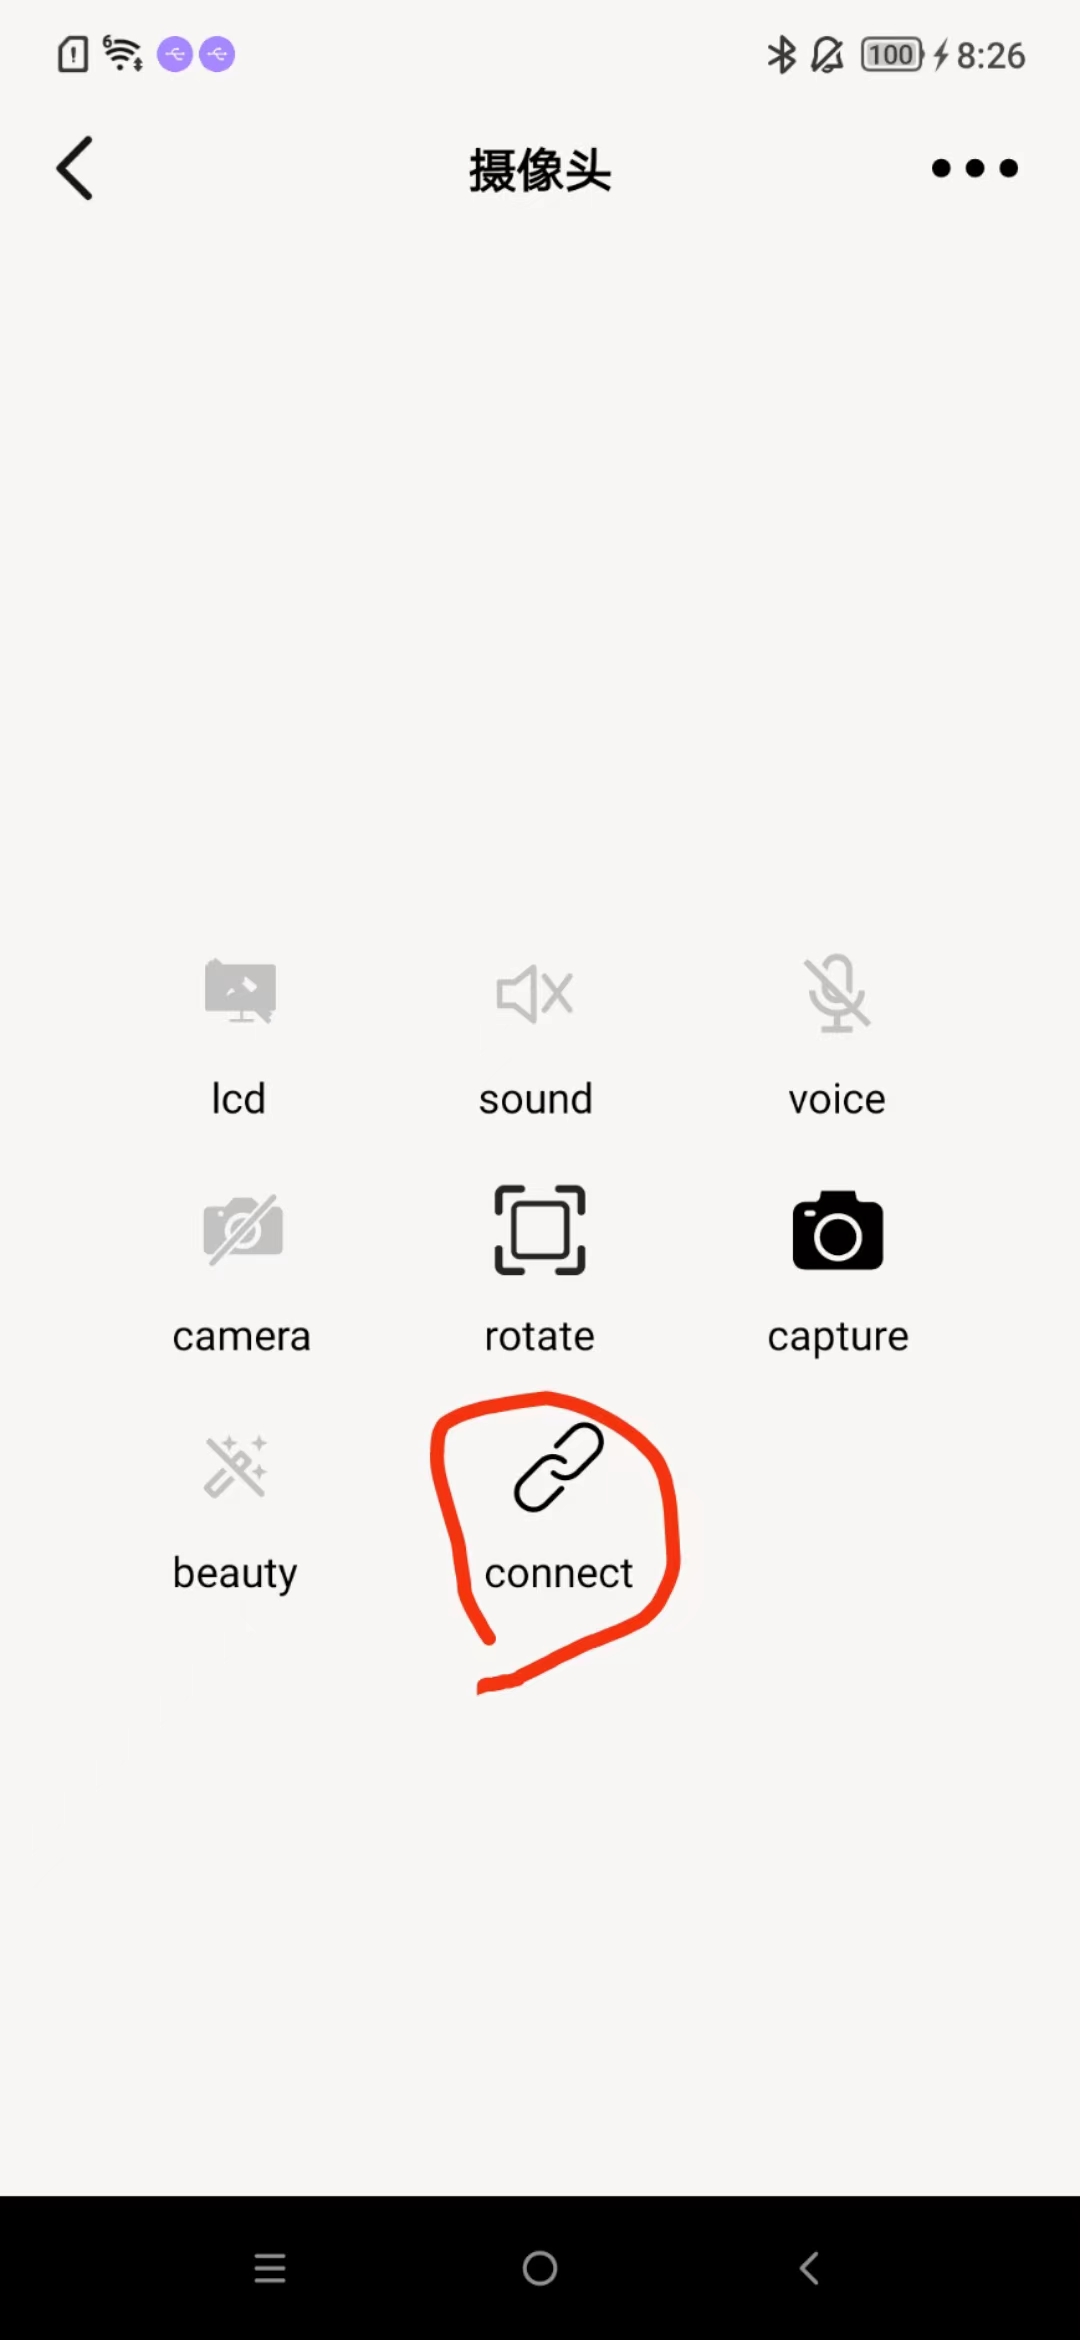
Connect
As shown in the image.
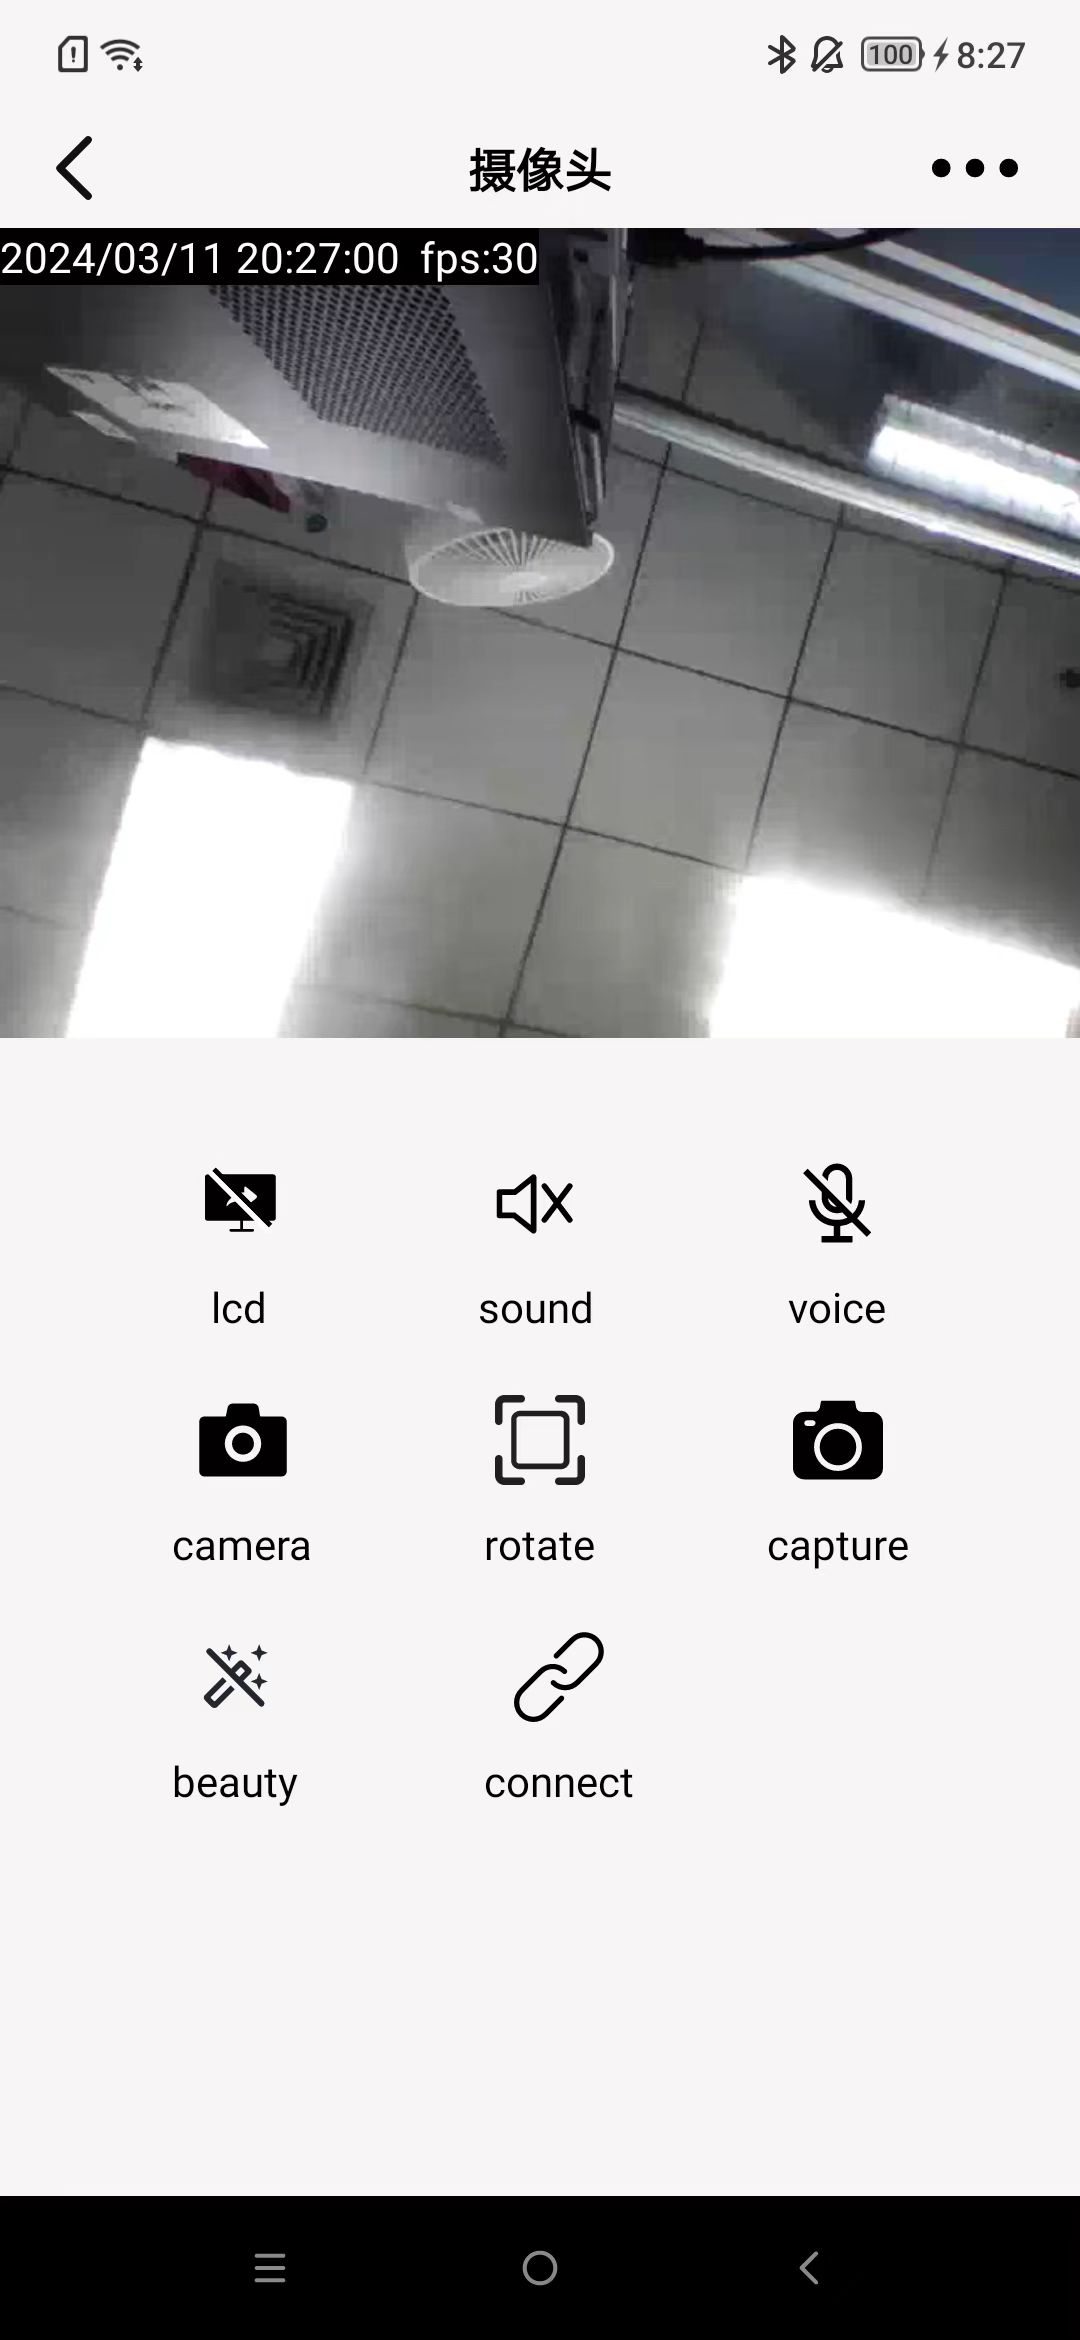
Functional Interface
As shown in the image.
MJPEG Decoding
Terminology and Comments
Each shift operation mentioned will be processed as unsigned.
Each frame of image data will be split into multiple data packets and sent in sequence.
A frame of image data may not be sent in one go.
Explanation of the terms involved:
rxData: The received MJPEG data, a byte array.
TransmissionUnpacked: A data structure representing an unpacked data object.
Head: Header information.
CameraPacket: A data structure that carries image information.
MAGIC_LB: A flag that must be a byte with the value 0xD5.
MAGIC_HB: A flag that must be a byte with the value 0xF0.
flags: Flags.
timestamp: A timestamp, the time at which the information is sent.
sequence: The sequence number of the image frame to which the current packet belongs.
length: The length of the data carried by the CameraPacket.
crc: The checksum.
id: The sequence number of the current packet.
eof: Whether the current packet is the last packet of the image frame it belongs to. A value of 1 indicates yes, otherwise no.
count: The serial number corresponding to the current packet after the image frame is split into packets. For example, if a frame of data is split into 5 packets in sequence, and one of the packets has a serial number of 3.
size: The length of the actual image data payload carried.
ImageFrame: A data structure where the parsed payload is assembled according to the sequence number.
Structure Diagram


Process
Parse all TransmissionUnpacked from the received data.
Extract CameraPacket from TransmissionUnpacked.
Parse values from CameraPacket.
Assemble CameraPacket into ImageFrame.
The decoder decodes ImageFrame.
Unpacking
Terminology Explanation
index: An integer type, initially set to 0.
reversed: A byte array with a length of 3, with initial values all set to 0.
cached: Data remaining from the unpacking process, which will continue to be used, with a variable length.
unpackedList: A list of unpacked data, structured as a sequential linked list, storing objects of TransmissionUnpacked.
offset: An integer type, initially set to 0.
packetList: A list of data awaiting assembly, structured as a sequential linked list, storing objects of CameraPacket.
imageFrame: The frame currently being assembled, an object of ImageFrame.
Extracting Sub-Packet Data
If the length of cached is 0, then:
If the current index + 16 is greater than the length of rxData, then:
Assign the data from index and beyond in rxData to cached.
Exit the loop.
Check the condition: The index bit of rxData is 0xD5 and the index+1 bit is 0xF0.
If the condition is met, then:
Assign flags: Shift the value at the index+3 position of rxData left by 8 bits, take the value at the index+2 position, perform an OR operation between the two results, and assign the final result to flags.
Assign timestamp: Shift the value at the index+7 position of rxData left by 24 bits, shift the value at the index+6 position left by 16 bits, shift the value at the index+5 position left by 8 bits, take the value at the index+4 position, perform an OR operation between the four results, and assign the final result to timestamp.
Assign sequence: Shift the value at the index+9 position of rxData left by 8 bits, take the value at the index+8 position, perform an OR operation between the two results, and assign the final result to sequence.
Assign length: Shift the value at the index+11 position of rxData left by 8 bits, take the value at the index+10 position, perform an OR operation between the two results, and assign the final result to length.
Assign crc: Take the value at the index+12 position of rxData and assign it to crc.
Assign reversed: Fill in the values at the index+13, index+14, and index+15 positions of rxData into reversed in order.
If the condition is not met, then:
Print an exception.
Exit the loop.
If index + 16 + length is greater than the length of rxData, then:
Assign the data from index and beyond in rxData to cached.
Exit the loop.
Take the data from rxData starting at position index + 16 with a length of length, and assign it to a temporary byte array, channelData.
Assign flags, timestamp, sequence, crc, length, channelData, reversed to TransmissionUnpacked.
Add TransmissionUnpacked to the unpackedList.
Assign index: index = index + 16 + length.
If the length of cached is greater than 0, then:
If the length of cached is less than 16, then:
If index + 16 is greater than the length of rxData, then:
Assign offset: Assign the length of cached to offset.
Expand the length of cached to offset + length of rxData - index.
Assign the data from index and beyond in rxData to cached starting at position offset.
Exit the loop.
If index + 16 is less than or equal to the length of rxData, then:
Assign offset: Assign the length of cached to offset.
Expand the length of cached to 16.
Take the data from rxData starting at position index with a length of 16 - offset, and assign it to cached starting at position offset.
Assign index: index = index + 16 - offset.
Check if the condition is met: The 0th bit of cached is 0xD5 and the 1st bit is 0xF0.
If the condition is met, then:
Assign flags: Shift the value at the 3rd position of cached left by 8 bits, take the value at the 2nd position, perform an OR operation between the two results, and assign the final result to flags.
Assign timestamp: Shift the value at the 7th position of cached left by 24 bits, shift the value at the 6th position left by 16 bits, shift the value at the 5th position left by 8 bits, take the value at the 4th position, perform an OR operation between the four results, and assign the final result to timestamp.
Assign sequence: Shift the value at the 9th position of cached left by 8 bits, take the value at the 8th position, perform an OR operation between the two results, and assign the final result to sequence.
Assign length: Shift the value at the 11th position of cached left by 8 bits, take the value at the 10th position, perform an OR operation between the two results, and assign the final result to length.
Assign crc: Take the value at the 12th position of cached and assign it to crc.
Assign reversed: Fill in the values at the 13th, 14th, and 15th positions of cached into reversed in order.
If the condition is not met, then:
Print an exception.
Exit the loop.
Check if the condition is met: The length of cached is less than 16 + length.
If the condition is met, then:
If the length of cached is less than 16 + length:
If index + 16 + length - length of cached is greater than the length of rxData:
Assign offset: Assign the length of cached to offset.
Expand the length of cached to offset + length of rxData - index.
Take the data from rxData starting at position index with a length of length of rxData - index, and assign it to cached starting at position offset.
Exit the loop.
Assign offset: Assign the length of cached to offset.
Assign an int variable named copyLen: The value is 16 + length - offset.
Expand the length of cached to 16 + length.
Take the data from rxData starting at position index with a length of copyLen, and assign it to cached starting at position offset.
Assign index: index = index + copyLen.
Take the data from cached starting at position 16 with a length of length, and assign it to a temporary byte array, channelData.
Assign flags, timestamp, sequence, crc, length, channelData, reversed to TransmissionUnpacked.
Add TransmissionUnpacked to the unpackedList.
Clear the cached data.
If the condition is not met, then:
Exit the loop.
If index is less than the length of rxData, continue the loop.
After exiting the loop, return and save the cached for the next use, and return the unpackedList.
Assembling Image Frames
The imageFrame successively receives and processes each TransmissionUnpacked.
Extract the length, and based on length, retrieve the corresponding data from CameraPacket.
From CameraPacket, extract id, count, eof, size from the corresponding positions, and based on size, extract the payload.
Check the condition: whether the id of the current packet is consistent with the id of the previous packet:
If met:
Store it in packetList.
If not met:
Clear all contents of packetList.
Do not proceed with subsequent steps.
Check the condition: whether the eof value of the current packet is 1:
If not met:
Do not proceed with subsequent steps.
If met:
Sort all data count in packetList.
Assign the payloads from the camerapacket in the linked list to a byte array frameData, and clear the linked list.
frameData is the final image frame data.
Decoding
During the unpacking process, you will obtain image frame data in the form of a byte array.
Use a decoder to decode this data.
On Android, you can use BitmapFactory.decodeByteArray for decoding.